GLM-Image 是 AI 圖像生成領域的重大突破,結合自回歸與擴散架構,突破視覺保真度的極限。對於開發人員和構建 AI 視覺應用的企業來說,高效部署此模型至關重要——但傳統設定流程涉及複雜的依賴項、環境配置和基礎設施管理。
Novita AI 透過預配置的 GPU 模板消除這些障礙,讓您能在數分鐘內而非數小時部署 GLM-Image。本指南將帶您完成完整部署流程,從模板選擇到運行首次推理,還有生產工作負載的優化策略。
無論您是原型製作內容生成工具、構建電子商務可視化平台,還是將先進圖像合成功能整合到應用中,本教程都提供您所需的一切,讓 GLM-Image 在企業級 GPU 基礎設施上運行。
什麼是 GLM-Image?
GLM-Image 是先進的圖像生成模型,結合自回歸與擴散解碼器架構,能提供卓越的視覺品質與細緻的細節渲染。由 ZAI 團隊開發,這種混合方法使 GLM-Image 成為傳統潛在擴散模型(LDM)的強力替代方案,特別在知識密集型圖像生成場景中表現突出。
模型的獨特架構讓它能在保持與業界標準方法競爭力的性能的同時,生成高度細緻的圖像。無論您是構建 AI 驅動的設計工具、內容創作平台還是視覺合成應用,GLM-Image 透過其文字轉圖像與圖像轉圖像生成能力,同時提供靈活性與精準度。
核心能力:
- 混合自回歸 + 擴散架構,實現卓越視覺保真度
- 文字轉圖像生成,支援細緻的提示詞理解
- 圖像轉圖像轉換與風格遷移
- 多圖像條件生成
- 高解析度輸出支援(可自訂尺寸)
如需完整的技術規格與模型文件,請造訪官方 GLM-Image 存儲庫。
為什麼要在 Novita AI 上部署 GLM-Image?
Novita AI 的 GPU 基礎設施是運行 GLM-Image 的理想環境,提供預配置模板、即時部署與可擴展的計算資源。與手動設定本地環境或管理雲端實例不同,Novita AI 簡化了從模板選擇到運行推理的整個部署流程。
逐步部署指南
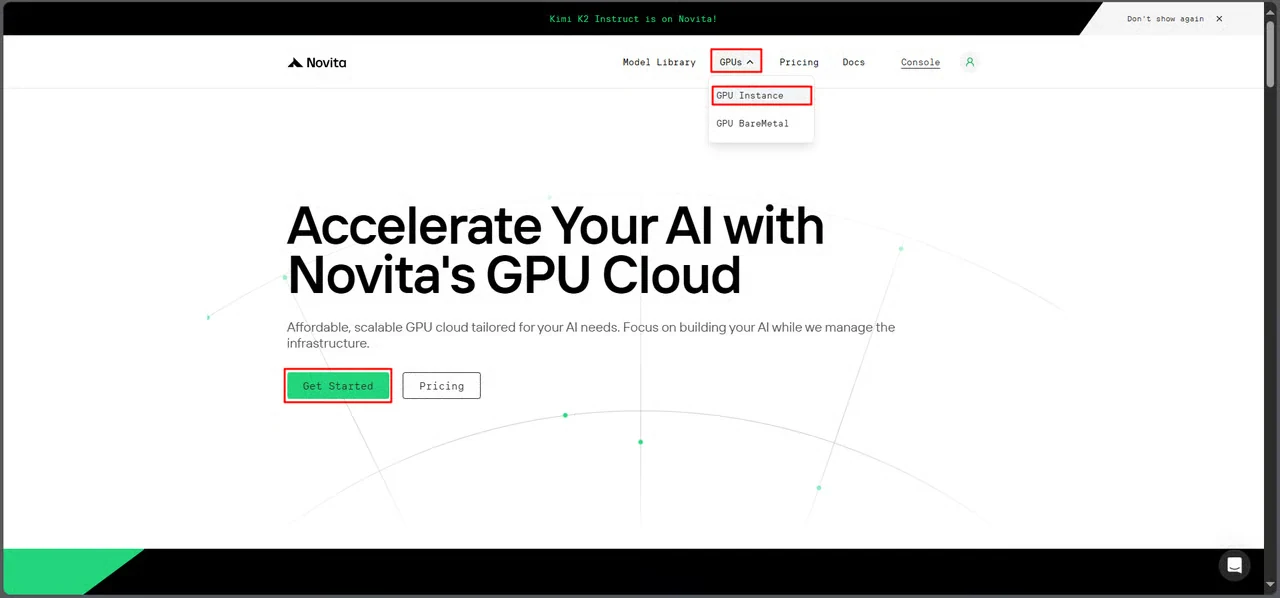
步驟 1:存取 GPU 控制台
導航至 Novita AI 的 GPU 介面,點擊 開始使用 進入部署管理儀表板。
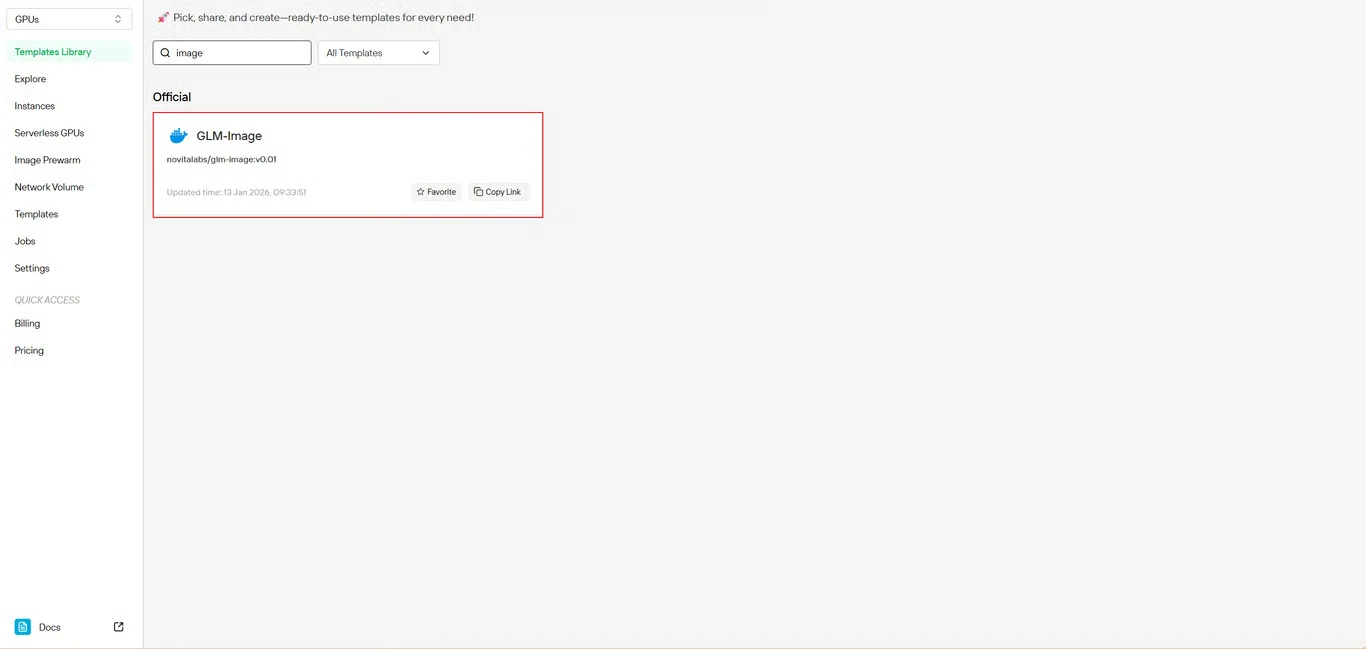
步驟 2:選擇 GLM-Image 模板
在模板存儲庫中找到 GLM-Image。Novita AI 的預建模板包含所有必要依賴項,無需複雜的環境設定。
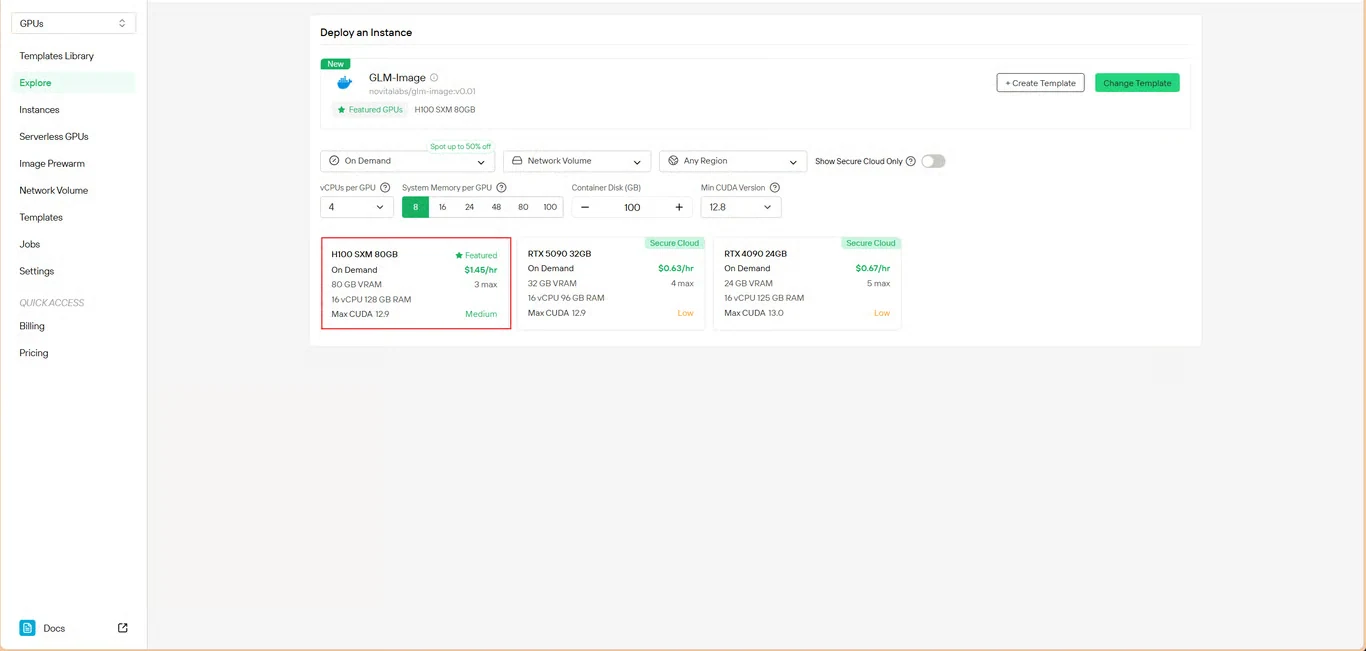
步驟 3:配置基礎設施
設定您的計算參數:
- 記憶體分配:確保有足夠的 VRAM 容納模型權重
- 儲存需求:分配空間給模型檔案與生成的圖像
- 網路設定:根據您的存取需求配置
配置完成後點擊 部署 繼續。
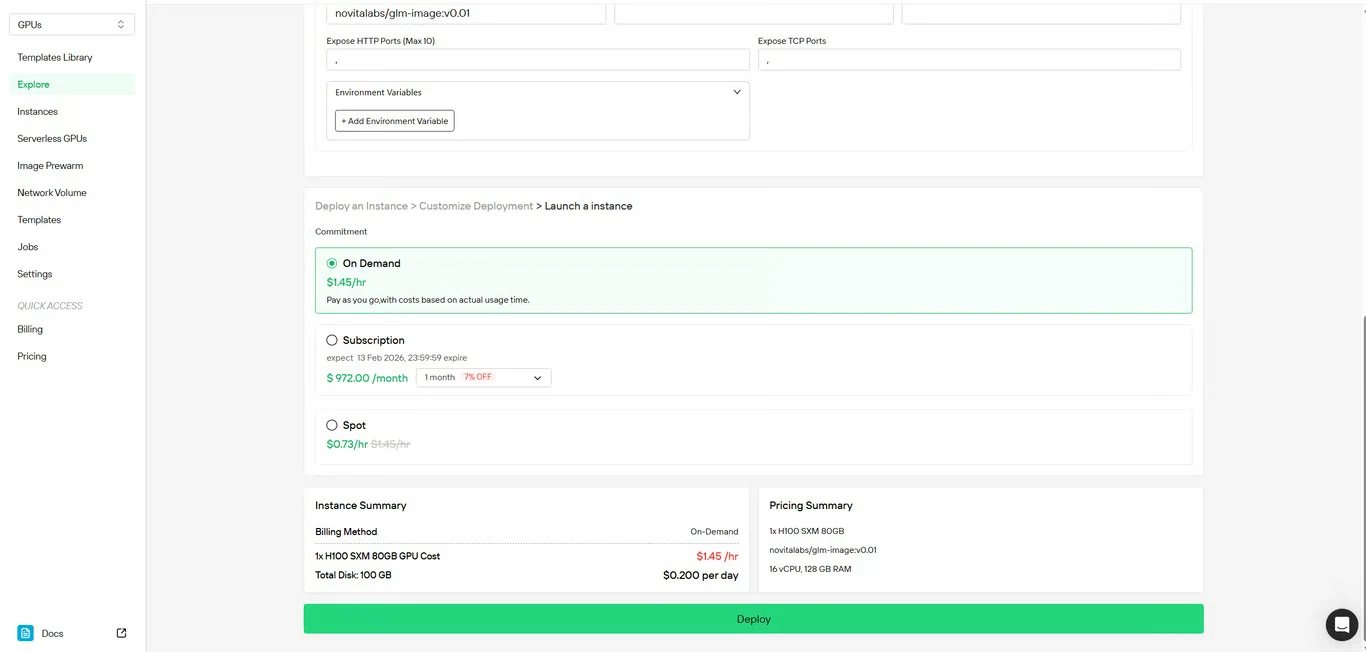
步驟 4:審核配置
再次檢查您的設定詳情與費用摘要。確認無誤後點擊 部署 啟動實例建立。
步驟 5:監控部署
系統會自動將您重新導向至實例管理頁面。您的 GLM-Image 實例將在背景中建立,無需手動介入。
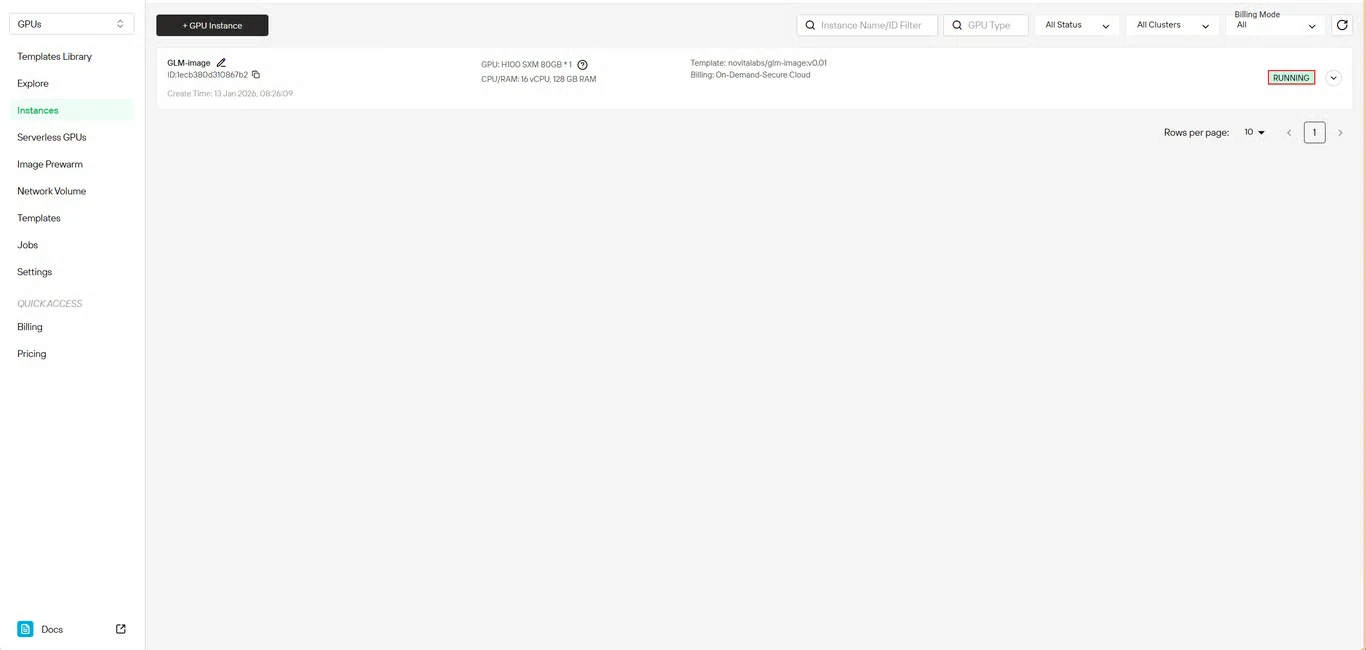
步驟 6:追蹤下載進度

即時監控模型下載狀態。部署完成後,您的實例狀態會從 拉取中 切換為 運行中。點擊實例名稱旁的箭頭圖示可查看詳細進度資訊。
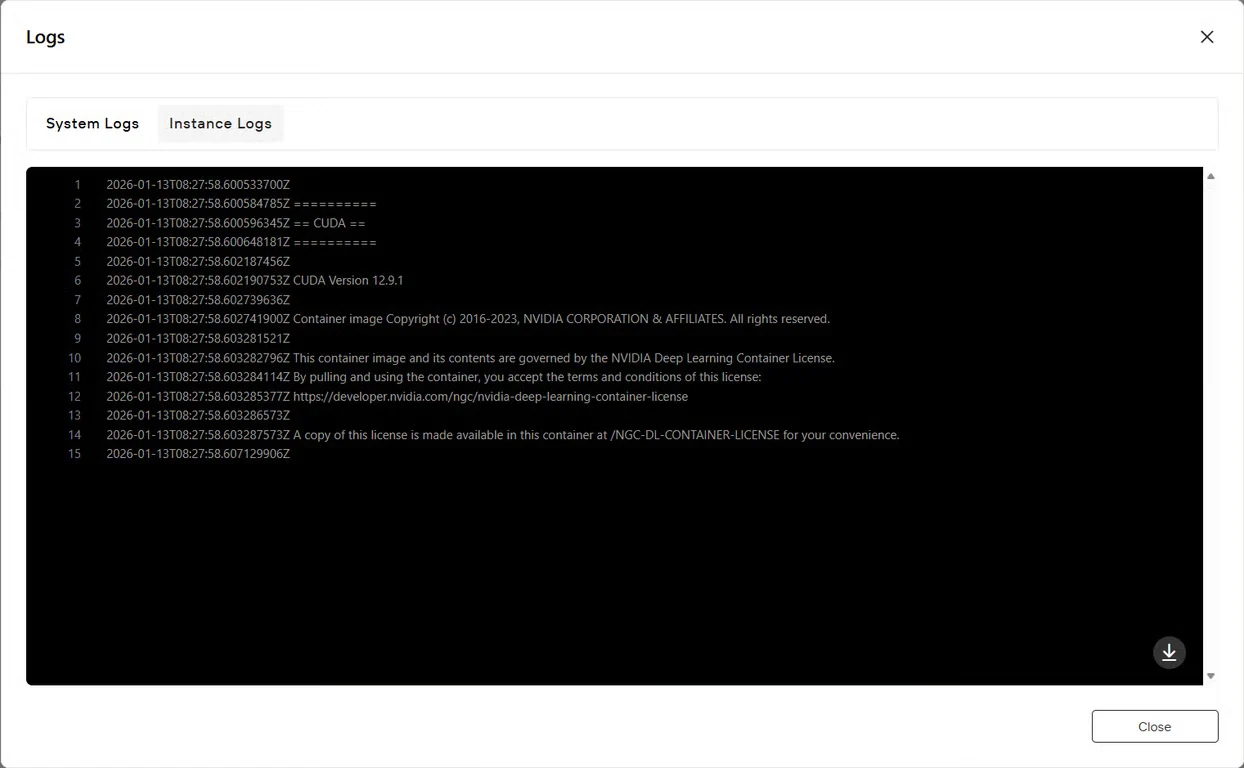
步驟 7:驗證服務狀態
點擊 日誌 按鈕查看實例日誌,確認 GLM-Image 服務已成功啟動。尋找表示模型已準備好進行推理的初始化確認訊息。
快速開始
範例 text2image.py
import torch
from diffusers.pipelines.glm_image import GlmImagePipeline
pipe = GlmImagePipeline.from_pretrained("zai-org/GLM-Image", torch_dtype=torch.bfloat16, device_map="cuda")
prompt = "A beautifully designed modern food magazine style dessert recipe illustration, themed around a raspberry mousse cake. The overall layout is clean and bright, divided into four main areas: the top left features a bold black title 'Raspberry Mousse Cake Recipe Guide', with a soft-lit close-up photo of the finished cake on the right, showcasing a light pink cake adorned with fresh raspberries and mint leaves; the bottom left contains an ingredient list section, titled 'Ingredients' in a simple font, listing 'Flour 150g', 'Eggs 3', 'Sugar 120g', 'Raspberry puree 200g', 'Gelatin sheets 10g', 'Whipping cream 300ml', and 'Fresh raspberries', each accompanied by minimalist line icons (like a flour bag, eggs, sugar jar, etc.); the bottom right displays four equally sized step boxes, each containing high-definition macro photos and corresponding instructions, arranged from top to bottom as follows: Step 1 shows a whisk whipping white foam (with the instruction 'Whip egg whites to stiff peaks'), Step 2 shows a red-and-white mixture being folded with a spatula (with the instruction 'Gently fold in the puree and batter'), Step 3 shows pink liquid being poured into a round mold (with the instruction 'Pour into mold and chill for 4 hours'), Step 4 shows the finished cake decorated with raspberries and mint leaves (with the instruction 'Decorate with raspberries and mint'); a light brown information bar runs along the bottom edge, with icons on the left representing 'Preparation time: 30 minutes', 'Cooking time: 20 minutes', and 'Servings: 8'. The overall color scheme is dominated by creamy white and light pink, with a subtle paper texture in the background, featuring compact and orderly text and image layout with clear information hierarchy."
image = pipe(
prompt=prompt,
height=32 * 32,
width=36 * 32,
num_inference_steps=30,
guidance_scale=1.5,
generator=torch.Generator(device="cuda").manual_seed(42),
).images[0]
image.save("output_t2i.png")
您可以修改 text2image.py 中的提示詞來運行,或直接使用現有範例執行。
python3 text2image
$ python3 text2image.py
Couldn't connect to the Hub: Cannot reach https://huggingface.co/api/models/zai-org/GLM-Image: offline mode is enabled. To disable it, please unset the `HF_HUB_OFFLINE` environment variable..
Will try to load from local cache.
Loading checkpoint shards: 100%|████████████████████████████████████████████████████████████████████████████████████████████████████████████████████████████████████████████████████| 3/3 [00:02<00:00,  1.47it/s]
Loading weights: 100%|█████████████████████████████████████████████████████████████████████████████████████████| 111/111 [00:00<00:00, 1391.52it/s, Materializing param=shared.weight]
Loading pipeline components...:  71%|██████████████████████████████████████████████████████████████████████████████████████████████████████▏                                        | 5/7 [00:02<00:00,  2.91it/s]Using a slow image processor as `use_fast` is unset and a slow processor was saved with this model. `use_fast=True` will be the default behavior in v4.52, even if the model was saved with a slow processor. This will result in minor differences in outputs. You'll still be able to use a slow processor with `use_fast=False`.
Loading weights: 100%|██████████████████████████████████████████████████████████████████████████████████████████| 1011/1011 [00:02<00:00, 359.59it/s, Materializing param=model.vqmodel.quantize.embedding.weight]
Loading pipeline components...: 100%|███████████████████████████████████████████████████████████████████████████████████████████████████████████████████████████████████████████████| 7/7 [00:07<00:00,  1.02s/it]
100%|█████████████████████████████████████████████████████████████████████████████████████████████████████████████████████████████████████████████████████████████████████████████| 30/30 [00:11<00:00,  2.69it/s]
output_t2i.png
範例 image2image.py
import torch
from diffusers.pipelines.glm_image import GlmImagePipeline
from PIL import Image

pipe = GlmImagePipeline.from_pretrained("zai-org/GLM-Image", torch_dtype=torch.bfloat16, device_map="cuda")
image_path = "cond.jpg"
prompt = "Replace the background of the snow forest with an underground station featuring an automatic escalator."
image = Image.open(image_path).convert("RGB")
image = pipe(
    prompt=prompt,
    image=[image],  # can input multiple images for multi-image-to-image generation such as [image, image1]
    height=33 * 32,
    width=32 * 32,
    num_inference_steps=30,
    guidance_scale=1.5,
    generator=torch.Generator(device="cuda").manual_seed(42),
).images[0]

image.save("output_i2i.png")
您可以修改 text2image.py 中的提示詞和圖像來運行,或直接使用現有範例執行。
python3 image2image.py
$ python3 image2image.py

Couldn't connect to the Hub: Cannot reach https://huggingface.co/api/models/zai-org/GLM-Image: offline mode is enabled. To disable it, please unset the `HF_HUB_OFFLINE` environment variable..
Will try to load from local cache.
Loading pipeline components...:   0%|                                                                                                                                                       | 0/7 [00:00<?, ?it/s]Using a slow image processor as `use_fast` is unset and a slow processor was saved with this model. `use_fast=True` will be the default behavior in v4.52, even if the model was saved with a slow processor. This will result in minor differences in outputs. You'll still be able to use a slow processor with `use_fast=False`.
Loading weights: 100%|██████████████████████████████████████████████████████████████████████████████████████████| 1011/1011 [00:02<00:00, 360.88it/s, Materializing param=model.vqmodel.quantize.embedding.weight]
Loading checkpoint shards: 100%|████████████████████████████████████████████████████████████████████████████████████████████████████████████████████████████████████████████████████| 3/3 [00:02<00:00,  1.46it/s]
Loading weights: 100%|█████████████████████████████████████████████████████████████████████████████████████████| 111/111 [00:00<00:00, 1426.62it/s, Materializing param=shared.weight]
Loading pipeline components...: 100%|███████████████████████████████████████████████████████████████████████████████████████████████████████████████████████████████████████████████| 7/7 [00:07<00:00,  1.03s/it]
100%|███████████████████████████████████████████████████████████████████████████████████| 30/30 [00:10<00:00,  2.97it/s]
GLM-Image 應用場景
GLM-Image 的混合架構在以下場景中表現尤為出色:
- 電子商務:產品可視化與變體生成
- 行銷:行銷創意與社群媒體內容
- 出版:編輯插圖與資訊圖表
- 設計:概念藝術與視覺原型製作
- 教育:教學圖表與視覺學習材料
模型在知識密集型生成任務中的優勢,讓它能準確渲染具有特定要求的複雜場景——非常適合需要創造力與精準度兼備的專案。
立即在 Novita AI 上開始使用 GLM-Image
立即在 Novita AI 的 GPU 基礎設施上部署 GLM-Image,無需手動設定的複雜流程,即可獲得企業級圖像生成能力。請造訪GLM-Image 模板頁面開始您的部署。
Novita AI是領先的 AI 雲端平台,為開發人員提供易於使用的 API 與實惠、可靠的 GPU 基礎設施,用於構建和擴展 AI 應用。