Want complete control over which AI model powers your coding assistant? This comprehensive guide shows you how to deploy your own custom model on Novita AI’s GPU infrastructure and integrate it seamlessly with Cursor IDE. Unlike using pre-configured API endpoints, deploying your own instance gives you full control over model selection, configuration, and performance optimization.
Practical Example: DeepSeek-R1-Distill-Qwen-1.5B
Step 1: Identify Your Model’s Base Architecture
Visit https://huggingface.co/deepseek-ai/DeepSeek-R1-Distill-Qwen-1.5B. Copy the model name for later use.
Step 2: Find the Corresponding Parser
Check the vLLM tool calling documentation. For Qwen-2.5 family models, use the hermes parser.
Why Tool Calling Matters for Coding Agents
Cursor doesn’t just send prompts and receive text responses. It needs models that can interact with your development environment, understand context across multiple files, and execute specific actions. Tool calling is the bridge that enables these capabilities.
Different model families require different parsers. Match your model to the correct parser type by consulting the vLLM tool calling documentation at.
Step 3: Create Your Novita AI Account
- Visit Novita AI Platform
- Click “Sign Up” for instant access
- Get $1 Free Credits automatically upon registration
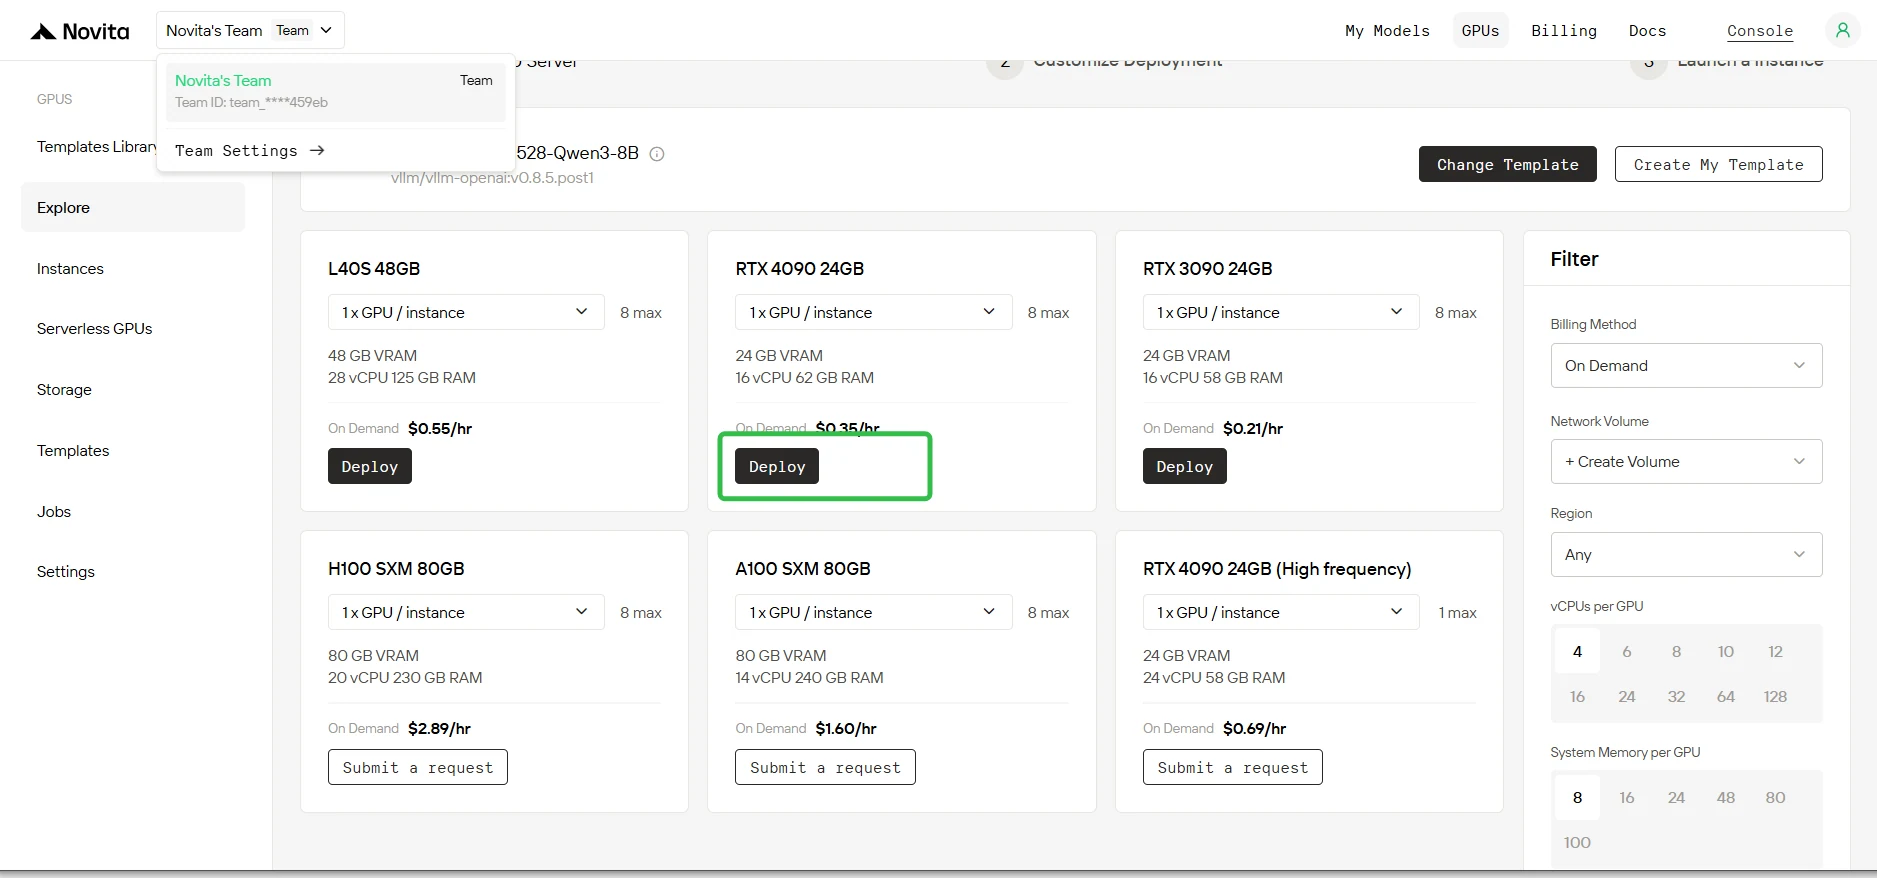
Step 4: Template Selection
Select the DeepSeek-R1-Distill-Qwen-1.5B from the model library or create your own template.
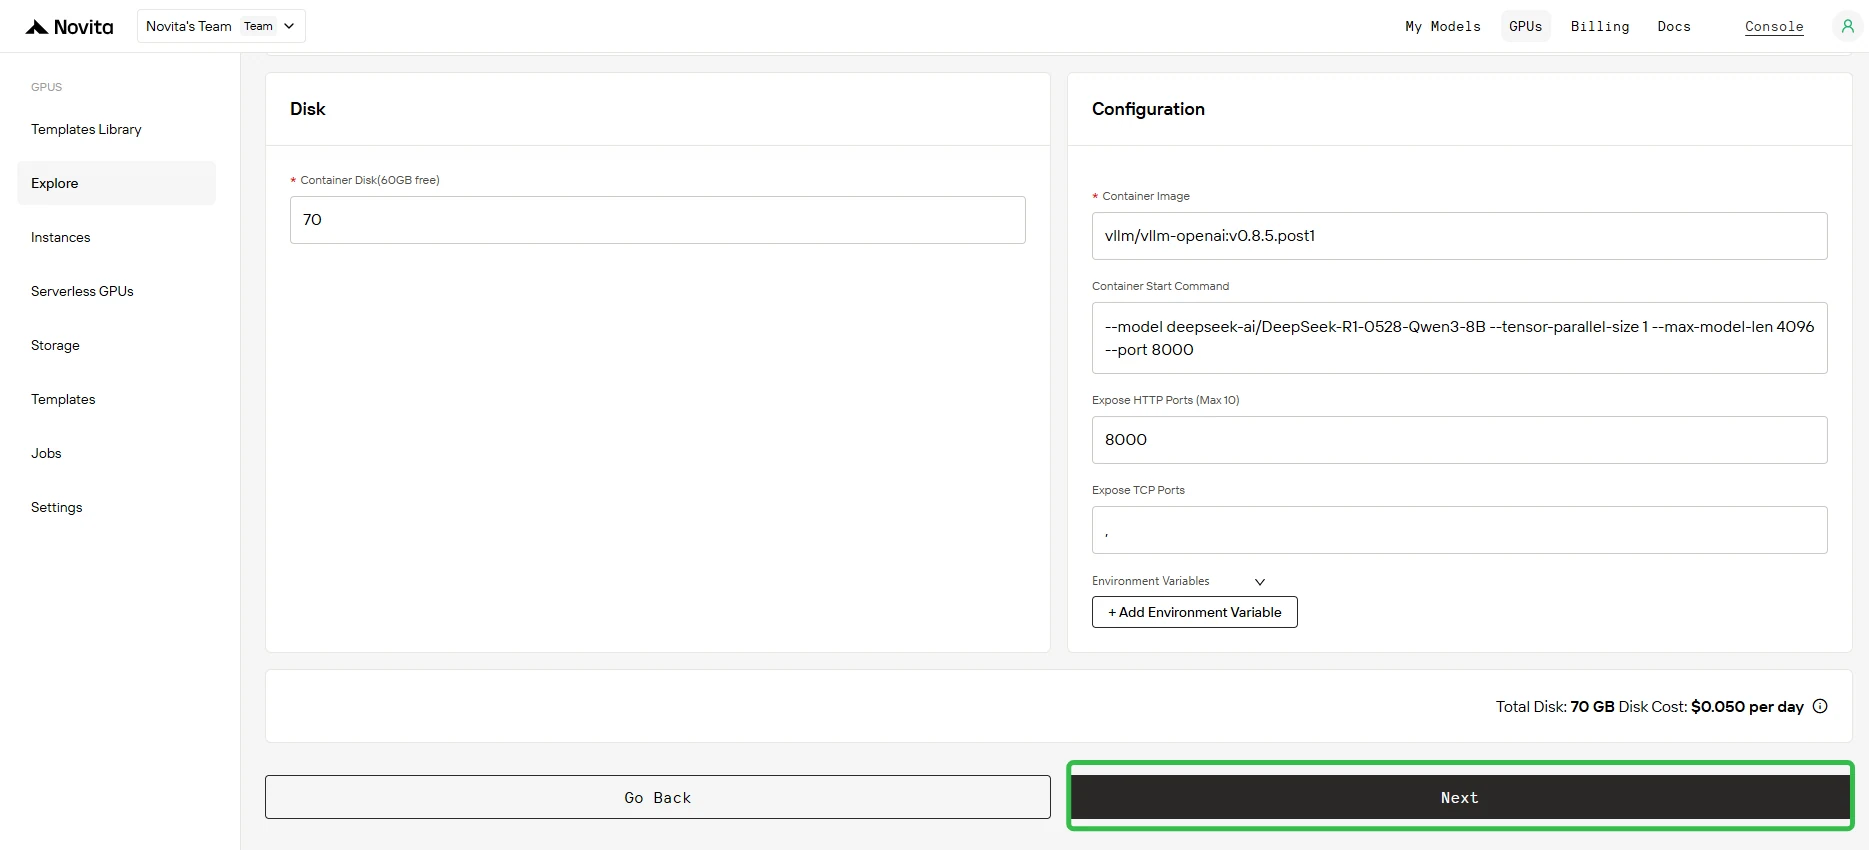
Step 5: Parameter Confirmation
Review the deployment parameters displayed on the configuration screen. Verify all settings are correct and click Next to proceed.
In the Container Startup Parameters field, add:
--enable-auto-tool-choice --tool-call-parser hermesImportant: The parser must match your model family. Consult vLLM documentation for the correct parser.
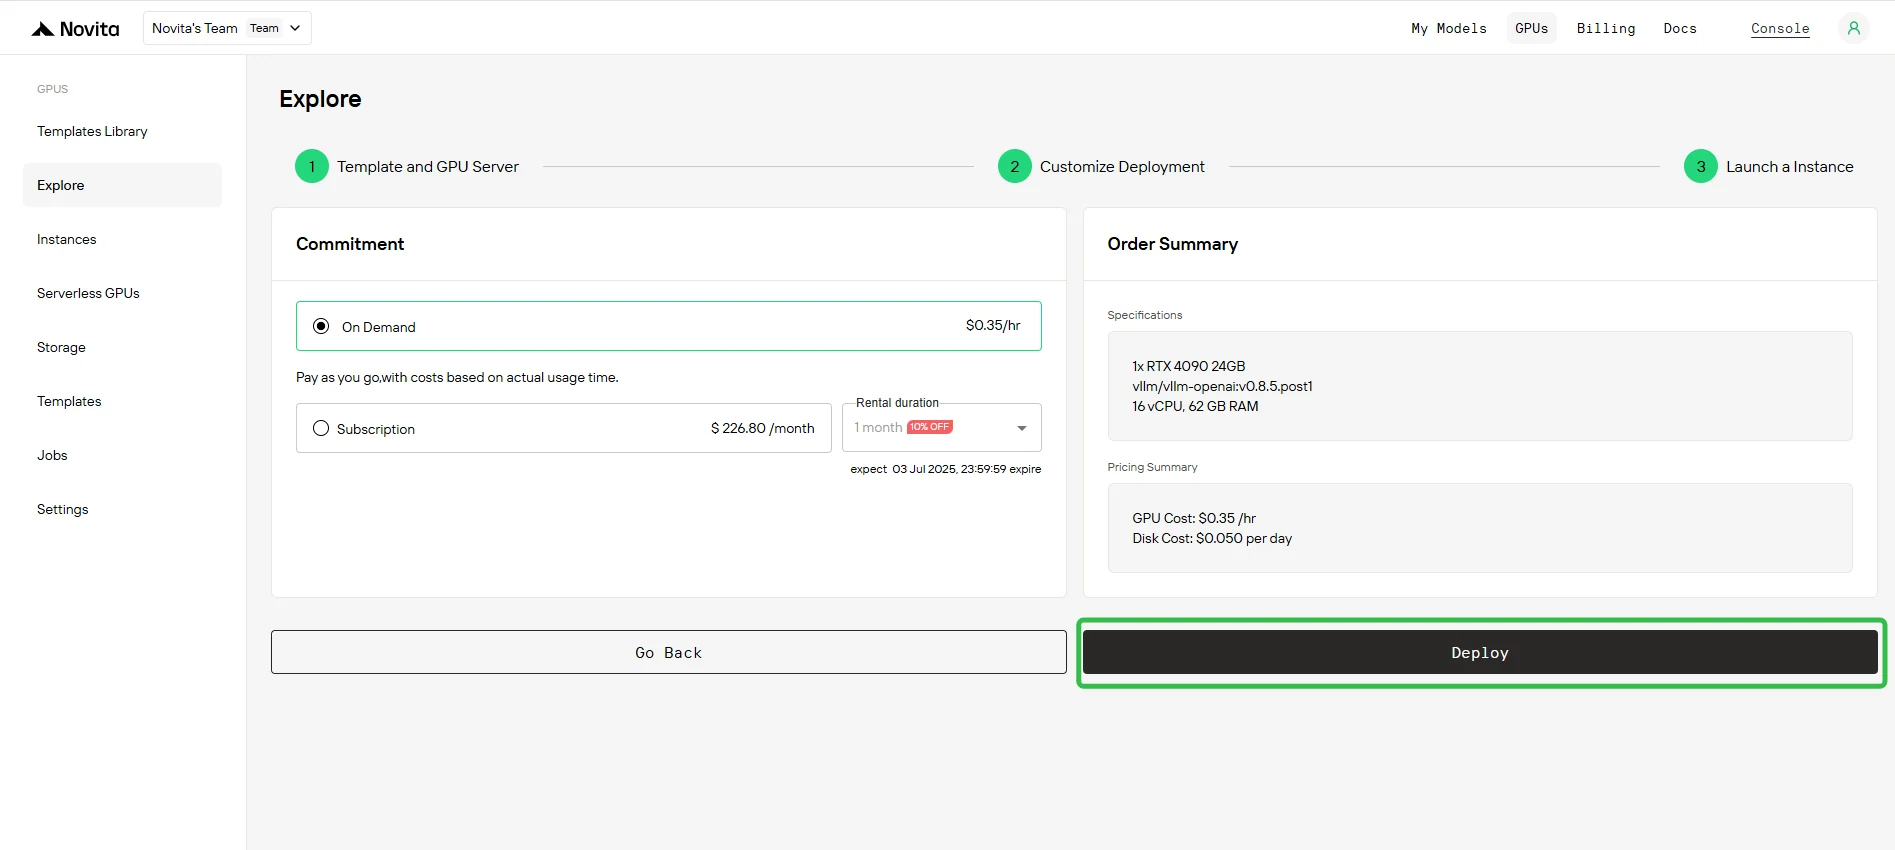
Step 6: Instance Deployment
Click Deploy to initiate the instance creation process. The system will begin provisioning your GPU instance.
Step 7: Monitor Deployment Progress
Navigate to Instance Management to access the control console. This dashboard allows you to track the deployment status in real-time.

Step 8: View Image Pulling Status
Click on your specific instance to monitor the container image download progress. This process may take several minutes depending on network conditions.

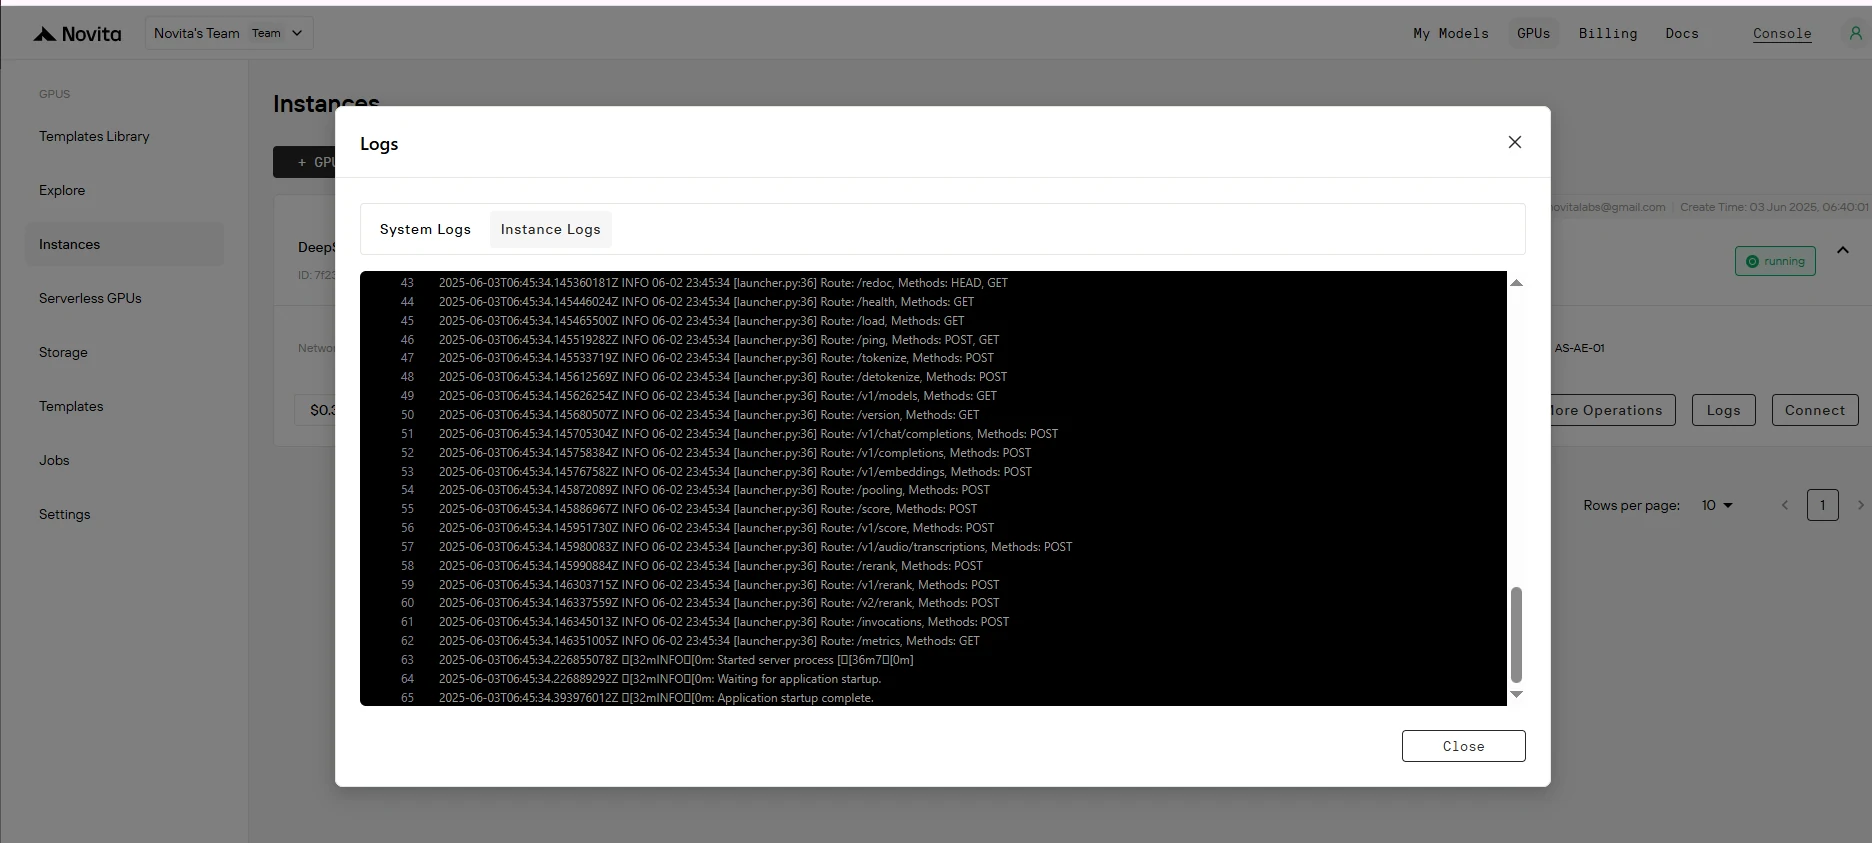
Step 9: Verify Successful Deployment
Look for the message "Application startup complete." in the instance logs. This indicates that the deployment process has finished successfully.
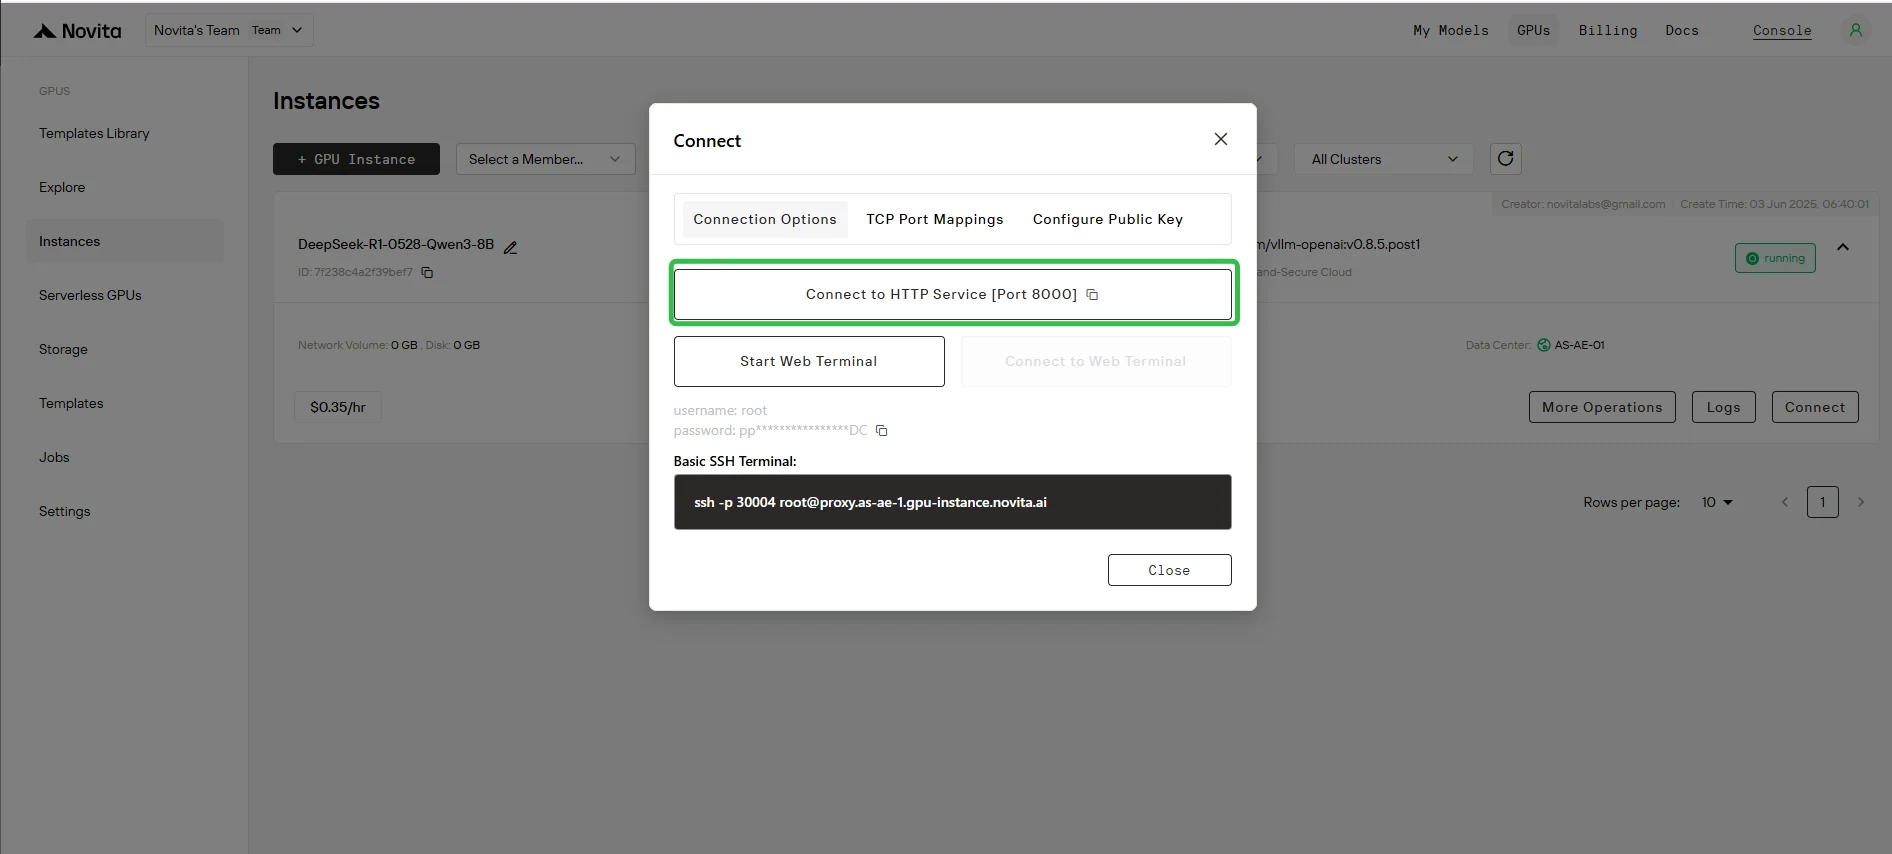
Step 10: Obtain Access URL
Click “Connect“, then click –> “Connect to HTTP Service [Port 8000]“. Since this is an API service, you’ll need to copy the address.

Complete Cursor IDE Configuration Guide
Step 1: Install and Subscribe to Cursor
- Download Cursor IDE from cursor.com
- Complete Pro plan purchase ($20/month)
- Launch application
Important: Agent mode and Edit functionality require a Cursor Pro subscription ($20/month).
Step 2: Access Model Settings
- Open Cursor Settings (Ctrl+, or Cmd+,)
- Navigate to “Models” section
- Locate “API Configuration” area
Step 3: Configure Your Custom Instance
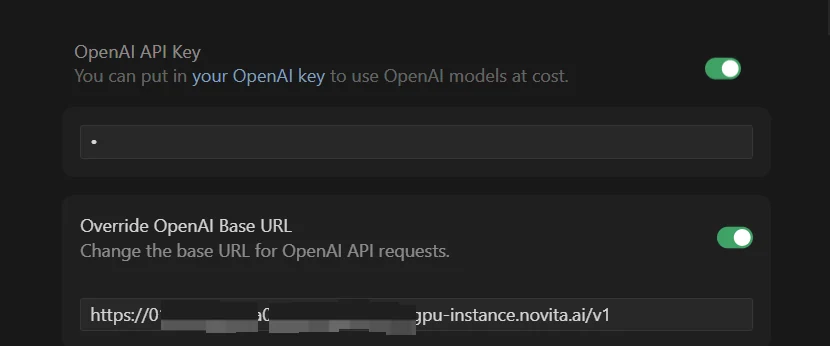
- ✅ Enable “OpenAI API Key” toggle
- ✅ Enable “Override OpenAI Base URL” toggle
Step 4: Enter Your Instance Credentials
In “OpenAI API Key” field: Enter any value (cannot be empty)
In “Override OpenAI Base URL” field: Paste your URL with the /v1 suffix:
https://your-instance-id.novita.ai/v1⚠️ Critical: The /v1 suffix is mandatory. Without it, Cursor cannot communicate with your instance.
Step 5: Add Your Custom Model
- Click ”+ Add Custom Model”
- Enter the exact model name on Huggingface
- Important: Model name must match exactly—case-sensitive
Step 6: Save and Select Your Model
- Save your configuration
- Select your custom model in Cursor’s dropdown
Testing and Verification
Test in Ask Mode
- Start a new chat in Ask Mode
- Send a simple coding question
- Verify you receive a response
Test in Agent Mode
- Switch to Agent Mode
- Request a multi-step coding task
- Verify tool calling functionality works
Common Setup Errors and Solutions
❌ Model Not Responding
Solutions:
- ✅ Verify both API toggles are enabled
- ✅ Check Base URL includes
/v1suffix - ✅ Confirm instance status shows “Running”
- ✅ Verify sufficient credits
❌ Connection Refused
Solutions:
- ✅ Check Base URL has no trailing slash after
/v1 - ✅ Ensure no extra spaces in URL
- ✅ Verify internet connection
❌ Model Name Not Found
Solutions:
- ✅ Copy exact model name from dashboard
- ✅ Check case sensitivity
- ✅ Verify no extra spaces
❌ Limited Functionality
Solutions:
- ✅ Verify tool calling parameters were added during deployment
- ✅ Check correct parser was selected
- ✅ Restart Cursor application
Conclusion
Deploying your own model on Novita AI for Cursor provides complete control over your AI coding assistant.
By following this guide and paying careful attention to tool calling configuration and connection parameters, you can successfully integrate custom AI models with Cursor and take full control of your coding assistant.
Novita AI is an AI cloud platform that offers developers an easy way to deploy AI models using our simple API, while also providing affordable and reliable GPU cloud for building and scaling.