

Recently, we have seen exponential growth in the field of artificial intelligence with Large Language Models (LLM), Vision Language Models, etc, and quite recently, AI agents. Unlike the traditional rule-based applications, these agents are capable of utilizing their reasoning and decision-making capabilities to perform complex tasks autonomously or with minimal user intervention. To do this, AI agents often need to generate and execute code dynamically, or even control the entire virtual machine, and Novita AI sandbox provides these capabilities.
In this tutorial, we will create an AI agent that will serve as our data analyst, and just like a human analyst, it will be able to go find and download a dataset using the Browser per our instructions, and when prompted, analyse, visualize, and execute code to respond with drawn insights to us.
What is an AI Agent?
An AI agent is a software program that uses artificial intelligence to reason, make plans, and carry out actions to reach specific goals. These agents can use tools, such as APIs, code execution, and web searches, to gather information or carry out tasks. Sometimes, they also collaborate with other agents, particularly for more complex goals, like Deep Research.
Here are typical components of an AI agent:
- Reasoning/Planning: When given a goal, the agent creates step-by-step plans to achieve it. This process may involve completing sub-tasks and gathering extra information to guide its next actions. This is especially common for complex tasks that take longer, and reasoning models work well for these situations.
- Tool Usage: AI agents can call external tools and services. These may include functions, APIs, or other resources that extend their capabilities.
- Coordination: Multiple agents can work together by sharing responsibilities, with each one helping to achieve a shared, complex, or long-term goal.
Novita AI Sandbox, LLM Products, and Browser Use Overview
What a Sandbox Is and Why It Matters
A sandbox is a secure, isolated runtime environment where untrusted code can be executed without affecting the host system. It is basically a lightweight virtual computer for your AI agent to execute code, commands, create files, etc.
Novita AI provides this sandbox on the cloud for your agent to access quickly on demand, with flexible per-second billing based on resources used.
Key features of the Novita sandbox:
- Secure Isolation: Each sandbox gets its isolated filesystem and environment, protecting data and preventing unintended interactions.
- Fast Startup: Sandbox instances launch in under ~200ms on average, making it ideal for low-latency scenarios.
- Multi-Language Support: You can run code in multiple programming languages, including Python, JavaScript, TypeScript, and more.
- Quick Pause & Resume: Pause the sandbox at any time and resume when needed, with filesystem and process state fully restored.
- Background Execution: Supports background task execution and is suitable for scenarios that require waiting for a result.
Novita Model API:
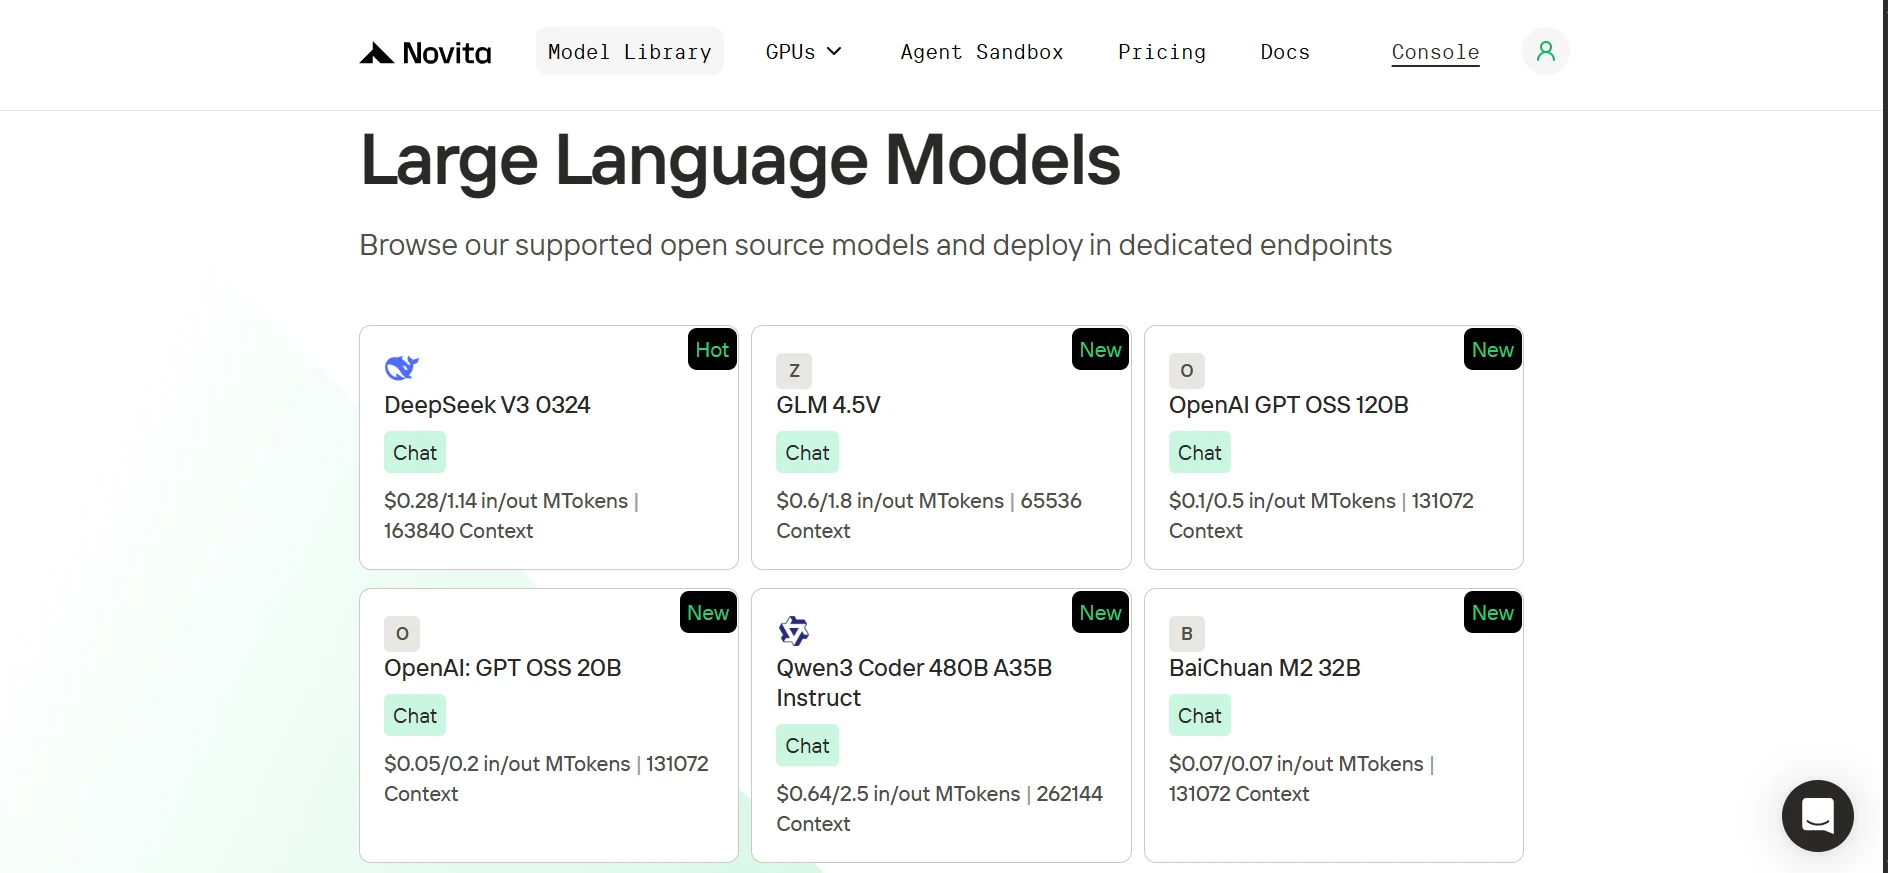
Novita offers a vast library of open source AI models from leading research labs like OpenAI, Google, DeepSeek, and Qwen etc. These include models for language, vision, audio, video, and embeddings. Our language models are also fully compatible with the OpenAI SDK, so switching from OpenAI to Novita only requires updating the base URL and API key in your client, then selecting a Novita model.
| from openai import OpenAI client = OpenAI( base_url=“https://api.novita.ai/v3/openai”, api_key=" ) |
Browser Use Overview:

Browser Use is an open-source Python library that enables AI agents to interact with web browsers using natural language commands (e.g “Check the weather in NY today”). Rather than writing complex rule-based selectors, the AI handles element finding and interaction. And given Novita’s OpenAI-compatible model API, you can use any LLM or VLM (vision-language model) to power Browser Use.
Setting Up Your Development Environment
To get started, we’ll clone the GitHub repository, set up a clean Python environment, install all required dependencies, and get Novita AI keys.
Clone the GitHub repository, and install dependencies with uv.
1. Install uv (a lightweight Python package manager)
| pip install uv |
2. Clone the repository (GitHub repo) and navigate into it.
| git clone https://github.com/Studio1HQ/AI-sandbox.git cd AI-sandbox |
3. Create and activate the uv virtual environment
| # Creates a virtual environment uv venv # Activate the virtual environment source .venv/bin/activate # For Mac/Linux # or .venv\Scripts\activate # For Windows |
4. Install project dependencies
| # Install dependencies uv sync |
Creating a Novita AI account and obtaining an API key
1. Sign up at novita.ai.
2. In the dashboard, hover over the user profile icon and click API Keys on the pop-up.
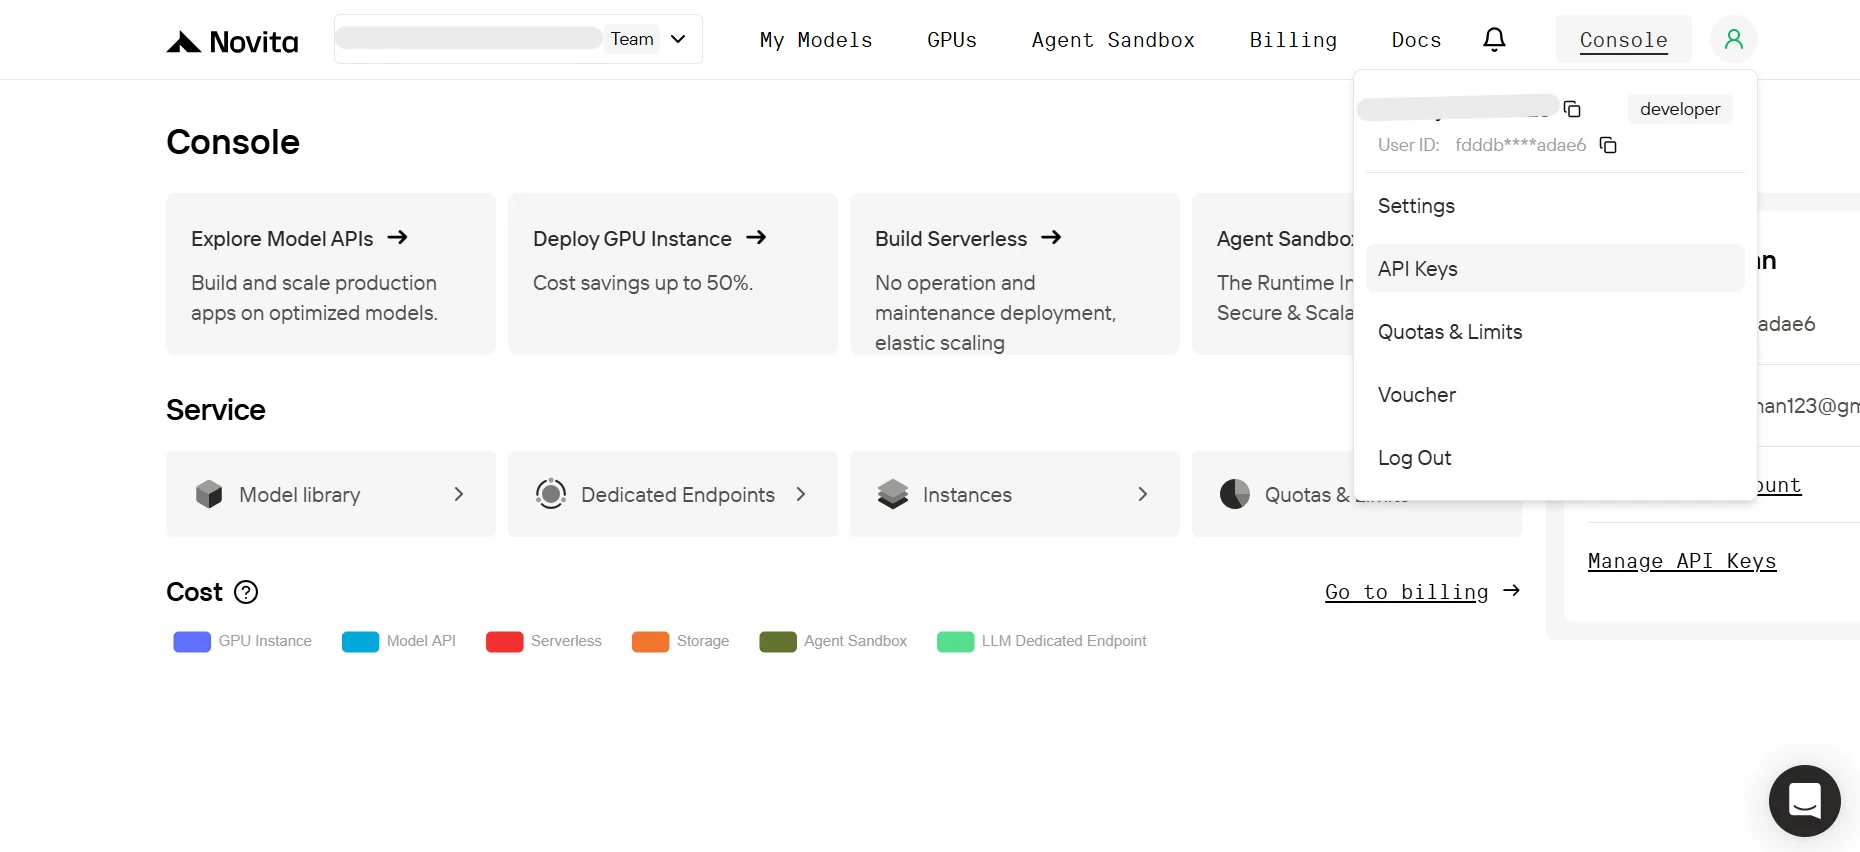
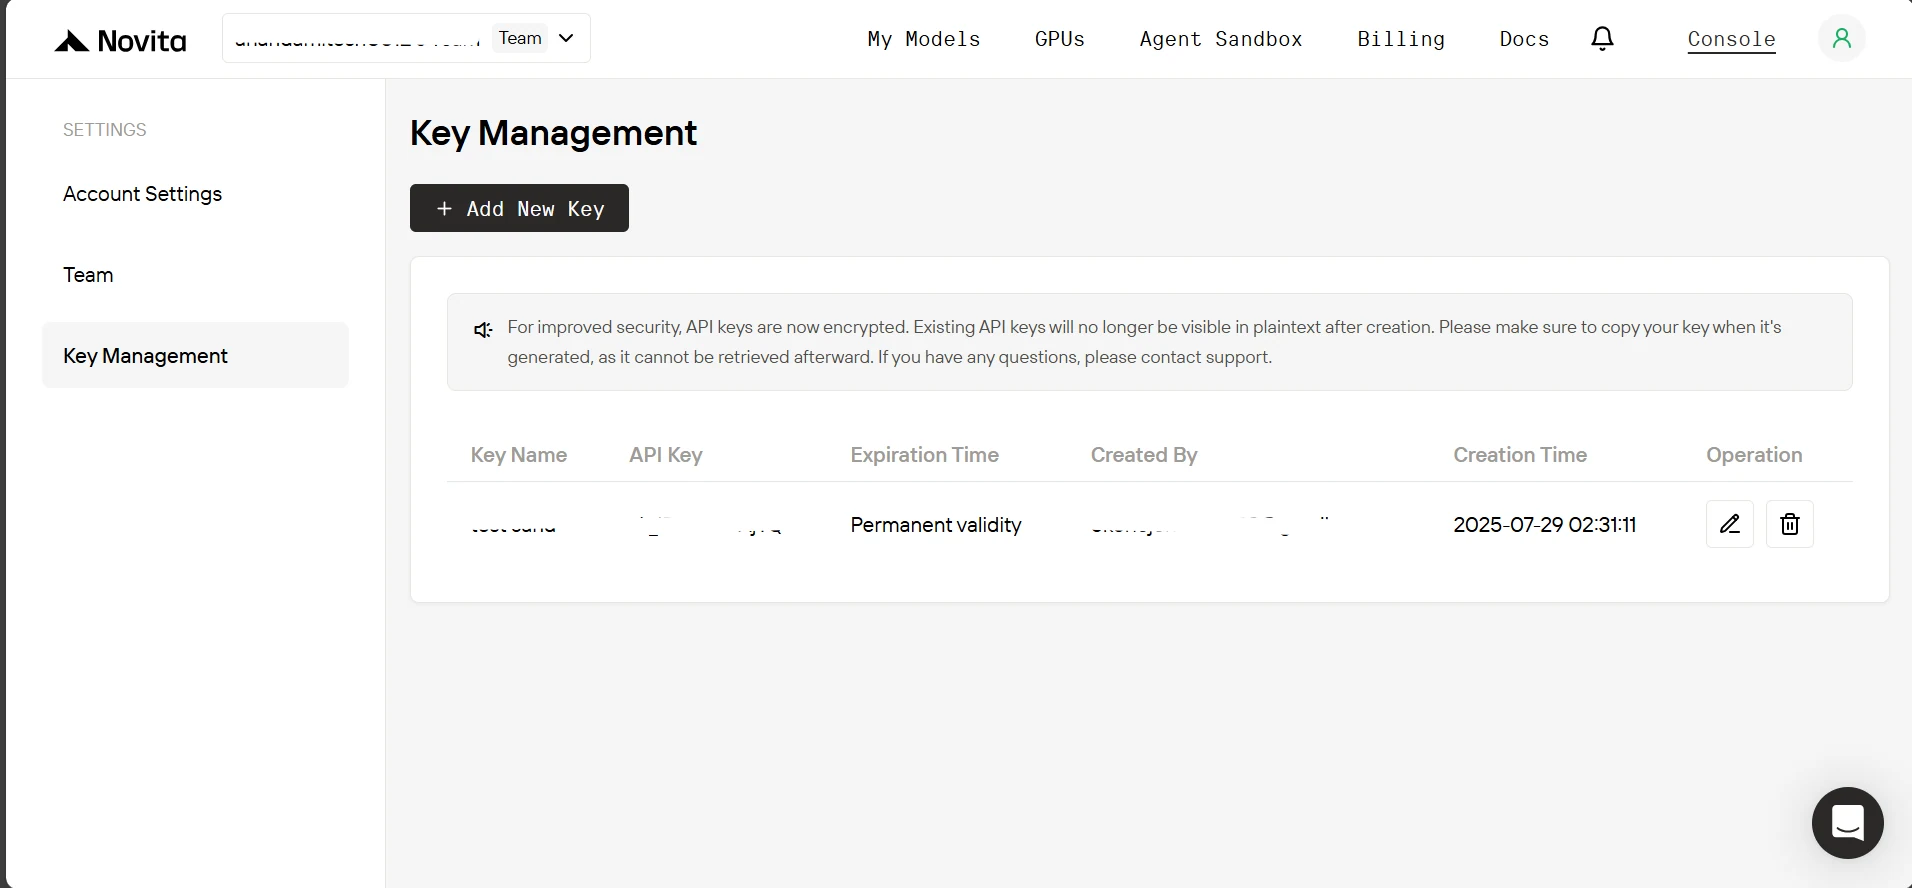
3. On the Key Management page, click Add New Key. In the pop-up, enter a name for your key, click Confirm, and then copy the generated key.
4. Now inside the project’s directory, create a .env file, and paste this below.
| NOVITA_API_KEY=" NOVITA_BASE_URL=“https://api.novita.ai/v3/openai” NOVITA_E2B_DOMAIN=“sandbox.novita.ai” NOVITA_E2B_TEMPLATE=“code-interpreter-v1” |
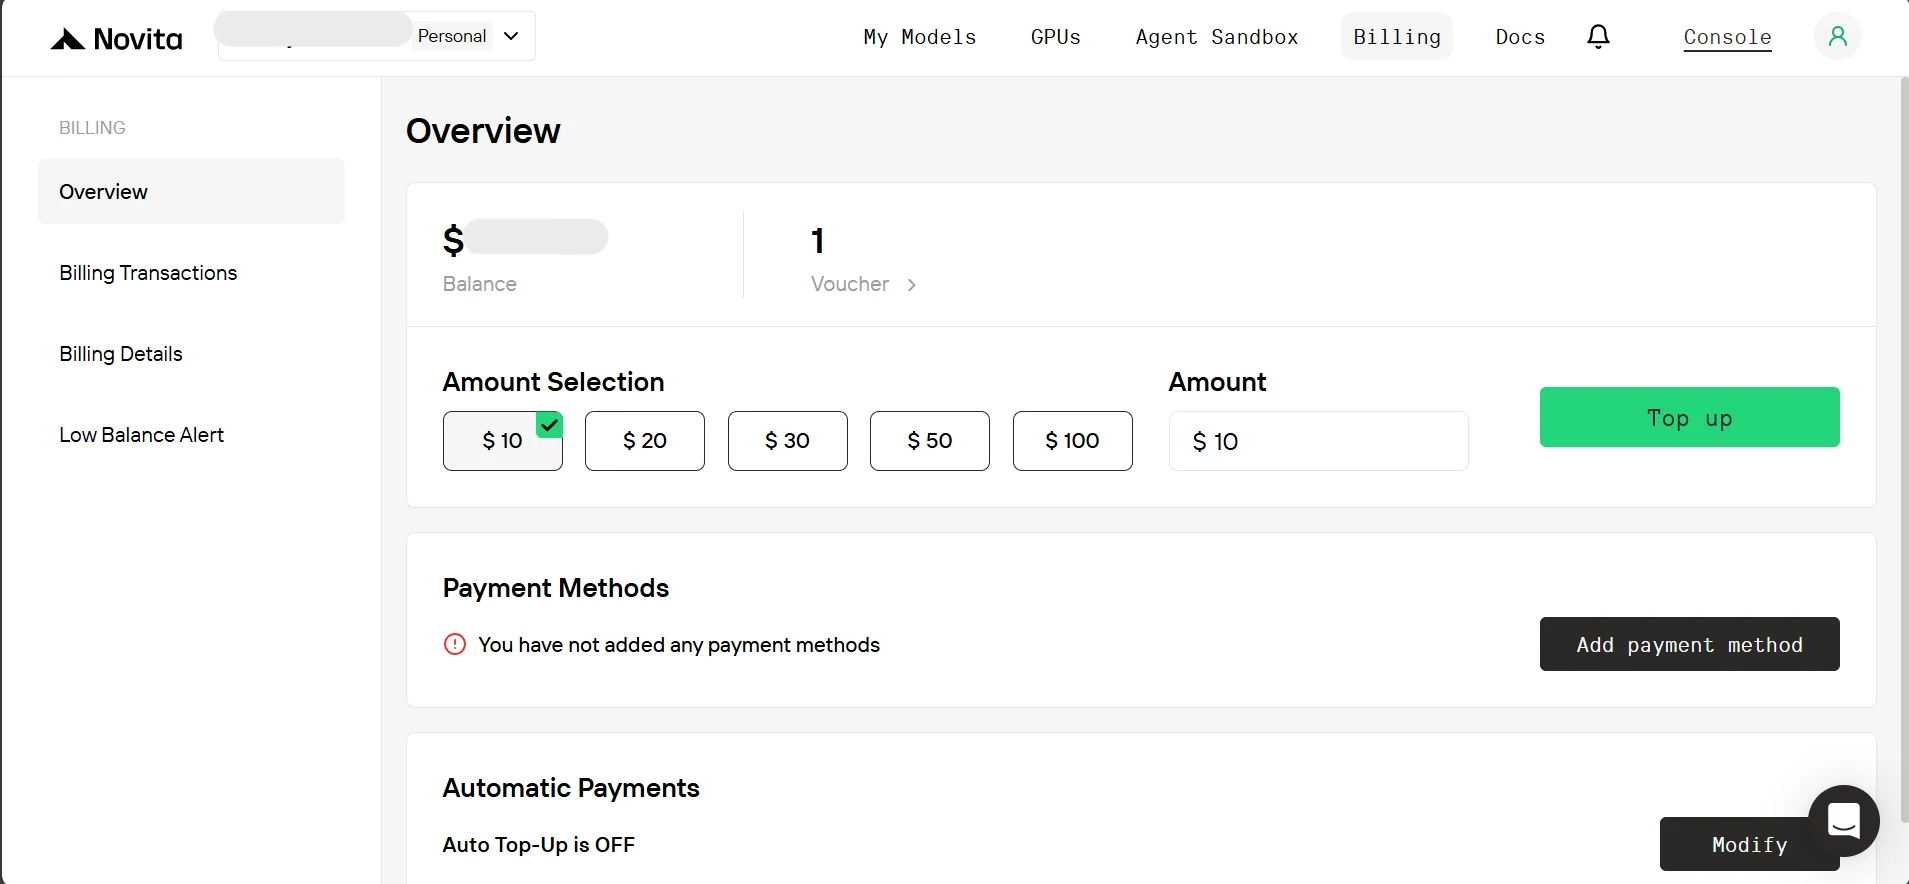
Add credits to the Novita AI account.
To use the Novita sandbox, you need to add credits to our account. On the dashboard tab, click ‘Billing.’ Then, on the billing page, add a payment method and top up at least $10 in credits.
Building the Exploratory Data Analyst (EDA) Agent
Now our environment is set up and we have our API key, let’s kickstart our Agent
Downloading datasets (or files) via Agent Browser Use:
Just like a human analyst, we want our agent to be able to take instructions and use a browser to get the datasets. So, as seen in browser_agent.py, we first create a Pydantic data structure for the agent’s final output, which will take the downloaded file names and the results of completed tasks to be written to a file.
| … # below existing code class TaskFile(BaseModel): """Represents a file generated as part of a task result e.g. scraped data or researched data.""" filename: str = Field(…, description=“Name of the file including extension”) content: str = Field(…, description=“Text content to be written into the file”) class AgentOutput(BaseModel): """Final aggregated output of the browser agent execution.""" downloaded_files: Optional[list[str]] = Field( None, description=“List of downloaded file names (with extension), if any” ) task_files: Optional[list[TaskFile]] = Field( None, description=“Files generated from user tasks (e.g., scraped or researched data), if any” ) |
Below is a sample of how the agent browser will work. We’ll be using a Large Language Model (LLM) for browser web navigation, which should cover most use cases. However, for more complex UI tasks (e.g., captcha solving), a Vision-Language Model (VLM) is recommended. When using a VLM, you can set the vision detail level (‘high’, ‘low’, or ‘auto’) to balance token cost against vision clarity.
We then create a browser session, configure the profile with a download path (./Download) and user_data_dir (set to None for incognito mode), and set our Pydantic model as the controller to get the agent outputs structured. Then, we will start the agent with await agent.run(), and the final results are parsed to get the downloaded file names.
| # A sample of how the browser agent will look agent = Agent( task=“Go to Hugging Face, search for An-j96/SuperstoreData and open its page, then navigate to the Files tab and download the data csv file.”, llm=ChatOpenAI(base_url=novita_base_url, model=novita_model, api_key=novita_api_key), use_vision=False, vision_detail_level=“auto”, # available options [‘low’, ‘high’, ‘auto’]; browser_session=BrowserSession( browser_profile=BrowserProfile( downloads_path=”./Download”, user_data_dir=None ) ), # set the download directory path for the browser. controller=Controller( output_model=AgentOutput ), # Get the agent to output the name of the downloaded file at the end of the task. ) all_results = await agent.run() final_output = AgentOutput.model_validate_json( all_results.final_result() ) # parse the final agent result. |
(Note: Running a browser agent on your local machine will launch a real browser instance so you can watch it in action.) The full method will collect the downloaded file names, write the task results to a file, and return all file paths for later upload.
| … # below existing code async def downloading_task_for_browser_agent( task: str, api_key: str, model: str, model_api_base_url: str, use_vision: bool, download_dir_path: str = ”./Download”, ) -> Tuple[str, list[str]]: """ Will perform the user’s download task via browser use and return download directory path and the downloaded files names. Returns: Tuple of (download_directory, filenames_with_extension) """ agent = Agent( task=task, llm=ChatOpenAI( base_url=model_api_base_url, model=model, api_key=api_key, max_completion_tokens=20_000, frequency_penalty=0, # This penalty can slightly affect tool use; keep at 0. ), use_vision=use_vision, vision_detail_level=“auto”, # available options [‘low’, ‘high’, ‘auto’]; browser_session=BrowserSession( browser_profile=BrowserProfile( downloads_path=download_dir_path, user_data_dir=None, # ”./browser_user_data” ) ), # set the download directory path for the browser. controller=Controller( output_model=AgentOutput ), # Have the agent output the task execution result according to the AgentOutput schema. max_failures=5, ) try: # Run the agent and structure its output all_results = await agent.run() final_output: AgentOutput = AgentOutput.model_validate_json( all_results.final_result() ) if final_output.task_files: console.print( Panel( f”[bold yellow]Writing task results to files…[/bold yellow] {final_output.task_files}“, title=“Task Results”, border_style=“white”, ) ) # Write each task result to a file in the download directory task_result_files: list[str] = [] for task_file in final_output.task_files or []: file_path = Path(task_file.filename) # Prevent path traversal or unsafe absolute paths if file_path.is_absolute() or ”..” in file_path.parts: raise ValueError( f”The agent passed an unsafe file path as a filename: {file_path}” ) # Point the file path inside the download directory file_path = Path(download_dir_path) / file_path # Ensure the download directory exists, else create it. file_path.parent.mkdir(parents=True, exist_ok=True) # Write task result content to a file with open(file_path, “w”, encoding=“utf-8”) as f: f.write(task_file.content) task_result_files.append(task_file.filename) if task_result_files: console.print( Panel( f”[bold green]Task results written to files:[/bold green] {task_result_files}“, title=“Task Results”, border_style=“white”, ) ) # Combine downloaded files with task result files file_results = (final_output.downloaded_files or []) + task_result_files if file_results: console.print( Panel( f”[bold green]Files available:[/bold green] {file_results} in {download_dir_path}“, title=“Downloaded Files”, border_style=“green”, ) ) else: raise RuntimeError(“No files were downloaded or written.”) except Exception as e: file_results = None console.print( Panel( f”[bold red]Error:[/bold red] {str(e)}\ “, title=“Execution Error”, border_style=“red”, ) ) return (download_dir_path, file_results) |
The agent call is wrapped in a try-except block, so if a failure occurs, an exception is raised, and file_results is set to None. Finally, the method returns both the download_dir_path and the file_results paths.
Defining schemas of the available tools for our agent:
Now that we’re done with browser use, it’s time to define the schemas for the tools available to our EDA agent. We’ll provide four tools:
- run_python_code: allows the agent to execute Python code inside the sandbox.
- run_on_command_line: lets the agent run commands in the sandbox terminal (e.g., installing Python packages).
- sync_with_user: enables the agent to sync created or updated files and directories from the sandbox to your local sync folder.
- delete_from_user_sync_folder: lets the agent remove files or directories from the local sync folder.
Together, all these tools give the agent full control over code execution, terminal use, and file synchronization between the sandbox and your local system.
In sandbox_eda.py, we see the schema for the tools:
- run_python_code, which simply takes the Python code to execute as an input parameter and returns a result if any.
| { “type”: “function”, “function”: { “name”: “run_python_code”, “description”: “Runs the python code and returns the result if any.”, “parameters”: { “type”: “object”, “properties”: { “python_code”: { “type”: “string”, “description”: “The Python code to run.”, } }, “required”: [“python_code”], }, }, }, |
- run_on_command_line, which again simply takes the command to run as an input parameter and returns a result if any.
| { “type”: “function”, “function”: { “name”: “run_on_command_line”, “description”: “Runs the command on the command line and returns the result if any.”, “parameters”: { “type”: “object”, “properties”: { “command”: { “type”: “string”, “description”: “The command to run on the command line.”, } }, “required”: [“command”], }, }, }, |
- sync_with_user, which takes two input parameters:
- sandbox_path: the path to the file or directory inside the sandbox.
- path_on_user_sync_folder : the path the agent wants the file or directory to take inside the user’s sync folder.
This second path will be of the form (e.g., /new.txt), with the assumption that the sync folder is the parent. For example, we will later resolve /new.txt to sync_folder/new.txt.
| { “type”: “function”, “function”: { “name”: “sync_with_user”, “description”: “Will sync a file or directory on sandbox, to the sync folder on the user’s computer”, “parameters”: { “type”: “object”, “properties”: { “sandbox_path”: { “type”: “string”, “description”: “Path to the file or directory on the sandbox.”, }, “path_on_user_sync_folder”: { “type”: “string”, “description”: “Relative path where the file or directory will be placed inside the user’s sync folder. For example, ‘/hello.txt’ goes directly in the sync folder, while ‘/run1/hello.txt’ will be placed in a ‘run1’ subfolder within the sync folder.”, }, }, “required”: [“sandbox_path”, “path_on_user_sync_folder”], }, }, }, |
- delete_from_user_sync_folder, which takes just one input parameter:
- path_on_user_sync_folder : the path to the file or directory the agent wants to delete from the user’s sync folder.
Note this follows the same path assumptions as in sync_with_user.
| { “type”: “function”, “function”: { “name”: “delete_from_user_sync_folder”, “description”: “Will delete a file or directory from the sync folder on the user’s computer”, “parameters”: { “type”: “object”, “properties”: { “path_on_user_sync_folder”: { “type”: “string”, “description”: “Relative path to the file or directory on the user’s sync folder. For example, ‘/hello.txt’ will delete it directly from the sync folder, while ‘/run1/hello.txt’ will delete it directly from ‘run1’ subfolder within the sync folder.”, } }, “required”: [“path_on_user_sync_folder”], }, }, }, |
Implementing the available functions:
First, we have a SandboxEDA class that takes the following parameters:
- sandbox: the sandbox instance.
- model_base_url and model_api_key: for connecting to the Novita model.
- max_consecutive_function_calls_allowed: defaults to 30 to prevent infinite function call loops from the agent, as we will see later.
| … # below existing code class SandboxEDA: def __init__( self, sandbox: Sandbox, model_api_base_url: str, model_api_key: str, max_consecutive_function_calls_allowed: int = 30, ): self.sandbox = sandbox self.model_api_base_url = model_api_base_url self.model_api_key = model_api_key self.max_consecutive_function_calls_allowed = ( max_consecutive_function_calls_allowed ) |
Then, run_python_code as a method of the SandboxEDA class. The method takes the Python code as input and uses the sandbox instance to execute it. When the outputs are returned, any image outputs (note: they are base64 encoded) are saved to the temp_image_output directory. Finally, the method returns a dictionary containing the image outputs, other outputs, logs, and any errors.
| … # below existing code class SandboxEDA: … # below existing code def run_python_code(self, python_code: str) -> dict: """ Runs the python code on the sandbox, and if there are any images save them locally. Args: python_code (str): The python code to run. Returns: dict: Containing the base64 image outputs and other outputs (stdout, logs, error, etc). """ execution = self.sandbox.run_code(python_code, language=“python”) image_outputs = [result.png for result in execution.results if result.png] # Iterate through the base64 encoded images and save them to a file with name format: temp-{timestamp}.png to ./temp_image_output dir for b64_image in image_outputs: timestamp = int(time.time_ns()) image_filename = Path(f”./temp_image_output/temp-{timestamp}.png”) # Will create the temp_image_output directory if it doesn’t exist already. image_filename.parent.mkdir(parents=True, exist_ok=True) with open(image_filename, “wb”) as f: f.write(base64.b64decode(b64_image)) return { “image_outputs”: image_outputs, “other_outputs”: { “outputs”: [result for result in execution.results if not result.png], “logs”: execution.logs, “error”: execution.error, }, } |
Next, run_on_command_line method. This similarly will execute the command on the sandbox instance, then return a dictionary with the outputs. If execution fails, it returns a dictionary with None for the outputs and sets “ execution error” to the error message.
| … # below existing code class SandboxEDA: … # below existing code def run_on_command_line(self, command: str) -> dict: """ Runs the command on the sandbox. Args: command (str): The command to run. Returns: dict: Containing the output of the command and the execution error if any. """ try: result = self.sandbox.commands.run(command) return { “output”: { “stdout”: result.stdout, “stderr”: result.stderr, “exit_code”: result.exit_code, “error”: result.error, }, “execution error”: None, } except Exception as e: return {“output”: None, “execution error”: str(e)} |
And the sync_with_user method. As described before, this will take the sandbox_path and path_on_user_sync_folder. If the sandbox path points to a file, it downloads the file from the sandbox to the corresponding sync folder locations. If it’s a directory, the method recursively traverses all descendant contents and downloads every file to its corresponding locations. If successful, we return “Sync Successful” otherwise we return the exception message.
| … # below existing code class SandboxEDA: … # below existing code def sync_with_user(self, sandbox_path, path_on_user_sync_folder): """ Downloads a file or directory from the sandbox to the user’s sync folder. Args: sandbox_path (str): The path of the file or directory to sync in the sandbox. path_on_user_sync_folder (str): The relative destination path of the file or directory in the user’s sync folder. Returns: str: “Sync Successful” if the file or directory was synced successfully, otherwise an error message. """ try: path_info = self.sandbox.files.get_info(sandbox_path) if path_info.type == FileType.DIR: # If its a directory loop through the contents and download them. dir_contents = self.sandbox.files.list(sandbox_path) for content in dir_contents: path_to_content_in_sync_folder = Path( path_on_user_sync_folder ).joinpath(content.name) self.sync_with_user(content.path, path_to_content_in_sync_folder) elif path_info.type == FileType.FILE: # Ensure the file is always inside ./sync_folder. sandbox_path_obj = Path(path_on_user_sync_folder) # Make the path relative by stripping any root or drive component relative_path = sandbox_path_obj.relative_to( sandbox_path_obj.anchor or ”.” ) # Final path inside sync_folder file_path = Path(“sync_folder”) / relative_path # Will create any directory in the path that doesn’t exist already. file_path.parent.mkdir(parents=True, exist_ok=True) # Download the file to sync folder. file_content = self.sandbox.files.read(sandbox_path, “bytes”) with open(file_path, “wb”) as f: f.write(file_content) return “Sync Successful” except Exception as e: return str(e) |
Finally, the delete_from_user_sync_folder method. Also, as already described takes path_on_user_sync_folder. Then we delete the corresponding file or directory if it exists and return “Deletion Successful” otherwise return the exception message.
| … # below existing code class SandboxEDA: … # below existing code def delete_from_user_sync_folder(self, path_on_user_sync_folder): """ Deletes a file or directory from the user sync folder. Args: path_on_user_sync_folder (str): The path of the file or directory to delete in the user sync folder. Returns: str: “Deletion Successful” if the file or directory was deleted successfully, otherwise an error message. """ # Ensure the file is always inside ./sync_folder. sandbox_path_obj = Path(path_on_user_sync_folder) # Make the path relative by stripping any root or drive component relative_path = sandbox_path_obj.relative_to(sandbox_path_obj.anchor or ”.”) # Final path inside sync_folder delete_path = Path(“sync_folder”) / relative_path try: if not delete_path.exists(): raise Exception( f”File or Directory does not exist at {path_on_user_sync_folder} in sync folder.” ) if delete_path.is_file(): delete_path.unlink() elif delete_path.is_dir(): shutil.rmtree(str(delete_path)) return “Deletion Successful” except Exception as e: return str(e) |
Other Sandbox functions:
1. Upload Files to the sandbox method.
| … # below existing code class SandboxEDA: … # below existing code def upload_files_to_sandbox( self, file_paths: list[str], file_names_in_sandbox: list[str] ): """ Uploads files to the sandbox. Args: file_paths (list[str]): File paths of the files to upload (eg [”./Download/data.csv”, ”./Download/data2.csv”]). file_names_in_sandbox (list[str]): The names the files will take in the sandbox (eg [“data.csv”, “data2.csv”]). Note: The files will be uploaded to the sandbox’s /home/user directory (e.g ./home/user/data.csv, ./home/user/data2.csv). """ console.print( f”[yellow]Uploading files(s) at {file_paths} to Sandbox[/yellow] (id: {self.sandbox.sandbox_id})“ ) for file_path, file_name_in_sandbox in zip(file_paths, file_names_in_sandbox): with open(file_path, “rb”) as file: self.sandbox.files.write(file_name_in_sandbox, file) console.print( f”[bold cyan]Files(s) {file_paths} uploaded to Sandbox[/bold cyan] (id: {self.sandbox.sandbox_id})” ) |
2. Listing sandbox main directory (/home/user) contents method.
| … # below existing code class SandboxEDA: … # below existing code def list_files_in_sandbox_main_dir(self) -> list[str]: return [i.name for i in self.sandbox.files.list(“/home/user”)] |
Building interaction with the agent:
Now we will see a method to interact with the agent. Before that, let’s look at the parameterized system prompt instruction in prompts/system_prompt.py.
| SYSTEM_PROMPT = """ You are an Exploratory Data Analysis (EDA) agent and you have access to a sandbox (with internet access) where you can: - Execute python code using the run_python_code function call. - You can basically do anything you can do on a linux machine via the run_on_command_line or run_python_code function call. - You can sync whatever directory (may be preferred for structure eg website) or file you have created, written to or updated to the user’s sync folder on their local machine through the sync_with_user function call. - You can delete any of those directory or file from the user’s sync folder on their local machine through the delete_from_user_sync_folder function call. Your current PWD is ‘/home/user’ and below are the files in it. {list_sandbox_files} Note: - The sandbox already comes pre-installed with the usual data analysis packages but if there’s a package you are not sure exists or your code had an import error due to a missing package, you can check if it’s installed and if not install it. - For image outputs (e.g from data visualization) make sure it is png format. Function Call Guidelines: - Always use run_python_code to perform any task unless you absolutely need to use run_on_command_line (e.g to install packages, etc) - Chain function calls when needed: After receiving results from one function call, immediately make additional calls if more information is required - Gather just the needed information first: Respond to the user only when you have at least enough information from function calls to provide a good answer - Be efficient: Although there is a maximum limit of {max_consecutive_function_calls_allowed} consecutive function calls try to make as less calls as possible to get just enough information. - Don’t just assume the user will read the output of the tool call respond to them with your answer. Be a helpful assistant to the user who is probably trying to perform EDA on dataset files ({downloaded_dataset_names}) at (/home/user/) directory. You can perform the following function calls: {available_function_calls_schema} """ |
Now over to the eda_chat method in SandboxEDA class. This method takes the names of files that have been uploaded to the sandbox (we’ll handle uploading before starting the chat, as we’ll see later) and the name of the Novita model to use.
1. First, we set the OpenAI client to point to Novita via the base url, and initialize the conversation with the system prompt as the first message.
| … # below existing code class SandboxEDA: … # below existing code def eda_chat( self, downloaded_dataset_names: list[str], model_for_eda: str, ): """ Interactive EDA session with AI agent capable of code execution and terminal commands Args: downloaded_dataset_names (list[str]): The names of the downloaded datasets. model_for_eda (str, optional): The underlying model to use. """ console.print( Panel( “[bold green]EDA Session Started[/bold green]\ Type ‘quit()’ to exit.”, title=“Exploratory Data Analysis”, border_style=“green”, ) ) client = OpenAI( base_url=self.model_api_base_url, api_key=self.model_api_key, ) # Initialize conversation with system prompt messages = [ { “role”: “system”, “content”: SYSTEM_PROMPT.format( downloaded_dataset_names=str(downloaded_dataset_names), list_sandbox_files=str(self.list_files_in_sandbox_main_dir()), available_function_calls_schema=str( AVAILABLE_FUNCTION_CALL_SCHEMAS ), max_consecutive_function_calls_allowed=self.max_consecutive_function_calls_allowed, ), } ] |
2. Next, the main chat loop is a while loop, in which we take the user’s message and append it to the existing message history. And to prevent infinite consecutive tool calls, inside the while loop, there is a for loop until the limit, raising an exception when it is reached. The model is then prompted with the messages.
| … # below existing code # Main chat loop while True: user_input = Prompt.ask(”\ [bold yellow]>>> User Message[/bold yellow]“) if user_input.lower().strip() == “quit()“: break messages.append({“role”: “user”, “content”: user_input}) # Handle potential consecutive tool calls with a safety limit to avoid infinite loops for i in range(self.max_consecutive_function_calls_allowed + 1): if i == self.max_consecutive_function_calls_allowed: raise Exception( f”Consecutive tool calls from the Agent must not exceed {self.max_consecutive_function_calls_allowed}.“ ) response = client.chat.completions.create( model=model_for_eda, messages=messages, tools=AVAILABLE_FUNCTION_CALL_SCHEMAS, frequency_penalty=0, ) response_message = response.choices[0].message |
3. Next, we check if the model decided to make a tool call. If it did, we execute the tool using the arguments provided by the model, print the output to the terminal for the user (or display an image if applicable), and then return the output to the model, starting with the run_python_code tool call.
| … # below existing code tool_calls = response_message.tool_calls if tool_calls: messages.append( response_message ) # Add assistant message that triggered tool calls # Execute each requested tool call for tool_call in tool_calls: name = tool_call.function.name args = json.loads(tool_call.function.arguments) if name == “run_python_code”: console.print( Panel( args[“python_code”], title=“Agent Executing Python Code”, border_style=“blue”, ) ) code_result = self.run_python_code(args[“python_code”]) messages.append( { “tool_call_id”: tool_call.id, “role”: “tool”, “name”: name, # If there are any image outputs (e.g data visualization), as it is not yet possible to return images # from a tool call just inform the Agent that the image has been shown to the user. ”content”: [ { “type”: “text”, “text”: ( f”THE IMAGES HAS ALREADY BEEN SHOW TO THE USER ON THE TERMINAL AND SAVED TO TEMP FILES eg temp-{{timestamp}}.png on the user’s computer in ./temp_image_output dir, THE OTHER OUTPUTS ARE BELOW\ {code_result[‘other_outputs’]}“ if code_result[“image_outputs”] else f”{code_result[‘other_outputs’]}” ), } ], } ) display_sandbox_code_output(code_result) |
3b. run_on_command_line tool call.
| … # below existing code elif name == “run_on_command_line”: console.print( Panel( args[“command”], title=“Agent Executing Command On Terminal”, border_style=“blue”, ) ) command_result = self.run_on_command_line(args[“command”]) messages.append( { “tool_call_id”: tool_call.id, “role”: “tool”, # Indicates this message is from tool use ”name”: name, “content”: str(command_result), } ) display_sandbox_command_output(command_result) |
3c. sync_with_user tool call.
| … # below existing code elif name == “sync_with_user”: console.print( Panel( f”[bold yellow]Agent Started Syncing {args[‘sandbox_path’]} To User’s Sync Folder ({args[‘path_on_user_sync_folder’]})[/bold yellow]“, title=“File Syncing”, border_style=“white”, ) ) sync_result = self.sync_with_user( args[“sandbox_path”], args[“path_on_user_sync_folder”] ) messages.append( { “tool_call_id”: tool_call.id, “role”: “tool”, # Indicates this message is from tool use ”name”: name, “content”: sync_result, } ) … # skipped for brevity |
3d. delete_from_user_sync_folder tool call and throw an unknown error if there are non-existent function calls.
| … # below existing code elif name == “delete_from_user_sync_folder”: console.print( Panel( f”[bold yellow]Agent Deleting File(s) From User’s Sync Folder ({args[‘path_on_user_sync_folder’]})[/bold yellow]“, title=“File Syncing”, border_style=“white”, ) ) delete_result = self.delete_from_user_sync_folder( args[“path_on_user_sync_folder”] ) messages.append( { “tool_call_id”: tool_call.id, “role”: “tool”, # Indicates this message is from tool use ”name”: name, “content”: delete_result, } ) … # skipped for brevity else: raise ValueError(f”Unknown Function Call: {name}”) |
4. If the agent’s latest response is not a tool call, print its response to the user and break out of the consecutive tool call limit loop.
| … # below existing code else: # No tool calls just display assistant response after adding it to the messages. messages.append( {“role”: “assistant”, “content”: response_message.content} ) console.print( f”[bold green]>>> Assistant Response: {response_message.content} [/]“ ) break |
Orchestrating the agent flow:
Finally, we have main.py serving as the entry point of our application, tying everything together. Inside, the start_eda method launches a new sandbox session. The sandbox_timeout parameter determines how long the sandbox remains active before it’s automatically terminated; for our demo, we’ll set it to 900 seconds (≈15 minutes).
After the sandbox is created, we upload files into it, then launch the eda_chat method to begin interacting with the agent.
| … # below existing code def start_eda( model_for_eda: str, dataset_paths: list[str], dataset_file_names: list[str], api_key_for_sandbox_and_model: str, model_api_base_url: str, sandbox_domain: str, sandbox_template: str, sandbox_timeout: int, ): with Sandbox( template=sandbox_template, api_key=api_key_for_sandbox_and_model, domain=sandbox_domain, timeout=sandbox_timeout, ) as sandbox: try: sandbox_eda = SandboxEDA( sandbox, model_api_base_url, api_key_for_sandbox_and_model ) console.print( f”[bold cyan]Started Sandbox[/bold cyan] (id: {sandbox.sandbox_id})“ ) sandbox_eda.upload_files_to_sandbox(dataset_paths, dataset_file_names) sandbox_eda.eda_chat(dataset_file_names, model_for_eda) console.print( f”\ \ [bold cyan]------ EDA Session Completed for Sandbox (id: {sandbox.sandbox_id}) ------[/]“ ) finally: console.print( f”[bold cyan]----- Closed Sandbox (id: {sandbox.sandbox_id})-----[/]\ ” ) |
Below is the main method our application’s start point:
| … # below existing code async def main( api_key_for_sandbox_and_model: str, model_api_base_url: str, model_for_browser_agent: str, enable_vision_for_browser_agent: bool, model_for_eda: str, sandbox_domain: str, sandbox_template: str, sandbox_timeout_seconds: int, ): while True: # Welcome Banner console.print( Panel( “[bold white]Welcome To Agentic Exploratory Data Analysis[/bold white]\ \ " "[grey]How would you like to proceed:[/grey]\ " "[grey]1.[/grey] Download a dataset first.\ " "[grey]2.[/grey] Proceed with already downloaded dataset.\ " "[grey]3.[/grey] Exit”, title=“MAIN MENU”, border_style=“green”, width=70, ) ) choice = Prompt.ask( ”\ [bold yellow]Enter your choice[/bold yellow]”, choices=[“1”, “2”, “3”] ).strip() if choice == “1”: result = await choice_download_dataset( api_key_for_sandbox_and_model, model_api_base_url, model_for_browser_agent, enable_vision_for_browser_agent, ) if result: download_path, filenames = result DATASET_PATHS = [ str(Path(download_path) / filename) for filename in filenames ] DATASET_FILE_NAMES = filenames else: continue # User returned to main menu elif choice == “2”: result = choice_proceed_with_already_downloaded_datasets() if result: DATASET_PATHS = result DATASET_FILE_NAMES = [os.path.basename(path) for path in result] else: continue # since user click back to main menu. elif choice == “3”: break # Start the EDA session start_eda( model_for_eda, DATASET_PATHS, DATASET_FILE_NAMES, api_key_for_sandbox_and_model, model_api_base_url, sandbox_domain, sandbox_template, sandbox_timeout_seconds, ) |
Because main.py will be run as a script, we add the code below, also passing our environment variables, sandbox timeout, and the Novita models we intend to use:
| … # below existing code if __name__ == “__main__“: NOVITA_API_KEY = os.getenv(“NOVITA_API_KEY”) NOVITA_BASE_URL = os.getenv(“NOVITA_BASE_URL”) NOVITA_E2B_DOMAIN = os.getenv(“NOVITA_E2B_DOMAIN”) NOVITA_E2B_TEMPLATE = os.getenv(“NOVITA_E2B_TEMPLATE”) NOVITA_MODEL_FOR_BROWSER_AGENT = “qwen/qwen3-coder-480b-a35b-instruct” ENABLE_VISION_FOR_BROWSER_AGENT = ( False # If true make sure the browser agent model has vision capabilities. ) NOVITA_MODEL_FOR_EDA = “qwen/qwen3-coder-480b-a35b-instruct” NOVITA_SANDBOX_TIMEOUT_SECONDS = 900 # 900 seconds (15 minutes), sandbox instance will be killed automatically after. asyncio.run( main( NOVITA_API_KEY, NOVITA_BASE_URL, NOVITA_MODEL_FOR_BROWSER_AGENT, ENABLE_VISION_FOR_BROWSER_AGENT, NOVITA_MODEL_FOR_EDA, NOVITA_E2B_DOMAIN, NOVITA_E2B_TEMPLATE, NOVITA_SANDBOX_TIMEOUT_SECONDS, ) ) |
Test running our eda-agent:
Run the following command in the terminal
| uv run main.py |
Conclusion
Congratulations on building your Exploratory Data Analyst agent. You can now ask it to create websites, PowerPoint etc, using analysis/insights from any dataset files, and the results will be synced directly to your local computer.
For a quick recap, in this article, you learned how to build an agent that can take instructions, then use the browser to navigate the web and download files, execute code and commands in the Novita Sandbox, and sync files and directories to your local computer.
This is just the tip of the iceberg, you can extend your agent to connect to databases, integrate with tools like Google Docs via MCP, and much more. Head over to Novita to bring your ideas to life!
Novita AI is an AI cloud platform that offers developers an easy way to deploy AI models using our simple API, while also providing the affordable and reliable GPU cloud for building and scaling.