

Imagine browsing documentation sites or coding tutorials and never feeling alone. Instead of navigating everything by yourself, you have an AI assistant that follows you from page to page. It isn’t tied to any single webpage. It’s always right there with you, ready to help. It can securely execute code you encounter online, offer explanations, and give you insights the moment you need them.
So how do you bring this experience to life? By building a browser extension. This extension will include an AI agent the user can chat with, and the agent will have access to a secure sandbox machine where it can run code and perform other operations safely.
To create this system, we’ll build a Chrome extension, use a Novita model capable of tool use, and integrate the Novita Sandbox as the secure runtime for the agent. In this article, we’ll walk through the full process of building it.
By the end of this tutorial, you’ll learn:
- How to build a Chrome extension that integrates with an AI agent
- How to utilize Novita’s Agentic LLMs
- How to set up Novita Sandbox as a secure environment for the browser agent
- How to make the extension communicate in real time with the agent
A Sandbox: The Only Tool You Need
The Chrome extension we’re building relies on an AI agent to assist the user. Since this extension is meant to function as a coding assistant, the agent needs the ability to run code, create files, inspect output, and perform all the typical tasks a developer might do. You might expect that it would require a long list of tools to make this possible, but in reality, it needs just one: a sandbox.
A sandbox gives the agent access to a Linux environment where it can run commands, create and modify files, and carry out any operation you would normally perform in a terminal. For this project, we’ll use the Novita Sandbox.
To set it up, first install the Novita Sandbox package:
pip install novita-sandboxNext, set the NOVITA_API_KEY environment variable to your API key. Once that’s done, you can create and use a sandbox like this:
from novita_sandbox.code_interpreter import Sandbox

sandbox = Sandbox.create()

result = sandbox.commands.run('ls -l')
print(result)

sandbox.kill()
This snippet creates a sandbox, runs the ls -l command, prints the output, and then shuts down the sandbox. This simple workflow is the foundation of how our browser assistant will leverage the sandbox to help users.
Now let’s take this principle and apply it to the full extension.
Architecture of the Browser Assistant Agent
The architecture of this project follows a client and server model. The Chrome extension acts as the client, while a dedicated backend server hosts both the AI agent and the sandbox environment.
The extension communicates with the server through a WebSocket connection. This allows real time, bidirectional messaging so the user’s requests and the agent’s responses flow instantly with no noticeable delay. The server, in turn, communicates with Novita’s APIs which include the model endpoint and the sandbox service.
Together, the extension and the backend form an intelligent browser assistant capable of running code securely, processing information quickly, and delivering helpful explanations directly within the user’s browsing experience.
Building the Extension
Now that we understand the overall architecture, we can begin implementing the extension itself. We will start with the plugin server.
The Extension Server
The extension server is a simple WebSocket service with a single endpoint /ws. This endpoint receives messages from the user and returns the LLM’s responses in real time. It also handles tool calls by invoking the sandbox whenever the agent needs to execute code or perform an operation.
Dependencies
The server relies on three core libraries:
- FastAPI: The HTTP framework that provides the WebSocket implementation
- OpenAI: The SDK used to communicate with Novita models
- Novita Sandbox: The secure environment where code is executed safely
Install them with:
pip install novita-sandbox "fastapi[standard]" openaiSet your Novita API key as an environment variable:
export NOVITA_API_KEY = sk-xxxxxxxxxxxxxxxxxxxxxxxxxxxxxxxxWriting the Server Code
Start by importing the required modules:
import os
import json
import uvicorn
from fastapi import FastAPI, WebSocket, WebSocketDisconnect
from fastapi.middleware.cors import CORSMiddleware
from novita_sandbox.code_interpreter import Sandbox
from openai import OpenAI
Initializing the LLM Client
Next, create an OpenAI client that points to Novita’s API. In this example we use the llama-3.3-70b-instruct model, but any Novita model that supports tool calling will work.
client = OpenAI(
   base_url="https://api.novita.ai/openai",
   api_key=os.environ["NOVITA_API_KEY"],
)

model = "meta-llama/llama-3.3-70b-instruct"
Defining the Tool Schema
The agent will use four tools, each interacting with the sandbox:
- read_file: Reads the content of a file
- write_file: Creates and writes to a single file
- write_files: Creates and writes to multiple files
- run_commands: Executes shell commands inside the sandbox
Here is the full tool schema:
tools = [
   {
       "type": "function",
       "function": {
           "name": "read_file",
           "description": "Read contents of a file inside the sandbox",
           "parameters": {
               "type": "object",
               "properties": {"path": {"type": "string"}},
               "required": ["path"],
           },
       },
   },
   {
       "type": "function",
       "function": {
           "name": "write_file",
           "description": "Write a single file inside the sandbox",
           "parameters": {
               "type": "object",
               "properties": {
                   "path": {"type": "string"},
                   "data": {"type": "string"},
               },
               "required": ["path", "data"],
           },
       },
   },
   {
       "type": "function",
       "function": {
           "name": "write_files",
           "description": "Write multiple files inside the sandbox",
           "parameters": {
               "type": "object",
               "properties": {
                   "files": {
                       "type": "array",
                       "items": {
                           "type": "object",
                           "properties": {
                               "path": {"type": "string"},
                               "data": {"type": "string"},
                           },
                           "required": ["path", "data"],
                       },
                   }
               },
               "required": ["files"],
           },
       },
   },
   {
       "type": "function",
       "function": {
           "name": "run_commands",
           "description": "Run a shell command inside the sandbox working directory",
           "parameters": {
               "type": "object",
               "properties": {
                   "command": {"type": "string"},
               },
               "required": ["command"],
           },
       },
   },
]
Configuring the HTTP Server
Set up FastAPI and enable CORS so the Chrome extension can make requests to the server.
app = FastAPI()

app.add_middleware(
   CORSMiddleware,
   allow_origins=["*"],
   allow_methods=["*"],
   allow_headers=["*"],
)
Implementing the tools
Define a handler function that implements each tool and routes the agent’s tool calls to the sandbox:
def make_tool_handlers(sandbox):
   def read_file(path: str):
       print(f"[LOG] read_file called with path: {path}")
       try:
           content = sandbox.files.read(path)
           print(f"[LOG] read_file result: {content}")
           return content
       except Exception as e:
           return f"Error reading file: {e}"

   def write_file(path: str, data: str):
       print(f"[LOG] write_file called with path: {path}")
       try:
           sandbox.files.write(path, data)
           return f"File created successfully at {path}"
       except Exception as e:
           return f"Error writing file: {e}"

   def write_files(files: list):
       print(f"[LOG] write_files called with {len(files)} files")
       try:
           sandbox.files.write_files(files)
           return f"{len(files)} file(s) created successfully"
       except Exception as e:
           return f"Error writing multiple files: {e}"

   def run_commands(command: str):
       print(f"[LOG] run_commands called with command: {command}")
       try:
           result = sandbox.commands.run(command)
           return result.stdout
       except Exception as e:
           return f"Error running command: {e}"

   return {
       "read_file": read_file,
       "write_file": write_file,
       "write_files": write_files,
       "run_commands": run_commands,
   }
Creating the Websocket Endpoint
Now let’s implement the WebSocket endpoint. When the user connects to the endpoint, it creates a new sandbox instance.
All communication between the user and the agent flows through this connection. If the user asks the agent to use a tool, the agent selects and executes the appropriate tool through the handler function.
When the connection is closed, the sandbox is terminated.
@app.websocket("/ws")
async def websocket_endpoint(ws: WebSocket):
   await ws.accept()
   print("\
[WS] Client connected")

   # Create sandbox per connection
   sandbox = Sandbox.create(timeout=1200)
   print("[WS] Sandbox created")

   tools_exec = make_tool_handlers(sandbox)
   messages = []  # persistent inside this websocket

   try:
       while True:
           data = await ws.receive_text()
           print(f"[WS] Received message: {data}")

           # Add user message
           messages.append({"role": "user", "content": data})

           # LLM call
           response = client.chat.completions.create(
               model=model,
               messages=messages,
               tools=tools,
           )

           assistant_msg = response.choices[0].message
           messages.append(assistant_msg)

           # If LLM wants to call tools
           if assistant_msg.tool_calls:
               print(f"[WS] Assistant requested {len(assistant_msg.tool_calls)} tool call(s).")

               results = []

               for tool_call in assistant_msg.tool_calls:
                   fn_name = tool_call.function.name
                   fn_args = json.loads(tool_call.function.arguments)

                   print(f"[WS] Tool call: {fn_name} args={fn_args}")

                   if fn_name in tools_exec:
                       result = tools_exec[fn_name](**fn_args)
                   else:
                       result = f"Error: Unknown tool {fn_name}"

                   results.append(result)

                   messages.append({
                       "tool_call_id": tool_call.id,
                       "role": "tool",
                       "content": str(result),
                   })

               # Follow-up model call
               follow_up = client.chat.completions.create(
                   model=model,
                   messages=messages,
               )
               final_answer = follow_up.choices[0].message
               messages.append(final_answer)

               await ws.send_json({
                   "reply": final_answer.content,
                   "tool_output": results,
               })

           else:
               # Simple model text output
               await ws.send_json({"reply": assistant_msg.content})

   except WebSocketDisconnect:
       print("[WS] Client disconnected")

   finally:
       sandbox.kill()
       print("[WS] Sandbox terminated")
Running the Server
Finally, use Uvicorn to launch the service:
if __name__ == "__main__":
   uvicorn.run(app, host="0.0.0.0", port=8000)
This completes the server component.
The Extension
The extension is the interface the user interacts with. It consists of a small collection of files that work together to run on any webpage. Once activated, the user can communicate with the extension server in real time directly from the page they are browsing.
The extension includes the following files:
- manifest.json: Defines the extension’s configuration and permissions
- background.js: Contains the service worker logic and handles context menu actions
- content.js: Manages in-page interactions and displays the assistant dialog
- styles.css: Provides the styling for the on-page assistant window
Each file has a distinct responsibility, and together they form a complete, functional extension.
How the Extension Works
Before we implement the files, let’s take a quick look at how the extension operates from the user’s perspective:
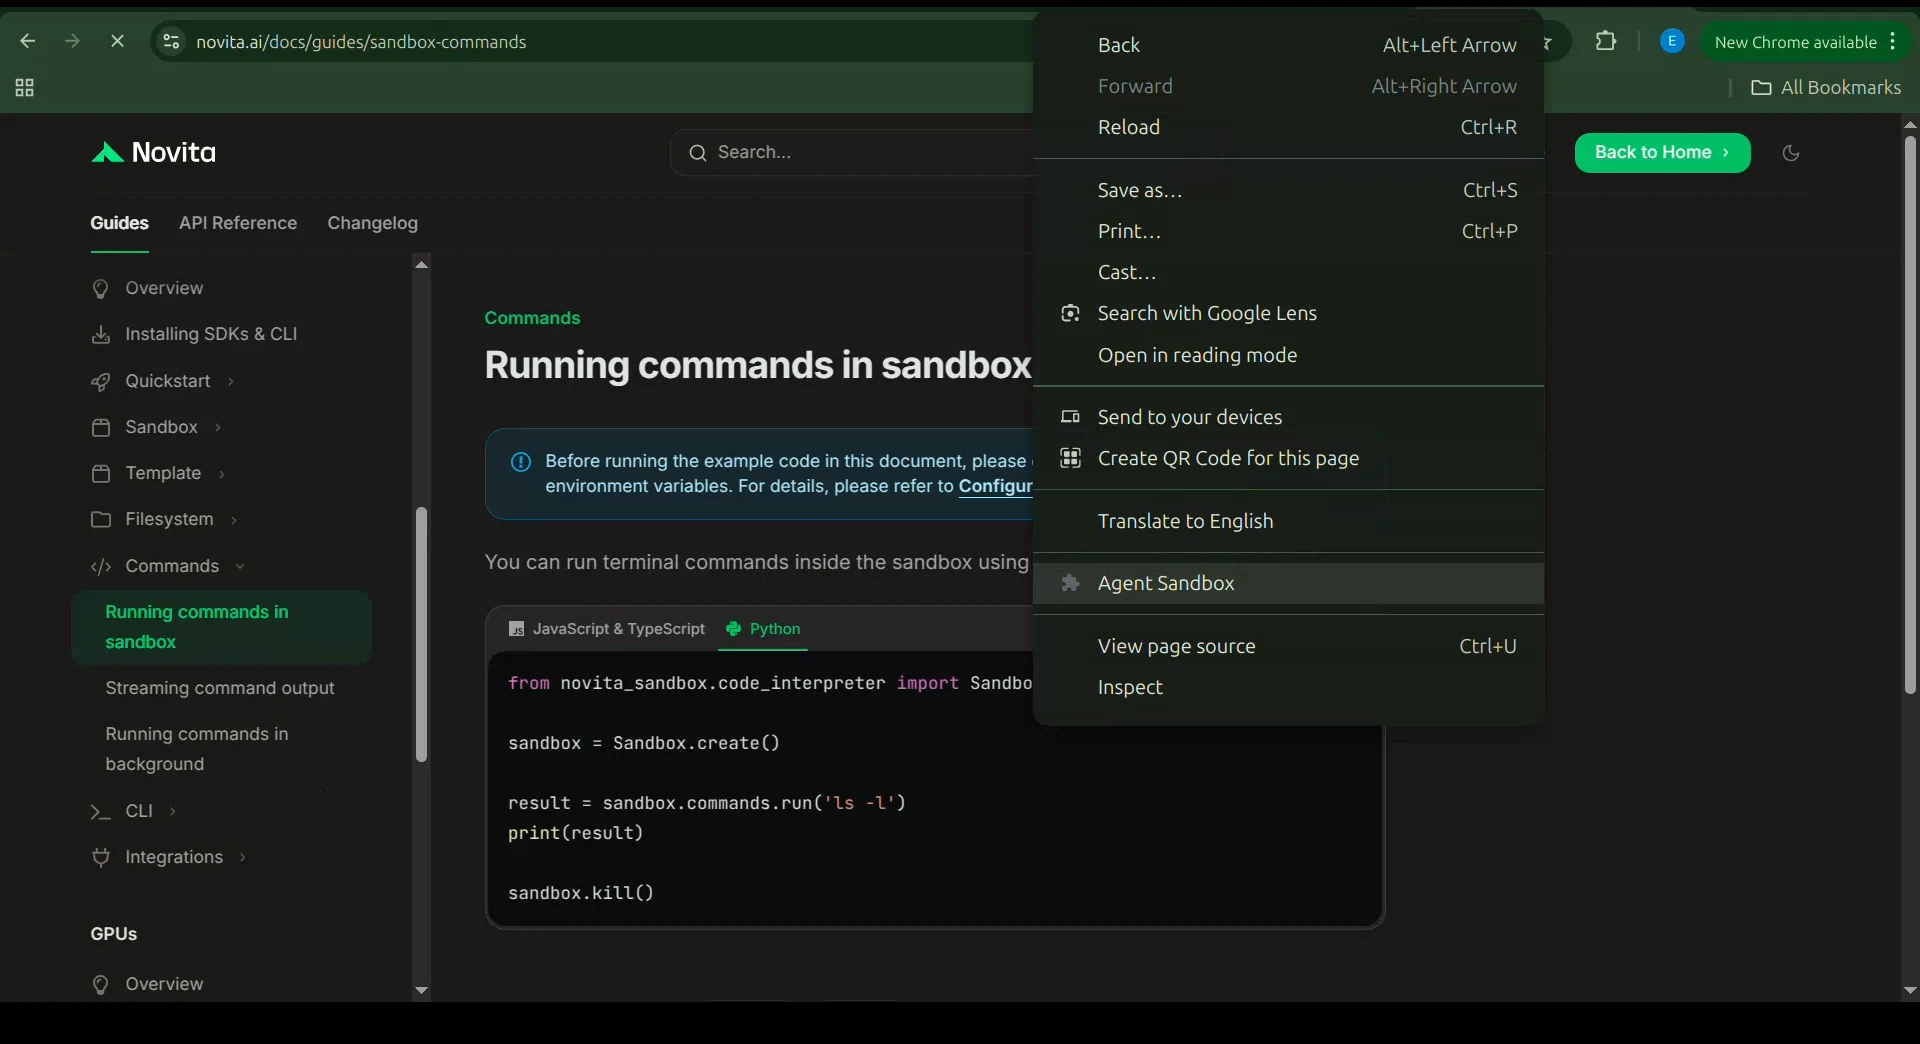
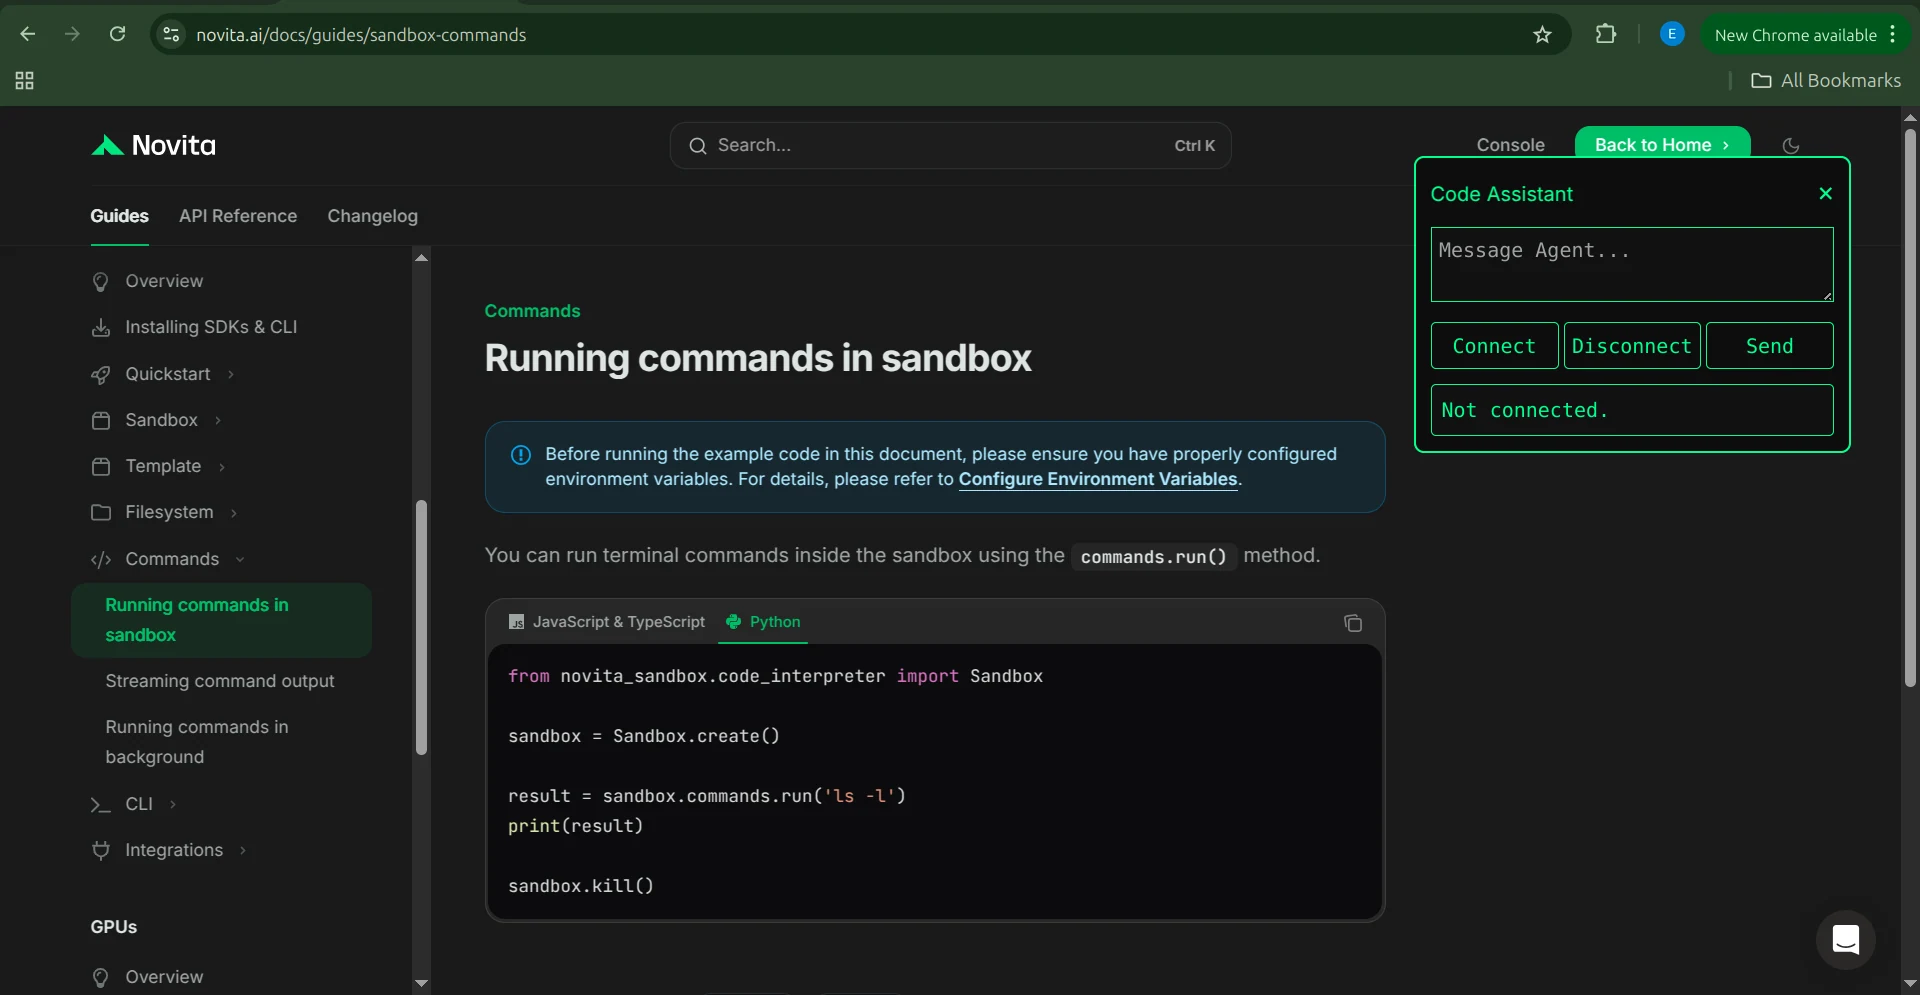
- The user right-clicks on any webpage, and the context menu appears.
- They select “Agent Sandbox” from the menu.
- The extension opens the assistant dialog on the page.
- The user clicks Connect to establish a connection with the extension server.
- Once the connection is established, the user can start typing directly into the message box.
- After typing their message, they simply click Send to deliver it to the server.
- If they want to provide the agent with page context, they can click Extract to capture all visible content from the webpage.
- They can also add extra context manually before clicking Send again.
Now that we understand the workflow, let’s start implementing the extension files.
manifest.json
The first file we create is the manifest.json, which configures the extension’s permissions, background logic, and content scripts.
{
 "manifest_version": 3,
 "name": "Agent Sandbox",
 "version": "1.0",
 "description": "Chat with your Novita AI sandbox agent over WebSocket.",
 "permissions": [
   "contextMenus",
   "activeTab",
   "scripting"
 ],
 "host_permissions": [
   "ws://localhost:8000/*",
   "http://localhost:8000/*",
   "https://localhost:8000/*"
 ],
 "background": {
   "service_worker": "background.js"
 },
 "action": {
   "default_icon": "icon.png"
 },
 "content_scripts": [
   {
     "matches": ["<all_urls>"],
     "js": ["content.js"],
     "css": ["styles.css"]
   }
 ]
}
This file tells Chrome which scripts to load, which permissions we need, and which file acts as the service worker.
background.js
The background script is the service worker that runs behind the scenes. It is responsible for adding our extension to the Chrome context menu and for listening to user interactions. When the user selects our menu option, the background script sends a message to the content script, which then activates the extension dialog.
chrome.runtime.onInstalled.addListener(() => {
 chrome.contextMenus.create({
   id: "ask-assistant",
   title: "Agent Sandbox",
   contexts: ["all"]
 });
});

chrome.contextMenus.onClicked.addListener((info, tab) => {
 chrome.scripting.executeScript(
   {
     target: { tabId: tab.id },
     files: ["content.js"]
   },
   () => {
     chrome.tabs.sendMessage(tab.id, {
       type: "OPEN_PANEL"
     });
   }
 );
});
content.js
The content script is responsible for displaying the extension dialog inside the webpage. When it receives a message from the background script, it opens the dialog. This script is plain JavaScript. It manages the UI through standard DOM operations and uses the WebSocket API to communicate with the extension server.
let socket = null;
chrome.runtime.onMessage.addListener((msg) => {
if (msg.type === "OPEN_PANEL") {
openPanel();
}
});
// -------------------------------------------------
// WEBPAGE TEXT EXTRACTOR
// -------------------------------------------------
function extractWebpageContent() {
const cloned = document.cloneNode(true);
cloned.querySelectorAll("script, style, iframe, noscript").forEach(e => e.remove());
let main =
cloned.querySelector("article") ||
cloned.querySelector("main") ||
cloned.querySelector("#content") ||
cloned.body;
const text = Array.from(main.querySelectorAll("h1, h2, h3, p"))
.map(el => el.innerText.trim())
.filter(Boolean)
.join("\
\
");
return text;
}
// -------------------------------------------------
// PANEL UI
// -------------------------------------------------
function openPanel() {
const old = document.getElementById("assistant-box");
if (old) old.remove();
const box = document.createElement("div");
box.id = "assistant-box";
box.innerHTML = `
<div id="assistant-container">
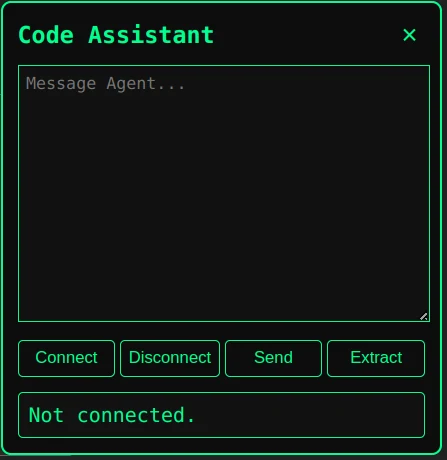
<div id="assistant-header">
<h3>Code Assistant</h3>
<button id="assistant-close">×</button>
</div>
<textarea id="assistant-input" placeholder="Message Agent..."></textarea>
<div class="btn-row">
<button id="connect-btn">Connect</button>
<button id="disconnect-btn">Disconnect</button>
<button id="send-btn">Send</button>
<button id="extract-btn">Extract</button>
</div>
<div id="assistant-result">Not connected.</div>
</div>
`;
document.body.appendChild(box);
document.getElementById("assistant-close").onclick = () => box.remove();
const resultBox = document.getElementById("assistant-result");
const inputBox = document.getElementById("assistant-input");
// -------------------------------------------------
// TEXT SELECTION LISTENER
// -------------------------------------------------
document.addEventListener("mouseup", () => {
const selection = window.getSelection().toString().trim();
if (!selection) return;
// Append selected text to message box
inputBox.value += (inputBox.value ? "\
\
" : "") + selection;
// Scroll text area to bottom
inputBox.scrollTop = inputBox.scrollHeight;
});
// -------------------------------------------------
// CONNECT
// -------------------------------------------------
document.getElementById("connect-btn").onclick = () => {
if (socket && socket.readyState === WebSocket.OPEN) {
resultBox.innerText = "Already connected.";
return;
}
socket = new WebSocket("ws://localhost:8000/ws");
socket.onopen = () => {
resultBox.innerText = "Connected to WebSocket.";
};
socket.onmessage = (event) => {
const data = JSON.parse(event.data);
resultBox.innerText += "\
\
Assistant:\
" + data.reply;
resultBox.scrollTop = resultBox.scrollHeight;
};
socket.onerror = () => {
resultBox.innerText = "WebSocket error.";
};
socket.onclose = () => {
resultBox.innerText = "Disconnected.";
};
};
// -------------------------------------------------
// DISCONNECT
// -------------------------------------------------
document.getElementById("disconnect-btn").onclick = () => {
if (socket) socket.close();
};
// -------------------------------------------------
// SEND MESSAGE
// -------------------------------------------------
document.getElementById("send-btn").onclick = () => {
const context = inputBox.value;
if (!socket || socket.readyState !== WebSocket.OPEN) {
resultBox.innerText = "Not connected.";
return;
}
socket.send(JSON.stringify({ message: context }));
inputBox.value = "";
resultBox.innerText += "\
\
You:\
" + context;
};
// -------------------------------------------------
// EXTRACT PAGE → ADD TO MESSAGE BOX
// -------------------------------------------------
document.getElementById("extract-btn").onclick = () => {
const extracted = extractWebpageContent();
if (!extracted || extracted.length < 10) {
resultBox.innerText = "Could not extract useful content.";
return;
}
// Add extracted text to input box (not sent automatically)
inputBox.value += (inputBox.value ? "\
\
" : "") + extracted;
// Scroll text area
inputBox.scrollTop = inputBox.scrollHeight;
resultBox.innerText = "📄 Extracted content added to message box.";
};
}styles.css
Then we use the styles.css file to style the interface and control how the extension appears on the page.
#assistant-box {

 position: fixed;

 top: 10%;

 right: 10%;

 width: 350px;

 background: #000;

 border: 1px solid #00ff7f;

 border-radius: 8px;

 box-shadow: 0 0 10px rgba(0,255,127,0.5);

 z-index: 999999;

 font-family: monospace;

 color: #00ff7f;

}

#assistant-container {

 padding: 12px;

}

#assistant-header {

 display: flex;

 justify-content: space-between;

 align-items: center;

}

#assistant-close {

 background: transparent;

 border: none;

 font-size: 20px;

 cursor: pointer;

 padding: 0 5px;

 font-weight: bold;

 color: #00ff7f;

}

#assistant-container textarea {

 width: 100%;

 height: 60px;

 margin-top: 8px;

 background: #0d0d0d;

 color: #00ff7f;

 border: 1px solid #00ff7f;

 border-radius: 4px;

 padding: 6px;

 resize: vertical;

 outline: none;

}

#send-btn {

 width: 100%;

 margin-top: 10px;

 background: #00ff7f;

 border: none;

 padding: 10px;

 color: #000;

 font-weight: bold;

 cursor: pointer;

 border-radius: 4px;

 transition: 0.2s;

}

#send-btn:hover {

 background: #00e66a;

}

#assistant-box pre {

 background: #0a0a0a;

 padding: 8px;

 border-radius: 4px;

 max-height: 120px;

 overflow: auto;

 white-space: pre-wrap;

 word-break: break-word;

 margin-top: 5px;

}

#assistant-result {

 margin-top: 12px;

 background: #0d0d0d;

 padding: 8px;

 border-radius: 5px;

 white-space: pre-wrap;

 max-height: 150px;

 overflow: auto;

}
How to Set Up the Chrome Extension
Now that all the required files are in place, the next step is to load the extension into Chrome. Follow these steps:
- Save the extension server code into a Python file.
- Install all dependencies and set up the necessary environment variables for the server.
- Create a new folder on your machine named code-assistant-extension for the extension client.
- Add the following files into the folder:
- manifest.json
- background.js
- content.js
- styles.css
- Open Chrome and go to: chrome://extensions/
- Enable Developer mode in the top right.
- Click Load unpacked.
- Select the folder containing your extension files.
- The extension will appear in the toolbar.
- Right-click any text selection on a webpage to see Agent Sandbox in the context menu.
Your extension is now ready to use.
Repo - AI Code Assistant Browser Extension
Conclusion
In this article we built a Chrome extension that connects to a Novita Sandbox-powered backend, allowing an AI agent to safely execute code and assist users as they browse. This pattern goes beyond coding help; it can power interactive learning tools, debugging assistants, documentation enhancers, and more.
The architecture is browser-agnostic, meaning the same approach can be adapted to any modern browser with minimal changes. From here you can extend the assistant’s capabilities, refine the UI, or add new sandbox tools. This foundation opens the door to creating powerful, intelligent browser companions.
Novita AIis a leading AI cloud platform that provides developers with easy-to-use APIs and affordable, reliable GPU infrastructure for building and scaling AI applications