

近年來,隨著大型語言模型(LLM)、視覺語言模型等技術的發展,人工智慧領域經歷了指數級增長,而近期 AI Agent 更是備受關注。與傳統基於規則的應用程式不同,這些 Agent 能夠運用自身的推理與決策能力,在幾乎不需要使用者介入的情況下自主完成複雜任務。為實現這一點,AI Agent 通常需要動態生成並執行程式碼,甚至控制整個虛擬機,而 Novita AI sandbox 正好提供了這些能力。
在本教程中,我們將建立一個充當數據分析師的 AI Agent,就像人類分析師一樣,它能夠根據我們的指示使用瀏覽器尋找並下載數據集,並在收到提示時分析、視覺化數據,執行程式碼並為我們提供分析洞察。
什麼是 AI Agent?
AI Agent 是一種運用人工智慧進行推理、規劃並執行動作以達成特定目標的軟體程式。這些 Agent 可以使用 API、程式碼執行、網路搜尋等工具來收集資訊或完成任務,有時也會為了實現 Deep Research 這類更複雜的目標,與其他 Agent 協同合作。
AI Agent 的典型組成部分如下:
- 推理/規劃: 當收到目標後,Agent 會制定逐步計畫來達成目標。這個過程可能涉及完成子任務、收集額外資訊以指導後續動作,對於耗時較長的複雜任務尤其常見,推理模型在這種場景下表現優異。
- 工具使用: AI Agent 可以呼叫外部工具與服務,包括函式、API 或其他能擴展其能力的資源。
- 協調能力: 多個 Agent 可以透過分擔職責協同工作,共同實現共享的、複雜的或長期的目標。
Novita AI Sandbox、LLM 產品與 Browser Use 總覽
什麼是 Sandbox?為什麼它很重要?
Sandbox 是一種安全、隔離的執行環境,可以在不影響主機系統的前提下執行不受信任的程式碼,本質上是為 AI Agent 提供的輕量級虛擬電腦,用於執行程式碼、指令、建立檔案等操作。
Novita AI 提供雲端 Sandbox 服務,Agent 可以隨需快速存取,並根據使用的資源彈性地按秒計費。
Novita Sandbox 的核心功能:
- 安全隔離: 每個 Sandbox 都有獨立的檔案系統與環境,保護資料安全並防止非預期的交互操作。
- 快速啟動: Sandbox 實例平均啟動時間不到 200 毫秒,非常適合低延遲場景。
- 多語言支援: 支援執行 Python、JavaScript、TypeScript 等多種程式語言的程式碼。
- 快速暫停與恢復: 可隨時暫停 Sandbox,需要時再恢復,檔案系統與行程狀態會完整保留。
- 背景執行: 支援背景任務執行,適合需要等待結果的場景。
Novita 模型 API:
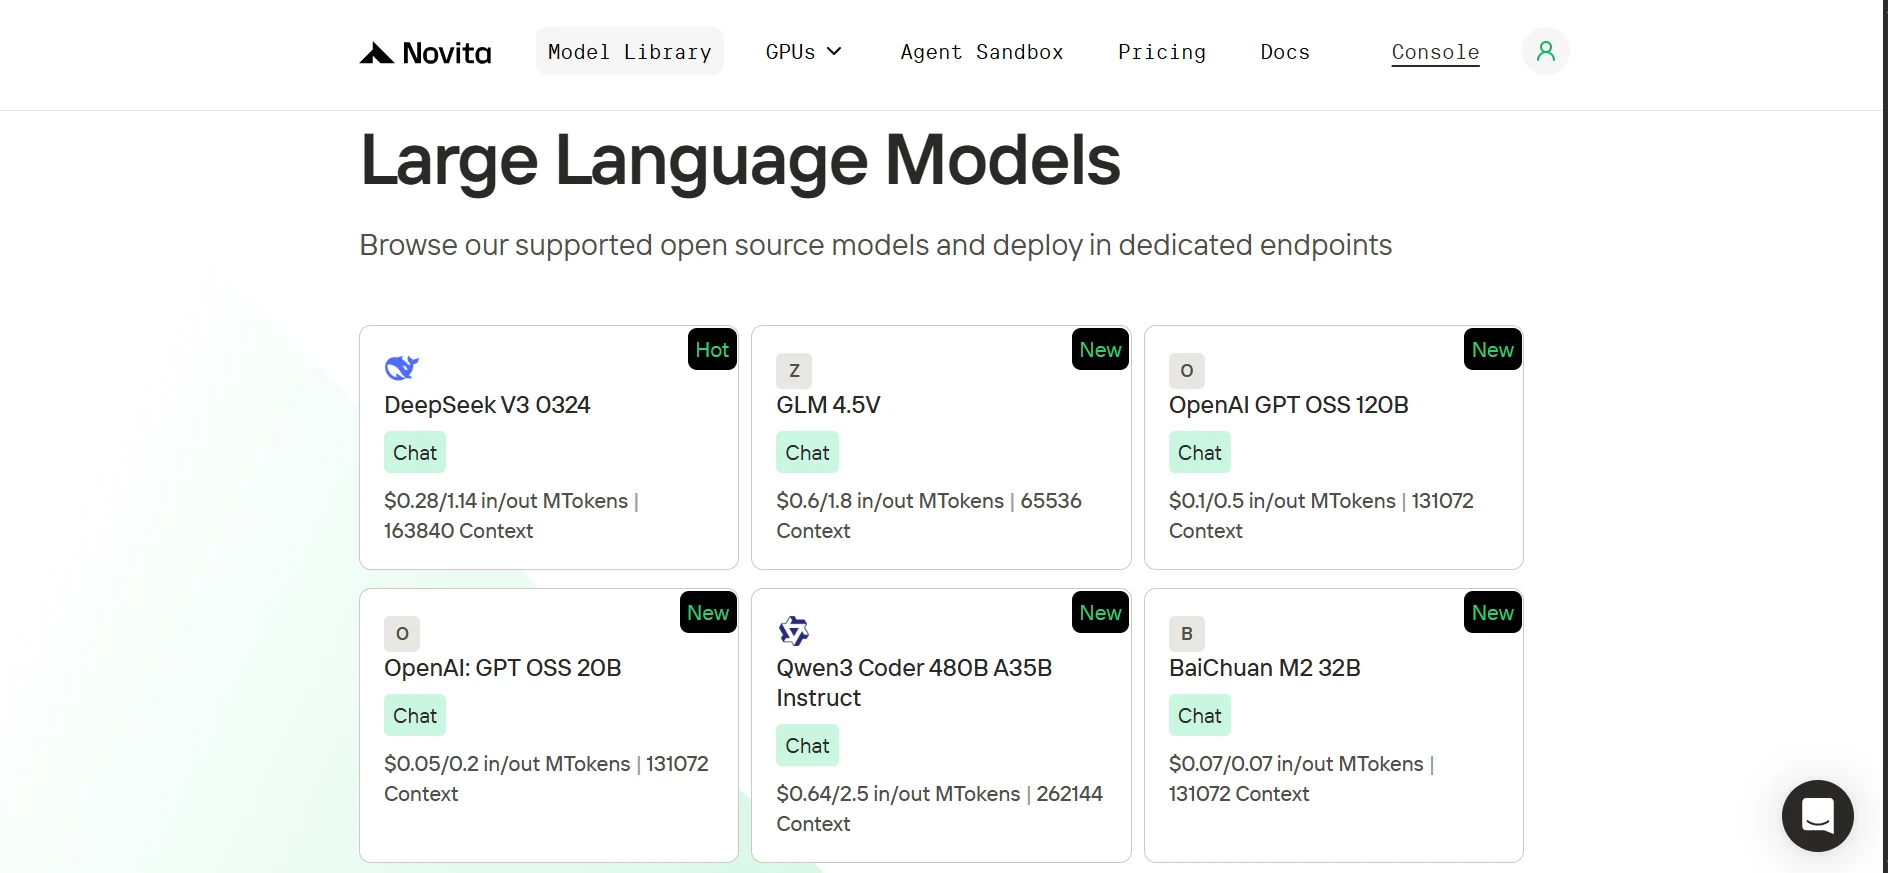
Novita 提供來自 OpenAI、Google、DeepSeek、Qwen 等頂尖研究實驗室的豐富開源 AI 模型庫,涵盖語言、視覺、音訊、影片與嵌入模型。我們的語言模型完全相容 OpenAI SDK,從 OpenAI 切換到 Novita 僅需更新客戶端的基礎 URL 與 API 金鑰,再選擇對應的 Novita 模型即可。
| from openai import OpenAI client = OpenAI( base_url=“https://api.novita.ai/v3/openai”, api_key=“ ) |
Browser Use 總覽:

Browser Use 是一個開源 Python 函式庫,能讓 AI Agent 透過自然語言指令(例如「查詢紐約今天的天氣」)與網頁瀏覽器交互。相較於撰寫複雜的基於規則的選擇器,AI 會自動處理元素查找與交互操作。由於 Novita 的模型 API 相容 OpenAI 格式,你可以使用任何 LLM 或 VLM(視覺語言模型)為 Browser Use 提供驅動能力。
設定開發環境
開始之前,我們需要複製 GitHub 儲存庫、設定乾淨的 Python 環境、安裝所有必要依賴項,並取得 Novita AI 金鑰。
複製 GitHub 儲存庫,並使用 uv 安裝依賴項
1. 安裝 uv(輕量級 Python 套件管理器)
| pip install uv |
2. 複製儲存庫(GitHub 儲存庫連結)並進入對應目錄
| git clone https://github.com/Studio1HQ/AI-sandbox.git cd AI-sandbox |
3. 建立並啟動 uv 虛擬環境
| # Creates a virtual environment uv venv # Activate the virtual environment source .venv/bin/activate # For Mac/Linux # or .venv\Scripts\activate # For Windows |
4. 安裝專案依賴項
| # Install dependencies uv sync |
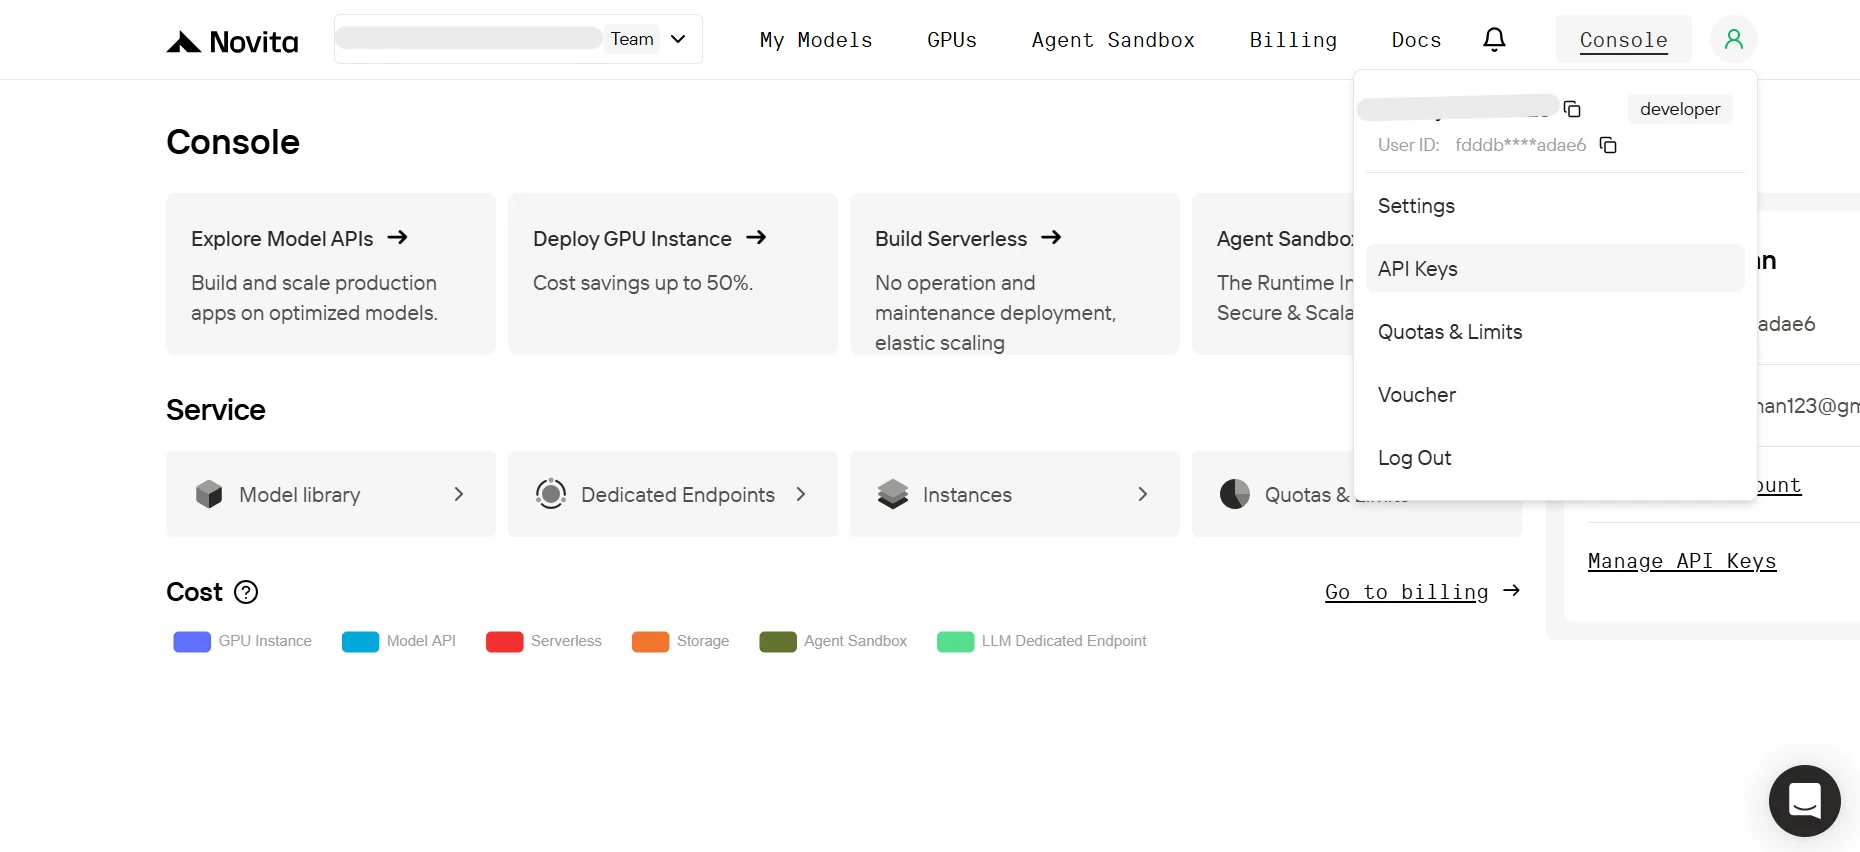
建立 Novita AI 帳號並取得 API 金鑰
1. 前往 novita.ai 註冊帳號。
2. 在控制台懸停在使用者頭像圖示上,點擊彈出選單中的 API Keys。
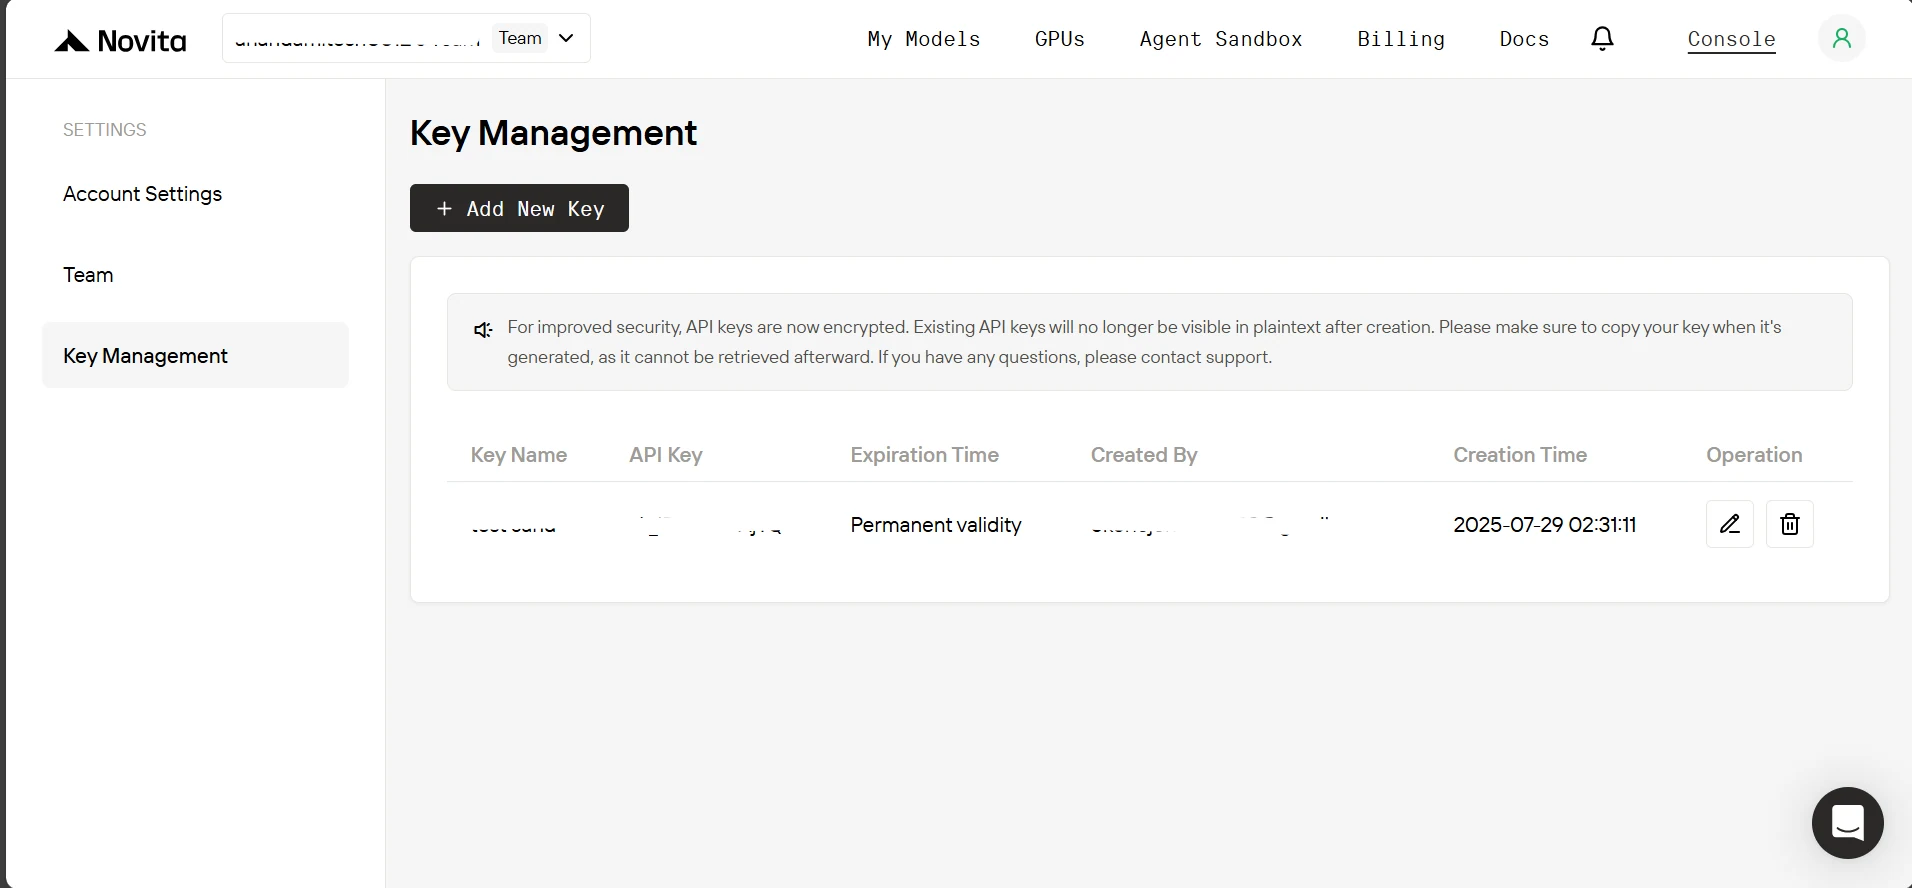
3. 在金鑰管理頁面點擊 Add New Key,在彈出視窗中輸入金鑰名稱,點擊 Confirm,最後複製生成的金鑰。
4. 現在進入專案目錄,建立一個 .env 檔案,並貼上下方內容:
| NOVITA_API_KEY=“ NOVITA_BASE_URL=“https://api.novita.ai/v3/openai” NOVITA_E2B_DOMAIN=“sandbox.novita.ai” NOVITA_E2B_TEMPLATE=“code-interpreter-v1” |
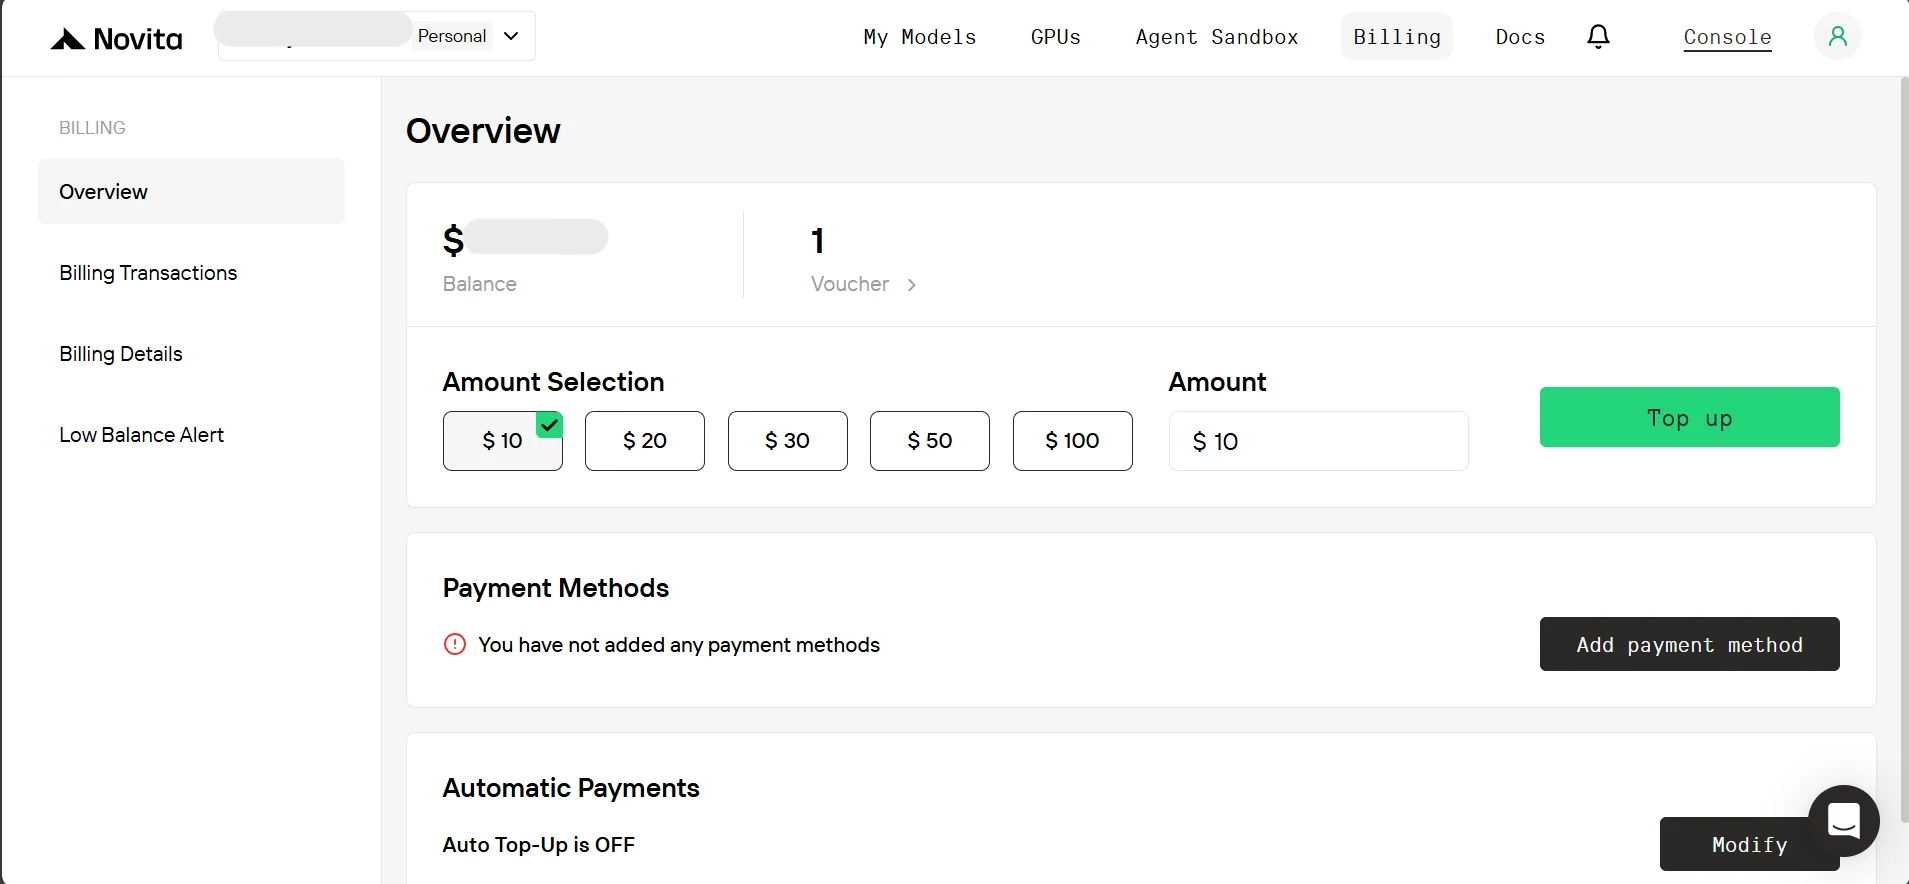
為 Novita AI 帳號充值
要使用 Novita Sandbox,你需要為帳號充值。在控制台頁面點擊 「Billing」,在計費頁面新增付款方式並至少充值 10 美元額度。
建構探索性數據分析(EDA)Agent
現在環境已經設定完成,我們也取得了 API 金鑰,接下來就開始建立 Agent 吧。
透過 Agent 的 Browser Use 下載數據集(或檔案)
就像人類分析師一樣,我們希望 Agent 能夠接收指令並使用瀏覽器獲取數據集。因此,如 browser_agent.py 中所見,我們首先為 Agent 的最終輸出建立 Pydantic 資料結構,用於儲存下載的檔案名稱以及要寫入檔案的已完成任務結果。
| … # below existing code class TaskFile(BaseModel): “”“Represents a file generated as part of a task result e.g. scraped data or researched data.”“” filename: str = Field(…, description=“Name of the file including extension”) content: str = Field(…, description=“Text content to be written into the file”) class AgentOutput(BaseModel): “”“Final aggregated output of the browser agent execution.”“” downloaded_files: Optional[list[str]] = Field( None, description=“List of downloaded file names (with extension), if any” ) task_files: Optional[list[TaskFile]] = Field( None, description=“Files generated from user tasks (e.g., scraped or researched data), if any” ) |
以下是 Agent 瀏覽器運作方式的範例。我們會使用大型語言模型(LLM)進行網頁瀏覽導航,這能覆蓋大多數使用場景。但對於更複雜的 UI 任務(例如驗證碼解題),建議使用視覺語言模型(VLM)。使用 VLM 時,你可以設定視覺細節等級(「high」、「low」或「auto」)來平衡權杖成本與視覺清晰度。
我們隨後會建立瀏覽器工作階段,配置下載路徑為 ./Download、user_data_dir 設為 None(無痕模式),並將 Pydantic 模型設為控制器以獲取結構化的 Agent 輸出。接著我們會使用 await agent.run() 啟動 Agent,最終解析結果取得下載的檔案名稱。
| # A sample of how the browser agent will look agent = Agent( task=“Go to Hugging Face, search for An-j96/SuperstoreData and open its page, then navigate to the Files tab and download the data csv file.”, llm=ChatOpenAI(base_url=novita_base_url, model=novita_model, api_key=novita_api_key), use_vision=False, vision_detail_level=“auto”, # available options [‘low’, ‘high’, ‘auto’]; browser_session=BrowserSession( browser_profile=BrowserProfile( downloads_path=“./Download”, user_data_dir=None ) ), # set the download directory path for the browser. controller=Controller( output_model=AgentOutput ), # Get the agent to output the name of the downloaded file at the end of the task. ) all_results = await agent.run() final_output = AgentOutput.model_validate_json( all_results.final_result() ) # parse the final agent result. |
(注意:在本地機器執行瀏覽器 Agent 會啟動真實的瀏覽器實例,你可以觀看其運作過程。)完整的方法會收集下載的檔案名稱、將任務結果寫入檔案,並返回所有檔案路徑以供後續上傳。
| … # below existing code async def downloading_task_for_browser_agent( task: str, api_key: str, model: str, model_api_base_url: str, use_vision: bool, download_dir_path: str = “./Download”, ) -> Tuple[str, list[str]]: “”“ Will perform the user’s download task via browser use and return download directory path and the downloaded files names. Returns: Tuple of (download_directory, filenames_with_extension) ”“” agent = Agent( task=task, llm=ChatOpenAI( base_url=model_api_base_url, model=model, api_key=api_key, max_completion_tokens=20_000, frequency_penalty=0, # This penalty can slightly affect tool use; keep at 0. ), use_vision=use_vision, vision_detail_level=“auto”, # available options [‘low’, ‘high’, ‘auto’]; browser_session=BrowserSession( browser_profile=BrowserProfile( downloads_path=download_dir_path, user_data_dir=None, # “./browser_user_data” ) ), # set the download directory path for the browser. controller=Controller( output_model=AgentOutput ), # Have the agent output the task execution result according to the AgentOutput schema. max_failures=5, ) try: # Run the agent and structure its output all_results = await agent.run() final_output: AgentOutput = AgentOutput.model_validate_json( all_results.final_result() ) if final_output.task_files: console.print( Panel( f"[bold yellow]Writing task results to files…[/bold yellow] {final_output.task_files}“, title=“Task Results”, border_style=“white”, ) ) # Write each task result to a file in the download directory task_result_files: list[str] = [] for task_file in final_output.task_files or []: file_path = Path(task_file.filename) # Prevent path traversal or unsafe absolute paths if file_path.is_absolute() or “…” in file_path.parts: raise ValueError( f"The agent passed an unsafe file path as a filename: {file_path}” ) # Point the file path inside the download directory file_path = Path(download_dir_path) / file_path # Ensure the download directory exists, else create it. file_path.parent.mkdir(parents=True, exist_ok=True) # Write task result content to a file with open(file_path, “w”, encoding=“utf-8”) as f: f.write(task_file.content) task_result_files.append(task_file.filename) if task_result_files: console.print( Panel( f"[bold green]Task results written to files:[/bold green] {task_result_files}“, title=“Task Results”, border_style=“white”, ) ) # Combine downloaded files with task result files file_results = (final_output.downloaded_files or []) + task_result_files if file_results: console.print( Panel( f”[bold green]Files available:[/bold green] {file_results} in {download_dir_path}“, title=“Downloaded Files”, border_style=“green”, ) ) else: raise RuntimeError(“No files were downloaded or written.”) except Exception as e: file_results = None console.print( Panel( f”[bold red]Error:[/bold red] {str(e)}\ ", title=“Execution Error”, border_style=“red”, ) ) return (download_dir_path, file_results) |
Agent 呼叫被封裝在 try-except 區塊中,如果發生失敗則拋出異常,並將 file_results 設為 None。最後該方法會返回 download_dir_path 與 file_results 兩個路徑。
定義 Agent 可用工具的結構描述
現在瀏覽器使用功能已經完成,接下來要為 EDA Agent 定義可用工具的結構描述。我們會提供四個工具:
- run_python_code: 允許 Agent 在 Sandbox 內執行程式碼。
- run_on_command_line: 讓 Agent 能在 Sandbox 終端機執行指令(例如安裝 Python 套件)。
- sync_with_user: 能將 Agent 在 Sandbox 中建立或更新的檔案與目錄同步到使用者的本地同步資料夾。
- delete_from_user_sync_folder: 讓 Agent 能從使用者的本地同步資料夾中刪除檔案或目錄。
這些工具 collectively 讓 Agent 能完全掌控程式碼執行、終端機使用,以及 Sandbox 與本地系統之間的檔案同步。
在 sandbox_eda.py 中,我們可以看到這些工具的結構描述:
- run_python_code,僅接收要執行的 Python 程式碼作為輸入參數,執行後返回結果(如果有)。
| { “type”: “function”, “function”: { “name”: “run_python_code”, “description”: “Runs the python code and returns the result if any.”, “parameters”: { “type”: “object”, “properties”: { “python_code”: { “type”: “string”, “description”: “The Python code to run.”, } }, “required”: [“python_code”], }, }, }, |
- run_on_command_line,同樣僅接收要執行的指令作為輸入參數,執行後返回結果(如果有)。
| { “type”: “function”, “function”: { “name”: “run_on_command_line”, “description”: “Runs the command on the command line and returns the result if any.”, “parameters”: { “type”: “object”, “properties”: { “command”: { “type”: “string”, “description”: “The command to run on the command line.”, } }, “required”: [“command”], }, }, }, |
- sync_with_user,接收兩個輸入參數:
- sandbox_path: Sandbox 內檔案或目錄的路徑。
- path_on_user_sync_folder: Agent 希望檔案或目錄在使用者同步資料夾中存放的路徑。
第二個路徑的格式例如 /new.txt,預設同步資料夾為其上層目錄。例如我們後續會將 /new.txt 解析為 sync_folder/new.txt。
| { “type”: “function”, “function”: { “name”: “sync_with_user”, “description”: “Will sync a file or directory on sandbox, to the sync folder on the user’s computer”, “parameters”: { “type”: “object”, “properties”: { “sandbox_path”: { “type”: “string”, “description”: “Path to the file or directory on the sandbox.”, }, “path_on_user_sync_folder”: { “type”: “string”, “description”: “Relative path where the file or directory will be placed inside the user’s sync folder. For example, ‘/hello.txt’ goes directly in the sync folder, while ‘/run1/hello.txt’ will be placed in a ‘run1’ subfolder within the sync folder.”, }, }, “required”: [“sandbox_path”, “path_on_user_sync_folder”], }, }, }, |
- delete_from_user_sync_folder,僅接收一個輸入參數:
- path_on_user_sync_folder: Agent 希望從使用者同步資料夾中刪除的檔案或目錄的路徑。
注意該方法的路徑假設與 sync_with_user 一致。
| { “type”: “function”, “function”: { “name”: “delete_from_user_sync_folder”, “description”: “Will delete a file or directory from the sync folder on the user’s computer”, “parameters”: { “type”: “object”, “properties”: { “path_on_user_sync_folder”: { “type”: “string”, “description”: “Relative path to the file or directory on the user’s sync folder. For example, ‘/hello.txt’ will delete it directly from the sync folder, while ‘/run1/hello.txt’ will delete it directly from ‘run1’ subfolder within the sync folder.”, } }, “required”: [“path_on_user_sync_folder”], }, }, }, |
實作可用函式
首先,我們有一個 SandboxEDA 類別,接受以下參數:
- sandbox: Sandbox 實例。
- model_base_url 與 model_api_key: 用於連接 Novita 模型。
- max_consecutive_function_calls_allowed: 預設為 30,用於防止 Agent 陷入無限函式呼叫迴圈,我們稍後會看到相關說明。
| … # below existing code class SandboxEDA: def init( self, sandbox: Sandbox, model_api_base_url: str, model_api_key: str, max_consecutive_function_calls_allowed: int = 30, ): self.sandbox = sandbox self.model_api_base_url = model_api_base_url self.model_api_key = model_api_key self.max_consecutive_function_calls_allowed = ( max_consecutive_function_calls_allowed ) |
接下來是 SandboxEDA 類別的方法 run_python_code,该方法接收 Python 程式碼作為輸入,並使用 sandbox 實例執行。返回結果時,所有圖片輸出(注意:它們是 base64 編碼的)會儲存到 temp_image_output 目錄中,最後返回包含圖片輸出、其他輸出、日誌與錯誤資訊的字典。
| … # below existing code class SandboxEDA: … # below existing code def run_python_code(self, python_code: str) -> dict: “”“ Runs the python code on the sandbox, and if there are any images save them locally. Args: python_code (str): The python code to run. Returns: dict: Containing the base64 image outputs and other outputs (stdout, logs, error, etc). ”“” execution = self.sandbox.run_code(python_code, language=“python”) image_outputs = [result.png for result in execution.results if result.png] # Iterate through the base64 encoded images and save them to a file with name format: temp-{timestamp}.png to ./temp_image_output dir for b64_image in image_outputs: timestamp = int(time.time_ns()) image_filename = Path(f"./temp_image_output/temp-{timestamp}.png") # Will create the temp_image_output directory if it doesn’t exist already. image_filename.parent.mkdir(parents=True, exist_ok=True) with open(image_filename, “wb”) as f: f.write(base64.b64decode(b64_image)) return { “image_outputs”: image_outputs, “other_outputs”: { “outputs”: [result for result in execution.results if not result.png], “logs”: execution.logs, “error”: execution.error, }, } |
接下來是 run_on_command_line 方法,它同樣會在 Sandbox 實例上執行指令,然後返回包含輸出的字典。如果執行失敗,則返回輸出的值為 None 的字典,並將 「execution error」 設定為錯誤訊息。
| … # below existing code class SandboxEDA: … # below existing code def run_on_command_line(self, command: str) -> dict: “”“ Runs the command on the sandbox. Args: command (str): The command to run. Returns: dict: Containing the output of the command and the execution error if any. ”“” try: result = self.sandbox.commands.run(command) return { “output”: { “stdout”: result.stdout, “stderr”: result.stderr, “exit_code”: result.exit_code, “error”: result.error, }, “execution error”: None, } except Exception as e: return {“output”: None, “execution error”: str(e)} |
接下來是 sync_with_user 方法,如前所述,它會接收 sandbox_path 與 path_on_user_sync_folder 兩個參數。如果 Sandbox 路徑指向檔案,則會將檔案從 Sandbox 下載到對應的同步資料夾位置;如果路徑指向目錄,則會遞迴遍歷所有子內容,將每個檔案下載到對應位置。執行成功時返回 「Sync Successful」,否則返回異常訊息。
| … # below existing code class SandboxEDA: … # below existing code def sync_with_user(self, sandbox_path, path_on_user_sync_folder): “”“ Downloads a file or directory from the sandbox to the user’s sync folder. Args: sandbox_path (str): The path of the file or directory to sync in the sandbox. path_on_user_sync_folder (str): The relative destination path of the file or directory in the user’s sync folder. Returns: str: “Sync Successful” if the file or directory was synced successfully, otherwise an error message. ”“” try: path_info = self.sandbox.files.get_info(sandbox_path) if path_info.type == FileType.DIR: # If its a directory loop through the contents and download them. dir_contents = self.sandbox.files.list(sandbox_path) for content in dir_contents: path_to_content_in_sync_folder = Path( path_on_user_sync_folder ).joinpath(content.name) self.sync_with_user(content.path, path_to_content_in_sync_folder) elif path_info.type == FileType.FILE: # Ensure the file is always inside ./sync_folder. sandbox_path_obj = Path(path_on_user_sync_folder) # Make the path relative by stripping any root or drive component relative_path = sandbox_path_obj.relative_to( sandbox_path_obj.anchor or “.” ) # Final path inside sync_folder file_path = Path(“sync_folder”) / relative_path # Will create any directory in the path that doesn’t exist already. file_path.parent.mkdir(parents=True, exist_ok=True) # Download the file to sync folder. file_content = self.sandbox.files.read(sandbox_path, “bytes”) with open(file_path, “wb”) as f: f.write(file_content) return “Sync Successful” except Exception as e: return str(e) |
最後是 delete_from_user_sync_folder 方法,它同樣接收 path_on_user_sync_folder 參數,會刪除對應的檔案或目錄(如果存在的話),成功時返回 「Deletion Successful」,否則返回異常訊息。
| … # below existing code class SandboxEDA: … # below existing code def delete_from_user_sync_folder(self, path_on_user_sync_folder): “”“ Deletes a file or directory from the user sync folder. Args: path_on_user_sync_folder (str): The path of the file or directory to delete in the user sync folder. Returns: str: “Deletion Successful” if the file or directory was deleted successfully, otherwise an error message. ”“” # Ensure the file is always inside ./sync_folder. sandbox_path_obj = Path(path_on_user_sync_folder) # Make the path relative by stripping any root or drive component relative_path = sandbox_path_obj.relative_to(sandbox_path_obj.anchor or “.”) # Final path inside sync_folder delete_path = Path(“sync_folder”) / relative_path try: if not delete_path.exists(): raise Exception( f"File or Directory does not exist at {path_on_user_sync_folder} in sync folder." ) if delete_path.is_file(): delete_path.unlink() elif delete_path.is_dir(): shutil.rmtree(str(delete_path)) return “Deletion Successful” except Exception as e: return str(e) |
其他 Sandbox 函式
1. 上傳檔案到 Sandbox 的方法
| … # below existing code class SandboxEDA: … # below existing code def upload_files_to_sandbox( self, file_paths: list[str], file_names_in_sandbox: list[str] ): “”“ Uploads files to the sandbox. Args: file_paths (list[str]): File paths of the files to upload (eg [”./Download/data.csv", “./Download/data2.csv”]). file_names_in_sandbox (list[str]): The names the files will take in the sandbox (eg [“data.csv”, “data2.csv”]). Note: The files will be uploaded to the sandbox’s /home/user directory (e.g ./home/user/data.csv, ./home/user/data2.csv). “”“ console.print( f”[yellow]Uploading files(s) at {file_paths} to Sandbox[/yellow] (id: {self.sandbox.sandbox_id})“ ) for file_path, file_name_in_sandbox in zip(file_paths, file_names_in_sandbox): with open(file_path, “rb”) as file: self.sandbox.files.write(file_name_in_sandbox, file) console.print( f”[bold cyan]Files(s) {file_paths} uploaded to Sandbox[/bold cyan] (id: {self.sandbox.sandbox_id})" ) |
2. 列出 Sandbox 主目錄(/home/user)內容的方法
| … # below existing code class SandboxEDA: … # below existing code def list_files_in_sandbox_main_dir(self) -> list[str]: return [i.name for i in self.sandbox.files.list(“/home/user”)] |
建構與 Agent 的交互邏輯
接下來我們會看到與 Agent 交互的方法,在此之前先看一下 prompts/system_prompt.py 中的參數化系統提示指令。
| SYSTEM_PROMPT = “”“ You are an Exploratory Data Analysis (EDA) agent and you have access to a sandbox (with internet access) where you can: - Execute python code using the run_python_code function call. - You can basically do anything you can do on a linux machine via the run_on_command_line or run_python_code function call. - You can sync whatever directory (may be preferred for structure eg website) or file you have created, written to or updated to the user’s sync folder on their local machine through the sync_with_user function call. - You can delete any of those directory or file from the user’s sync folder on their local machine through the delete_from_user_sync_folder function call. Your current PWD is ‘/home/user’ and below are the files in it. {list_sandbox_files} Note: - The sandbox already comes pre-installed with the usual data analysis packages but if there’s a package you are not sure exists or your code had an import error due to a missing package, you can check if it’s installed and if not install it. - For image outputs (e.g from data visualization) make sure it is png format. Function Call Guidelines: - Always use run_python_code to perform any task unless you absolutely need to use run_on_command_line (e.g to install packages, etc) - Chain function calls when needed: After receiving results from one function call, immediately make additional calls if more information is required - Gather just the needed information first: Respond to the user only when you have at least enough information from function calls to provide a good answer - Be efficient: Although there is a maximum limit of {max_consecutive_function_calls_allowed} consecutive function calls try to make as less calls as possible to get just enough information. - Don’t just assume the user will read the output of the tool call respond to them with your answer. Be a helpful assistant to the user who is probably trying to perform EDA on dataset files ({downloaded_dataset_names}) at (/home/user/) directory. You can perform the following function calls: {available_function_calls_schema} ”“” |
接下來是 SandboxEDA 類別中的 eda_chat 方法,该方法接收已上傳到 Sandbox 的檔案名稱(我們會在開始對話前處理上傳,稍後會說明)以及要使用的 Novita 模型名稱。
1. 首先,我們將 OpenAI 客戶端的基礎 URL 設定為指向 Novita,並以系統提示作為第一條訊息初始化對話。
| … # below existing code class SandboxEDA: … # below existing code def eda_chat( self, downloaded_dataset_names: list[str], model_for_eda: str, ): “”“ Interactive EDA session with AI agent capable of code execution and terminal commands Args: downloaded_dataset_names (list[str]): The names of the downloaded datasets. model_for_eda (str, optional): The underlying model to use. ”“” console.print( Panel( “[bold green]EDA Session Started[/bold green]\ Type ‘quit()’ to exit.”, title=“Exploratory Data Analysis”, border_style=“green”, ) ) client = OpenAI( base_url=self.model_api_base_url, api_key=self.model_api_key, ) # Initialize conversation with system prompt messages = [ { “role”: “system”, “content”: SYSTEM_PROMPT.format( downloaded_dataset_names=str(downloaded_dataset_names), list_sandbox_files=str(self.list_files_in_sandbox_main_dir()), available_function_calls_schema=str( AVAILABLE_FUNCTION_CALL_SCHEMAS ), max_consecutive_function_calls_allowed=self.max_consecutive_function_calls_allowed, ), } ] |
2. 接下來的主對話迴圈是 while 迴圈,會接收使用者的訊息並將其新增到現有訊息歷史中。為防止無限連續的工具呼叫,while 迴圈內有一個 for 迴圈,達到上限時會拋出異常,然後將訊息傳遞給模型。
| … # below existing code # Main chat loop while True: user_input = Prompt.ask(“\ [bold yellow]>>> User Message[/bold yellow]”) if user_input.lower().strip() == “quit()”: break messages.append({“role”: “user”, “content”: user_input}) # Handle potential consecutive tool calls with a safety limit to avoid infinite loops for i in range(self.max_consecutive_function_calls_allowed + 1): if i == self.max_consecutive_function_calls_allowed: raise Exception( f"Consecutive tool calls from the Agent must not exceed {self.max_consecutive_function_calls_allowed}." ) response = client.chat.completions.create( model=model_for_eda, messages=messages, tools=AVAILABLE_FUNCTION_CALL_SCHEMAS, frequency_penalty=0, ) response_message = response.choices[0].message |
3. 接下來檢查模型是否決定進行工具呼叫,如果是,則使用模型提供的參數執行對應工具,將輸出打印到終端機供使用者查看(或顯示圖片,如果適用的話),然後將輸出返回給模型,首先處理 run_python_code 工具呼叫。
| … # below existing code tool_calls = response_message.tool_calls if tool_calls: messages.append( response_message ) # Add assistant message that triggered tool calls # Execute each requested tool call for tool_call in tool_calls: name = tool_call.function.name args = json.loads(tool_call.function.arguments) if name == “run_python_code”: console.print( Panel( args[“python_code”], title=“Agent Executing Python Code”, border_style=“blue”, ) ) code_result = self.run_python_code(args[“python_code”]) messages.append( { “tool_call_id”: tool_call.id, “role”: “tool”, “name”: name, # If there are any image outputs (e.g data visualization), as it is not yet possible to return images # from a tool call just inform the Agent that the image has been shown to the user. “content”: [ { “type”: “text”, “text”: ( f"THE IMAGES HAS ALREADY BEEN SHOW TO THE USER ON THE TERMINAL AND SAVED TO TEMP FILES eg temp-{timestamp}.png on the user’s computer in ./temp_image_output dir, THE OTHER OUTPUTS ARE BELOW\ {code_result[‘other_outputs’]}“ if code_result[“image_outputs”] else f”{code_result[‘other_outputs’]}" ), } ], } ) display_sandbox_code_output(code_result) |
3b. run_on_command_line 工具呼叫
| … # below existing code elif name == “run_on_command_line”: console.print( Panel( args[“command”], title=“Agent Executing Command On Terminal”, border_style=“blue”, ) ) command_result = self.run_on_command_line(args[“command”]) messages.append( { “tool_call_id”: tool_call.id, “role”: “tool”, # Indicates this message is from tool use “name”: name, “content”: str(command_result), } ) display_sandbox_command_output(command_result) |
3c. sync_with_user 工具呼叫
| … # below existing code elif name == “sync_with_user”: console.print( Panel( f"[bold yellow]Agent Started Syncing {args[‘sandbox_path’]} To User’s Sync Folder ({args[‘path_on_user_sync_folder’]})[/bold yellow]", title=“File Syncing”, border_style=“white”, ) ) sync_result = self.sync_with_user( args[“sandbox_path”], args[“path_on_user_sync_folder”] ) messages.append( { “tool_call_id”: tool_call.id, “role”: “tool”, # Indicates this message is from tool use “name”: name, “content”: sync_result, } ) … # skipped for brevity |
3d. delete_from_user_sync_folder 工具呼叫,如果遇到不存在的函式呼叫則拋出未知錯誤。
| … # below existing code elif name == “delete_from_user_sync_folder”: console.print( Panel( f"[bold yellow]Agent Deleting File(s) From User’s Sync Folder ({args[‘path_on_user_sync_folder’]})[/bold yellow]“, title=“File Syncing”, border_style=“white”, ) ) delete_result = self.delete_from_user_sync_folder( args[“path_on_user_sync_folder”] ) messages.append( { “tool_call_id”: tool_call.id, “role”: “tool”, # Indicates this message is from tool use “name”: name, “content”: delete_result, } ) … # skipped for brevity else: raise ValueError(f"Unknown Function Call: {name}”) |
4. 如果 Agent 的最新回覆不是工具呼叫,則將其回覆打印給使用者,並跳出連續工具呼叫限制迴圈。
| … # below existing code else: # No tool calls just display assistant response after adding it to the messages. messages.append( {“role”: “assistant”, “content”: response_message.content} ) console.print( f"[bold green]>>> Assistant Response: {response_message.content} [/]" ) break |
編排 Agent 流程
最後,main.py 是我們應用的進入點,負責串聯所有組件。其中的 start_eda 方法會啟動新的 Sandbox 工作階段,sandbox_timeout 參數決定了 Sandbox 在自動終止前能保持活躍的時間,本次演示我們會將其設定為 900 秒(約 15 分鐘)。
Sandbox 建立完成後,我們會將檔案上傳到其中,然後啟動 eda_chat 方法開始與 Agent 交互。
| … # below existing code def start_eda( model_for_eda: str, dataset_paths: list[str], dataset_file_names: list[str], api_key_for_sandbox_and_model: str, model_api_base_url: str, sandbox_domain: str, sandbox_template: str, sandbox_timeout: int, ): with Sandbox( template=sandbox_template, api_key=api_key_for_sandbox_and_model, domain=sandbox_domain, timeout=sandbox_timeout, ) as sandbox: try: sandbox_eda = SandboxEDA( sandbox, model_api_base_url, api_key_for_sandbox_and_model ) console.print( f"[bold cyan]Started Sandbox[/bold cyan] (id: {sandbox.sandbox_id})“ ) sandbox_eda.upload_files_to_sandbox(dataset_paths, dataset_file_names) sandbox_eda.eda_chat(dataset_file_names, model_for_eda) console.print( f”\ \ [bold cyan]------ EDA Session Completed for Sandbox (id: {sandbox.sandbox_id}) ------[/]“ ) finally: console.print( f”[bold cyan]----- Closed Sandbox (id: {sandbox.sandbox_id})-----\ " ) |
以下是應用的啟動點 main 方法:
| … # below existing code async def main( api_key_for_sandbox_and_model: str, model_api_base_url: str, model_for_browser_agent: str, enable_vision_for_browser_agent: bool, model_for_eda: str, sandbox_domain: str, sandbox_template: str, sandbox_timeout_seconds: int, ): while True: # Welcome Banner console.print( Panel( “[bold white]Welcome To Agentic Exploratory Data Analysis[/bold white]\ \ “ ”[grey]How would you like to proceed:[/grey]\ “ ”[grey]1.[/grey] Download a dataset first.\ “ ”[grey]2.[/grey] Proceed with already downloaded dataset.\ “ ”[grey]3.[/grey] Exit”, title=“MAIN MENU”, border_style=“green”, width=70, ) ) choice = Prompt.ask( “\ [bold yellow]Enter your choice[/bold yellow]”, choices=[“1”, “2”, “3”] ).strip() if choice == “1”: result = await choice_download_dataset( api_key_for_sandbox_and_model, model_api_base_url, model_for_browser_agent, enable_vision_for_browser_agent, ) if result: download_path, filenames = result DATASET_PATHS = [ str(Path(download_path) / filename) for filename in filenames ] DATASET_FILE_NAMES = filenames else: continue # User returned to main menu elif choice == “2”: result = choice_proceed_with_already_downloaded_datasets() if result: DATASET_PATHS = result DATASET_FILE_NAMES = [os.path.basename(path) for path in result] else: continue # since user click back to main menu. elif choice == “3”: break # Start the EDA session start_eda( model_for_eda, DATASET_PATHS, DATASET_FILE_NAMES, api_key_for_sandbox_and_model, model_api_base_url, sandbox_domain, sandbox_template, sandbox_timeout_seconds, ) |
由於 main.py 會以腳本形式執行,我們新增了以下程式碼,同時傳入環境變數、Sandbox 超時時間以及我們要使用的 Novita 模型:
| … # below existing code if name == “main”: NOVITA_API_KEY = os.getenv(“NOVITA_API_KEY”) NOVITA_BASE_URL = os.getenv(“NOVITA_BASE_URL”) NOVITA_E2B_DOMAIN = os.getenv(“NOVITA_E2B_DOMAIN”) NOVITA_E2B_TEMPLATE = os.getenv(“NOVITA_E2B_TEMPLATE”) NOVITA_MODEL_FOR_BROWSER_AGENT = “qwen/qwen3-coder-480b-a35b-instruct” ENABLE_VISION_FOR_BROWSER_AGENT = ( False # If true make sure the browser agent model has vision capabilities. ) NOVITA_MODEL_FOR_EDA = “qwen/qwen3-coder-480b-a35b-instruct” NOVITA_SANDBOX_TIMEOUT_SECONDS = 900 # 900 seconds (15 minutes), sandbox instance will be killed automatically after. asyncio.run( main( NOVITA_API_KEY, NOVITA_BASE_URL, NOVITA_MODEL_FOR_BROWSER_AGENT, ENABLE_VISION_FOR_BROWSER_AGENT, NOVITA_MODEL_FOR_EDA, NOVITA_E2B_DOMAIN, NOVITA_E2B_TEMPLATE, NOVITA_SANDBOX_TIMEOUT_SECONDS, ) ) |
測試執行 EDA Agent
在終端機執行以下指令
| uv run main.py |
結論
恭喜你完成了探索性數據分析 Agent 的建構!現在你可以要求它使用任何數據集檔案的分析結果與洞察來建立網站、PowerPoint 等內容,結果會直接同步到你的本地電腦。
快速回顧一下,本文你學會了如何建構一個能接收指令、使用瀏覽器瀏覽網頁並下載檔案、在 Novita Sandbox 中執行程式碼與指令、並將檔案與目錄同步到本地電腦的 Agent。
這只是冰山一角,你可以進一步擴展 Agent 的功能,例如連接資料庫、透過 MCP 整合 Google Docs 等工具,實現更多可能性。前往 Novita 把你的想法化為現實吧!
Novita AI 是一個 AI 雲端平台,為開發者提供簡單的 API 來部署 AI 模型,同時也提供高性價比、可靠的 GPU 雲端服務,用於建構與擴展 AI 應用。