

In letzter Zeit haben wir ein exponentielles Wachstum im Bereich der künstlichen Intelligenz mit Large Language Models (LLM), Vision Language Models usw. und seit Kurzem auch bei KI-Agenten beobachtet. Im Gegensatz zu herkömmlichen regelbasierten Anwendungen sind diese Agenten in der Lage, ihre Argumentations- und Entscheidungsfähigkeiten zu nutzen, um komplexe Aufgaben autonom oder mit minimalem Benutzereingriff auszuführen. Dazu müssen KI-Agenten oft dynamisch Code generieren und ausführen oder sogar die gesamte virtuelle Maschine steuern – genau diese Fähigkeiten bietet der Novita AI Sandbox.
In diesem Tutorial erstellen wir einen KI-Agenten, der als Datenanalyst fungiert. Genau wie ein menschlicher Analyst kann er Anweisungen entgegennehmen, mithilfe eines Browsers Datensätze suchen und herunterladen, und auf Anfrage Code analysieren, visualisieren und ausführen, um dir Erkenntnisse zu liefern.
Was ist ein KI-Agent?
Ein KI-Agent ist ein Softwareprogramm, das künstliche Intelligenz nutzt, um zu argumentieren, Pläne zu erstellen und Aktionen zur Erreichung bestimmter Ziele auszuführen. Diese Agenten können Tools wie APIs, Codeausführung und Websuchen nutzen, um Informationen zu sammeln oder Aufgaben zu erledigen. Manchmal arbeiten sie auch mit anderen Agenten zusammen, insbesondere für komplexere Ziele wie Deep Research.
Dies sind typische Komponenten eines KI-Agenten:
- Argumentation/Planung: Wenn dem Agenten ein Ziel vorgegeben wird, erstellt er schrittweise Pläne zur Erreichung dieses Ziels. Dieser Prozess kann die Erledigung von Teilaufgaben und das Sammeln zusätzlicher Informationen zur Steuerung der nächsten Aktionen umfassen. Dies ist besonders häufig bei komplexen, länger andauernden Aufgaben der Fall, und Argumentationsmodelle eignen sich hierfür besonders gut.
- Tool-Nutzung: KI-Agenten können externe Tools und Dienste aufrufen. Dazu gehören Funktionen, APIs oder andere Ressourcen, die ihre Fähigkeiten erweitern.
- Koordination: Mehrere Agenten können zusammenarbeiten, indem sie Verantwortlichkeiten aufteilen, wobei jeder zur Erreichung eines gemeinsamen, komplexen oder langfristigen Ziels beiträgt.
Übersicht über Novita AI Sandbox, LLM-Produkte und Browser Use
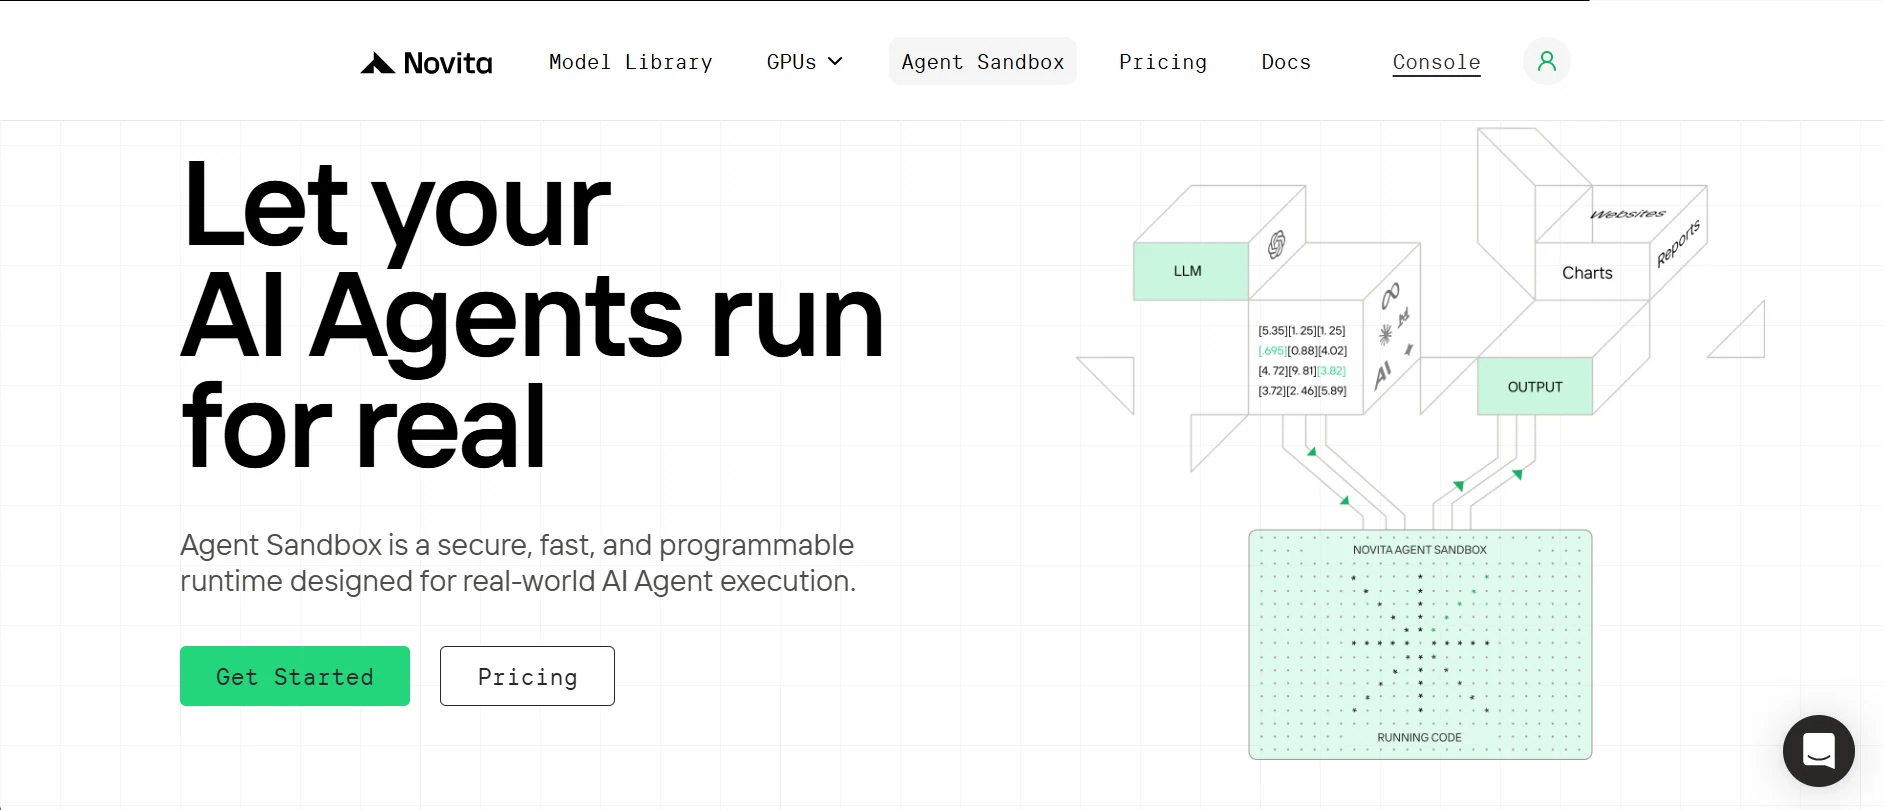
Was ein Sandbox ist und warum er wichtig ist
Ein Sandbox ist eine sichere, isolierte Laufzeitumgebung, in der nicht vertrauenswürdiger Code ausgeführt werden kann, ohne das Hostsystem zu beeinträchtigen. Im Grunde ist es ein leichtgewichtiger virtueller Computer, auf dem dein KI-Agent Code, Befehle ausführen, Dateien erstellen usw. kann.
Novita AI stellt diesen Sandbox in der Cloud bereit, sodass dein Agent ihn bei Bedarf schnell nutzen kann, mit flexibler sekundengenauer Abrechnung basierend auf den verwendeten Ressourcen.
Hauptfunktionen des Novita-Sandbox:
- Sichere Isolierung: Jeder Sandbox erhält ein eigenes isoliertes Dateisystem und eine eigene Umgebung, die Daten schützen und unbeabsichtigte Interaktionen verhindern.
- Schneller Start: Sandbox-Instanzen starten im Durchschnitt in unter ~200 ms, was sie ideal für Szenarien mit geringer Latenz macht.
- Mehrsprachige Unterstützung: Du kannst Code in mehreren Programmiersprachen ausführen, darunter Python, JavaScript, TypeScript und weitere.
- Schnelles Pausieren und Fortsetzen: Pausiere den Sandbox jederzeit und setze ihn bei Bedarf fort, wobei Dateisystem- und Prozesszustand vollständig wiederhergestellt werden.
- Hintergrundausführung: Unterstützt die Ausführung von Hintergrundaufgaben und eignet sich für Szenarien, in denen auf ein Ergebnis gewartet werden muss.
Novita Modell-API:
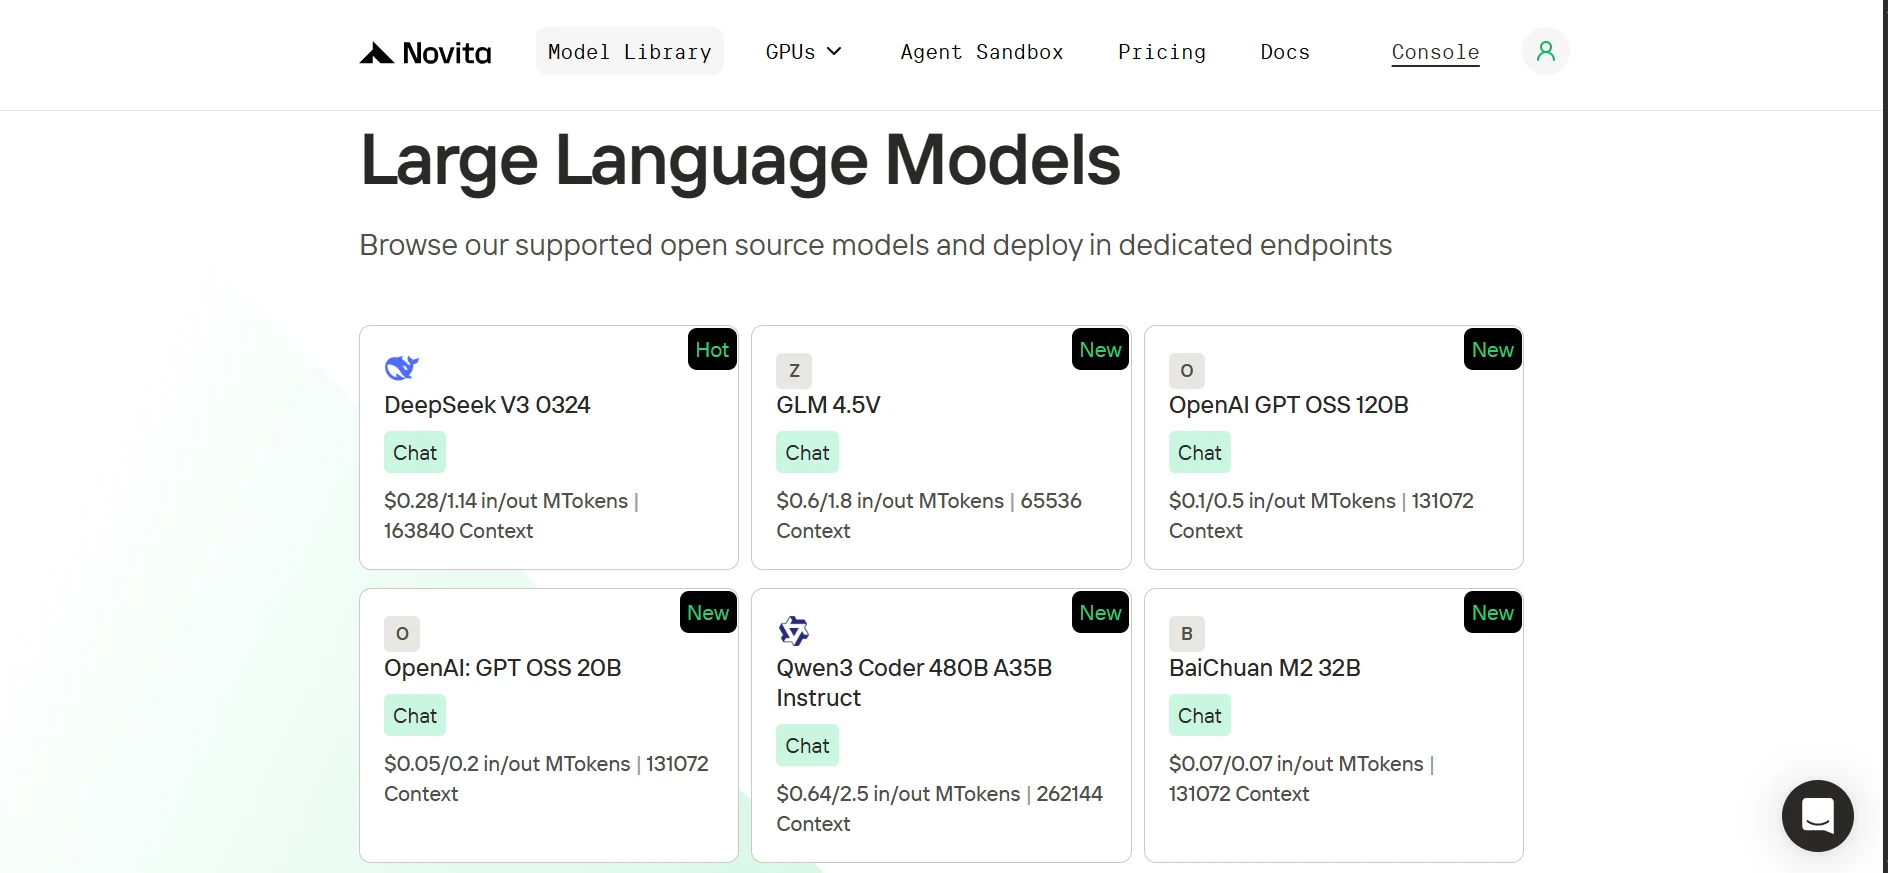
Novita bietet eine umfangreiche Bibliothek mit Open-Source-KI-Modellen von führenden Forschungslaboren wie OpenAI, Google, DeepSeek und Qwen usw. Dazu gehören Modelle für Sprache, Vision, Audio, Video und Einbettungen. Unsere Sprachmodelle sind zudem vollständig kompatibel mit dem OpenAI-SDK, sodass der Wechsel von OpenAI zu Novita nur das Aktualisieren der Basis-URL und des API-Schlüssels in deinem Client sowie die Auswahl eines Novita-Modells erfordert.
| from openai import OpenAI client = OpenAI( base_url=“https://api.novita.ai/v3/openai”, api_key=“ ) |
Übersicht über Browser Use:

Browser Use ist eine Open-Source-Python-Bibliothek, die es KI-Agenten ermöglicht, über natürliche Sprachbefehle mit Webbrowsern zu interagieren (z. B. „Prüfe das Wetter in New York heute“). Statt komplexe regelbasierte Selektoren zu schreiben, übernimmt die KI die Suche nach Elementen und die Interaktion mit ihnen. Und dank der OpenAI-kompatiblen Modell-API von Novita kannst du jedes LLM oder VLM (Vision-Language-Modell) zum Betreiben von Browser Use verwenden.
Einrichtung deiner Entwicklungsumgebung
Um loszulegen, klonen wir das GitHub-Repository, richten eine saubere Python-Umgebung ein, installieren alle erforderlichen Abhängigkeiten und holen uns Novita AI-Schlüssel.
Klone das GitHub-Repository und installiere Abhängigkeiten mit uv
1. Installiere uv (einen leichtgewichtigen Python-Paketmanager)
| pip install uv |
2. Klone das Repository (GitHub-Repo) und wechsle in das Verzeichnis.
| git clone https://github.com/Studio1HQ/AI-sandbox.git cd AI-sandbox |
3. Erstelle und aktiviere die uv-virtuelle Umgebung
| # Creates a virtual environment uv venv # Activate the virtual environment source .venv/bin/activate # For Mac/Linux # or .venv\Scripts\activate # For Windows |
4. Installiere Projektabhängigkeiten
| # Install dependencies uv sync |
Erstellen eines Novita AI-Kontos und Abrufen eines API-Schlüssels
1. Registriere dich unter novita.ai.
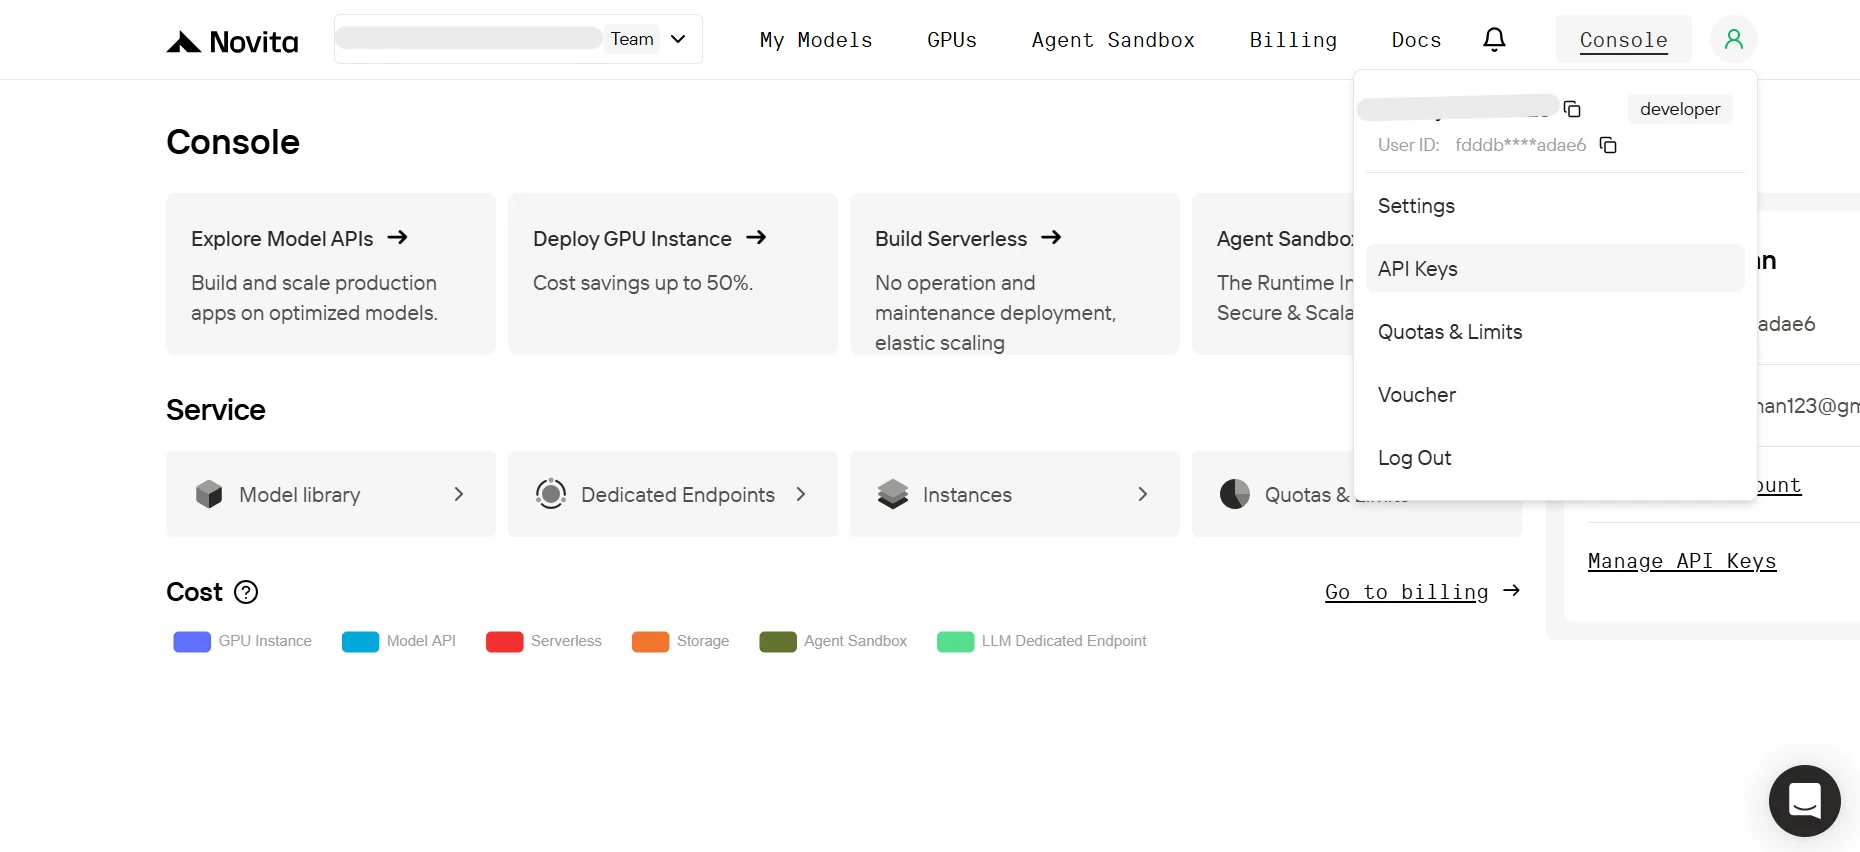
2. Bewege im Dashboard den Mauszeiger über das Benutzerprofil-Symbol und klicke im Pop-up auf API-Schlüssel.
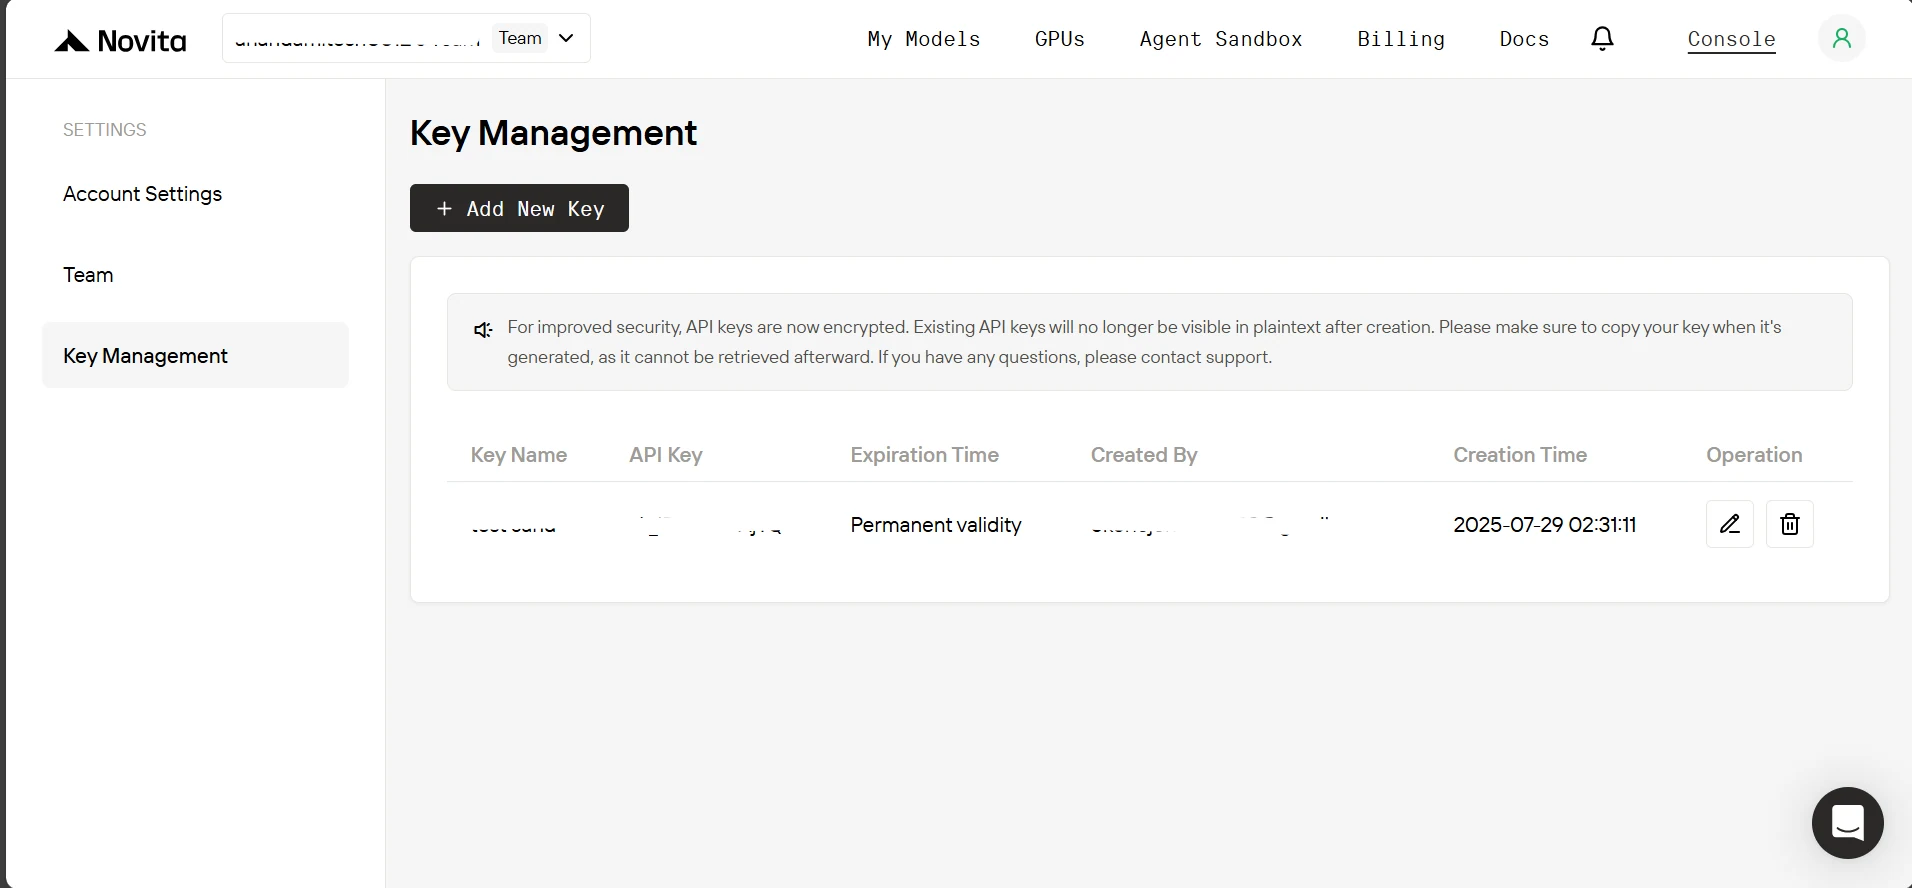
3. Klicke auf der Seite zur Schlüsselverwaltung auf Neuen Schlüssel hinzufügen. Gib im Pop-up einen Namen für deinen Schlüssel ein, klicke auf Bestätigen und kopiere anschließend den generierten Schlüssel.
4. Erstelle nun im Projektverzeichnis eine .env-Datei und füge untenstehenden Inhalt ein.
| NOVITA_API_KEY=“ NOVITA_BASE_URL=“https://api.novita.ai/v3/openai” NOVITA_E2B_DOMAIN=“sandbox.novita.ai” NOVITA_E2B_TEMPLATE=“code-interpreter-v1” |
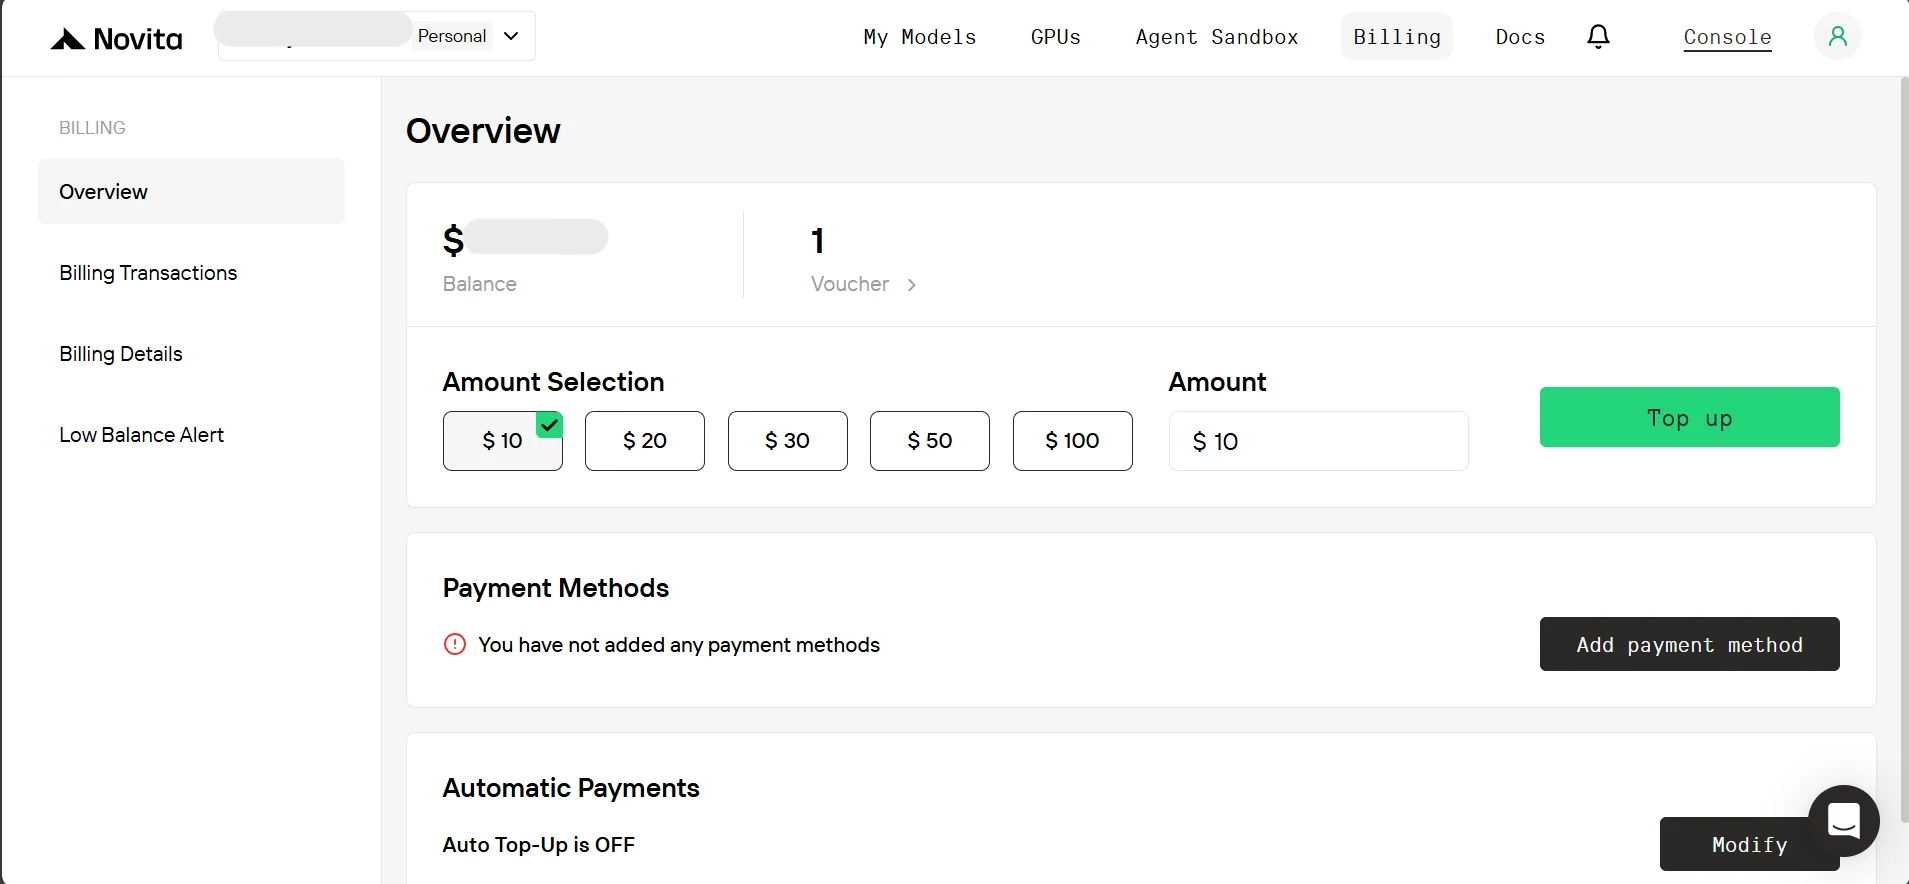
Füge dem Novita AI-Konto Guthaben hinzu.
Um den Novita-Sandbox zu nutzen, musst du deinem Konto Guthaben hinzufügen. Klicke im Dashboard auf den Reiter ‘Abrechnung’. Füge dann auf der Abrechnungsseite eine Zahlungsmethode hinzu und lade mindestens 10 $ Guthaben auf.
Erstellen des Explorative Datenanalyse-Agenten (EDA-Agenten)
Jetzt ist unsere Umgebung eingerichtet und wir haben unseren API-Schlüssel – lass uns unseren Agenten starten.
Herunterladen von Datensätzen (oder Dateien) über die Agent-Browser-Nutzung:
Genau wie ein menschlicher Analyst soll unser Agent Anweisungen entgegennehmen und einen Browser nutzen können, um die Datensätze abzurufen. Wie in browser_agent.py zu sehen, erstellen wir zunächst eine Pydantic-Datenstruktur für die endgültige Ausgabe des Agenten, die die Namen der heruntergeladenen Dateien und die Ergebnisse abgeschlossener Aufgaben enthält, die in eine Datei geschrieben werden sollen.
| … # below existing code class TaskFile(BaseModel): “”“Represents a file generated as part of a task result e.g. scraped data or researched data.”“” filename: str = Field(…, description=“Name of the file including extension”) content: str = Field(…, description=“Text content to be written into the file”) class AgentOutput(BaseModel): “”“Final aggregated output of the browser agent execution.”“” downloaded_files: Optional[list[str]] = Field( None, description=“List of downloaded file names (with extension), if any” ) task_files: Optional[list[TaskFile]] = Field( None, description=“Files generated from user tasks (e.g., scraped or researched data), if any” ) |
Unten ist ein Beispiel dafür, wie der Agent-Browser funktioniert. Wir verwenden ein Large Language Model (LLM) für die Browser-Navigation, das die meisten Anwendungsfälle abdecken sollte. Für komplexere UI-Aufgaben (z. B. Captcha-Lösung) wird jedoch ein Vision-Language-Modell (VLM) empfohlen. Bei Verwendung eines VLM kannst du den Vision-Detailgrad (‘high’, ‘low’ oder ‘auto’) festlegen, um Token-Kosten und Bildklarheit auszugleichen.
Wir erstellen dann eine Browser-Sitzung, konfigurieren das Profil mit einem Download-Pfad (./Download) und user_data_dir (auf None für den Inkognito-Modus gesetzt) und legen unser Pydantic-Modell als Controller fest, um die Agentenausgaben strukturiert zu erhalten. Anschließend starten wir den Agenten mit await agent.run(), und die endgültigen Ergebnisse werden geparst, um die Namen der heruntergeladenen Dateien zu erhalten.
| # A sample of how the browser agent will look agent = Agent( task=“Go to Hugging Face, search for An-j96/SuperstoreData and open its page, then navigate to the Files tab and download the data csv file.”, llm=ChatOpenAI(base_url=novita_base_url, model=novita_model, api_key=novita_api_key), use_vision=False, vision_detail_level=“auto”, # available options [‘low’, ‘high’, ‘auto’]; browser_session=BrowserSession( browser_profile=BrowserProfile( downloads_path=“./Download”, user_data_dir=None ) ), # set the download directory path for the browser. controller=Controller( output_model=AgentOutput ), # Get the agent to output the name of the downloaded file at the end of the task. ) all_results = await agent.run() final_output = AgentOutput.model_validate_json( all_results.final_result() ) # parse the final agent result. |
(Hinweis: Die Ausführung eines Browser-Agenten auf deinem lokalen Rechner startet eine echte Browser-Instanz, sodass du den Ablauf beobachten kannst.) Die vollständige Methode sammelt die Namen der heruntergeladenen Dateien, schreibt die Aufgabenergebnisse in eine Datei und gibt alle Dateipfade für den späteren Upload zurück.
| … # below existing code async def downloading_task_for_browser_agent( task: str, api_key: str, model: str, model_api_base_url: str, use_vision: bool, download_dir_path: str = “./Download”, ) -> Tuple[str, list[str]]: “”“ Will perform the user’s download task via browser use and return download directory path and the downloaded files names. Returns: Tuple of (download_directory, filenames_with_extension) ”“” agent = Agent( task=task, llm=ChatOpenAI( base_url=model_api_base_url, model=model, api_key=api_key, max_completion_tokens=20_000, frequency_penalty=0, # This penalty can slightly affect tool use; keep at 0. ), use_vision=use_vision, vision_detail_level=“auto”, # available options [‘low’, ‘high’, ‘auto’]; browser_session=BrowserSession( browser_profile=BrowserProfile( downloads_path=download_dir_path, user_data_dir=None, # “./browser_user_data” ) ), # set the download directory path for the browser. controller=Controller( output_model=AgentOutput ), # Have the agent output the task execution result according to the AgentOutput schema. max_failures=5, ) try: # Run the agent and structure its output all_results = await agent.run() final_output: AgentOutput = AgentOutput.model_validate_json( all_results.final_result() ) if final_output.task_files: console.print( Panel( f"[bold yellow]Writing task results to files…[/bold yellow] {final_output.task_files}“, title=“Task Results”, border_style=“white”, ) ) # Write each task result to a file in the download directory task_result_files: list[str] = [] for task_file in final_output.task_files or []: file_path = Path(task_file.filename) # Prevent path traversal or unsafe absolute paths if file_path.is_absolute() or “…” in file_path.parts: raise ValueError( f"The agent passed an unsafe file path as a filename: {file_path}” ) # Point the file path inside the download directory file_path = Path(download_dir_path) / file_path # Ensure the download directory exists, else create it. file_path.parent.mkdir(parents=True, exist_ok=True) # Write task result content to a file with open(file_path, “w”, encoding=“utf-8”) as f: f.write(task_file.content) task_result_files.append(task_file.filename) if task_result_files: console.print( Panel( f"[bold green]Task results written to files:[/bold green] {task_result_files}“, title=“Task Results”, border_style=“white”, ) ) # Combine downloaded files with task result files file_results = (final_output.downloaded_files or []) + task_result_files if file_results: console.print( Panel( f”[bold green]Files available:[/bold green] {file_results} in {download_dir_path}“, title=“Downloaded Files”, border_style=“green”, ) ) else: raise RuntimeError(“No files were downloaded or written.”) except Exception as e: file_results = None console.print( Panel( f”[bold red]Error:[/bold red] {str(e)}\ ", title=“Execution Error”, border_style=“red”, ) ) return (download_dir_path, file_results) |
Der Agentenaufruf ist in einen try-except-Block eingeschlossen, sodass bei einem Fehler eine Ausnahme ausgelöst wird und file_results auf None gesetzt wird. Abschließend gibt die Methode sowohl den download_dir_path als auch die file_results-Pfade zurück.
Definieren der Schemata der verfügbaren Tools für unseren Agenten:
Nachdem wir mit der Browser-Nutzung fertig sind, ist es Zeit, die Schemata für die Tools zu definieren, die unserem EDA-Agenten zur Verfügung stehen. Wir stellen vier Tools bereit:
- run_python_code: Ermöglicht dem Agenten, Python-Code innerhalb des Sandbox auszuführen.
- run_on_command_line: Lässt den Agenten Befehle im Sandbox-Terminal ausführen (z. B. Installieren von Python-Paketen).
- sync_with_user: Ermöglicht dem Agenten, erstellte oder aktualisierte Dateien und Verzeichnisse aus dem Sandbox mit deinem lokalen Sync-Ordner zu synchronisieren.
- delete_from_user_sync_folder: Lässt den Agenten Dateien oder Verzeichnisse aus dem lokalen Sync-Ordner entfernen.
Zusammen geben alle diese Tools dem Agenten die volle Kontrolle über Codeausführung, Terminalnutzung und Dateisynchronisation zwischen Sandbox und deinem lokalen System.
In sandbox_eda.py siehst du die Schemata für die Tools:
- run_python_code, das lediglich den auszuführenden Python-Code als Eingabeparameter entgegennimmt und ggf. ein Ergebnis zurückgibt.
| { “type”: “function”, “function”: { “name”: “run_python_code”, “description”: “Runs the python code and returns the result if any.”, “parameters”: { “type”: “object”, “properties”: { “python_code”: { “type”: “string”, “description”: “The Python code to run.”, } }, “required”: [“python_code”], }, }, }, |
- run_on_command_line, das ebenfalls lediglich den auszuführenden Befehl als Eingabeparameter entgegennimmt und ggf. ein Ergebnis zurückgibt.
| { “type”: “function”, “function”: { “name”: “run_on_command_line”, “description”: “Runs the command on the command line and returns the result if any.”, “parameters”: { “type”: “object”, “properties”: { “command”: { “type”: “string”, “description”: “The command to run on the command line.”, } }, “required”: [“command”], }, }, }, |
- sync_with_user, das zwei Eingabeparameter entgegennimmt:
- sandbox_path: Der Pfad zur Datei oder zum Verzeichnis innerhalb des Sandbox.
- path_on_user_sync_folder: Der Pfad, den die Datei oder das Verzeichnis im Sync-Ordner des Benutzers haben soll.
Dieser zweite Pfad hat die Form (z. B. /new.txt), wobei davon ausgegangen wird, dass der Sync-Ordner das übergeordnete Verzeichnis ist. Beispielsweise werden wir /new.txt später zu sync_folder/new.txt auflösen.
| { “type”: “function”, “function”: { “name”: “sync_with_user”, “description”: “Will sync a file or directory on sandbox, to the sync folder on the user’s computer”, “parameters”: { “type”: “object”, “properties”: { “sandbox_path”: { “type”: “string”, “description”: “Path to the file or directory on the sandbox.”, }, “path_on_user_sync_folder”: { “type”: “string”, “description”: “Relative path where the file or directory will be placed inside the user’s sync folder. For example, ‘/hello.txt’ goes directly in the sync folder, while ‘/run1/hello.txt’ will be placed in a ‘run1’ subfolder within the sync folder.”, }, }, “required”: [“sandbox_path”, “path_on_user_sync_folder”], }, }, }, |
- delete_from_user_sync_folder, das nur einen Eingabeparameter entgegennimmt:
- path_on_user_sync_folder: Der Pfad zur Datei oder zum Verzeichnis, das der Agent aus dem Sync-Ordner des Benutzers löschen möchte.
Hinweis: Dies folgt den gleichen Pfadannahmen wie bei sync_with_user.
| { “type”: “function”, “function”: { “name”: “delete_from_user_sync_folder”, “description”: “Will delete a file or directory from the sync folder on the user’s computer”, “parameters”: { “type”: “object”, “properties”: { “path_on_user_sync_folder”: { “type”: “string”, “description”: “Relative path to the file or directory on the user’s sync folder. For example, ‘/hello.txt’ will delete it directly from the sync folder, while ‘/run1/hello.txt’ will delete it directly from ‘run1’ subfolder within the sync folder.”, } }, “required”: [“path_on_user_sync_folder”], }, }, }, |
Implementieren der verfügbaren Funktionen:
Zuerst haben wir eine SandboxEDA-Klasse, die die folgenden Parameter entgegennimmt:
- sandbox: Die Sandbox-Instanz.
- model_base_url und model_api_key: Zum Herstellen einer Verbindung zum Novita-Modell.
- max_consecutive_function_calls_allowed: Standardmäßig auf 30 gesetzt, um unendliche Funktionsaufruf-Schleifen des Agenten zu verhindern, wie wir später sehen werden.
| … # below existing code class SandboxEDA: def __init__( self, sandbox: Sandbox, model_api_base_url: str, model_api_key: str, max_consecutive_function_calls_allowed: int = 30, ): self.sandbox = sandbox self.model_api_base_url = model_api_base_url self.model_api_key = model_api_key self.max_consecutive_function_calls_allowed = ( max_consecutive_function_calls_allowed ) |
Dann run_python_code als Methode der SandboxEDA-Klasse. Die Methode nimmt den Python-Code als Eingabe entgegen und verwendet die sandbox-Instanz zur Ausführung. Wenn die Ausgaben zurückgegeben werden, werden alle Bildausgaben (Hinweis: Sie sind base64-kodiert) im Verzeichnis temp_image_output gespeichert. Abschließend gibt die Methode ein Wörterbuch zurück, das die Bildausgaben, weitere Ausgaben, Protokolle und etwaige Fehler enthält.
| … # below existing code class SandboxEDA: … # below existing code def run_python_code(self, python_code: str) -> dict: “”“ Runs the python code on the sandbox, and if there are any images save them locally. Args: python_code (str): The python code to run. Returns: dict: Containing the base64 image outputs and other outputs (stdout, logs, error, etc). ”“” execution = self.sandbox.run_code(python_code, language=“python”) image_outputs = [result.png for result in execution.results if result.png] # Iterate through the base64 encoded images and save them to a file with name format: temp-{timestamp}.png to ./temp_image_output dir for b64_image in image_outputs: timestamp = int(time.time_ns()) image_filename = Path(f"./temp_image_output/temp-{timestamp}.png") # Will create the temp_image_output directory if it doesn’t exist already. image_filename.parent.mkdir(parents=True, exist_ok=True) with open(image_filename, “wb”) as f: f.write(base64.b64decode(b64_image)) return { “image_outputs”: image_outputs, “other_outputs”: { “outputs”: [result for result in execution.results if not result.png], “logs”: execution.logs, “error”: execution.error, }, } |
Als Nächstes die Methode run_on_command_line. Diese führt den Befehl ebenfalls auf der Sandbox-Instanz aus und gibt dann ein Wörterbuch mit den Ausgaben zurück. Wenn die Ausführung fehlschlägt, gibt sie ein Wörterbuch mit None für die Ausgaben zurück und setzt „execution error“ auf die Fehlermeldung.
| … # below existing code class SandboxEDA: … # below existing code def run_on_command_line(self, command: str) -> dict: “”“ Runs the command on the sandbox. Args: command (str): The command to run. Returns: dict: Containing the output of the command and the execution error if any. ”“” try: result = self.sandbox.commands.run(command) return { “output”: { “stdout”: result.stdout, “stderr”: result.stderr, “exit_code”: result.exit_code, “error”: result.error, }, “execution error”: None, } except Exception as e: return {“output”: None, “execution error”: str(e)} |
Und die Methode sync_with_user. Wie bereits beschrieben, nimmt sie den sandbox_path und den path_on_user_sync_folder entgegen. Wenn der Sandbox-Pfad auf eine Datei verweist, lädt sie die Datei aus dem Sandbox in die entsprechenden Sync-Ordner-Speicherorte herunter. Wenn es sich um ein Verzeichnis handelt, durchläuft die Methode rekursiv alle untergeordneten Inhalte und lädt jede Datei an die entsprechenden Speicherorte herunter. Bei Erfolg geben wir „Sync Successful“ zurück, andernfalls die Ausnahmemeldung.
| … # below existing code class SandboxEDA: … # below existing code def sync_with_user(self, sandbox_path, path_on_user_sync_folder): “”“ Downloads a file or directory from the sandbox to the user’s sync folder. Args: sandbox_path (str): The path of the file or directory to sync in the sandbox. path_on_user_sync_folder (str): The relative destination path of the file or directory in the user’s sync folder. Returns: str: “Sync Successful” if the file or directory was synced successfully, otherwise an error message. ”“” try: path_info = self.sandbox.files.get_info(sandbox_path) if path_info.type == FileType.DIR: # If its a directory loop through the contents and download them. dir_contents = self.sandbox.files.list(sandbox_path) for content in dir_contents: path_to_content_in_sync_folder = Path( path_on_user_sync_folder ).joinpath(content.name) self.sync_with_user(content.path, path_to_content_in_sync_folder) elif path_info.type == FileType.FILE: # Ensure the file is always inside ./sync_folder. sandbox_path_obj = Path(path_on_user_sync_folder) # Make the path relative by stripping any root or drive component relative_path = sandbox_path_obj.relative_to( sandbox_path_obj.anchor or “.” ) # Final path inside sync_folder file_path = Path(“sync_folder”) / relative_path # Will create any directory in the path that doesn’t exist already. file_path.parent.mkdir(parents=True, exist_ok=True) # Download the file to sync folder. file_content = self.sandbox.files.read(sandbox_path, “bytes”) with open(file_path, “wb”) as f: f.write(file_content) return “Sync Successful” except Exception as e: return str(e) |
Abschließend die Methode delete_from_user_sync_folder. Wie bereits beschrieben nimmt sie ebenfalls path_on_user_sync_folder entgegen. Dann löschen wir die entsprechende Datei oder das entsprechende Verzeichnis, falls es existiert, und geben „Deletion Successful“ zurück, andernfalls die Ausnahmemeldung.
| … # below existing code class SandboxEDA: … # below existing code def delete_from_user_sync_folder(self, path_on_user_sync_folder): “”“ Deletes a file or directory from the user sync folder. Args: path_on_user_sync_folder (str): The path of the file or directory to delete in the user sync folder. Returns: str: “Deletion Successful” if the file or directory was deleted successfully, otherwise an error message. ”“” # Ensure the file is always inside ./sync_folder. sandbox_path_obj = Path(path_on_user_sync_folder) # Make the path relative by stripping any root or drive component relative_path = sandbox_path_obj.relative_to(sandbox_path_obj.anchor or “.”) # Final path inside sync_folder delete_path = Path(“sync_folder”) / relative_path try: if not delete_path.exists(): raise Exception( f"File or Directory does not exist at {path_on_user_sync_folder} in sync folder." ) if delete_path.is_file(): delete_path.unlink() elif delete_path.is_dir(): shutil.rmtree(str(delete_path)) return “Deletion Successful” except Exception as e: return str(e) |
Weitere Sandbox-Funktionen:
1. Methode zum Hochladen von Dateien in den Sandbox.
| … # below existing code class SandboxEDA: … # below existing code def upload_files_to_sandbox( self, file_paths: list[str], file_names_in_sandbox: list[str] ): “”“ Uploads files to the sandbox. Args: file_paths (list[str]): File paths of the files to upload (eg [”./Download/data.csv", “./Download/data2.csv”]). file_names_in_sandbox (list[str]): The names the files will take in the sandbox (eg [“data.csv”, “data2.csv”]). Note: The files will be uploaded to the sandbox’s /home/user directory (e.g ./home/user/data.csv, ./home/user/data2.csv). “”“ console.print( f”[yellow]Uploading files(s) at {file_paths} to Sandbox[/yellow] (id: {self.sandbox.sandbox_id})“ ) for file_path, file_name_in_sandbox in zip(file_paths, file_names_in_sandbox): with open(file_path, “rb”) as file: self.sandbox.files.write(file_name_in_sandbox, file) console.print( f”[bold cyan]Files(s) {file_paths} uploaded to Sandbox[/bold cyan] (id: {self.sandbox.sandbox_id})" ) |
2. Methode zum Auflisten des Inhalts des Sandbox-Hauptverzeichnisses (/home/user).
| … # below existing code class SandboxEDA: … # below existing code def list_files_in_sandbox_main_dir(self) -> list[str]: return [i.name for i in self.sandbox.files.list(“/home/user”)] |
Aufbau der Interaktion mit dem Agenten:
Jetzt sehen wir uns eine Methode zur Interaktion mit dem Agenten an. Zuvor werfen wir einen Blick auf die parametrisierte System-Prompt-Anweisung in prompts/system_prompt.py.
| SYSTEM_PROMPT = “”“ You are an Exploratory Data Analysis (EDA) agent and you have access to a sandbox (with internet access) where you can: - Execute python code using the run_python_code function call. - You can basically do anything you can do on a linux machine via the run_on_command_line or run_python_code function call. - You can sync whatever directory (may be preferred for structure eg website) or file you have created, written to or updated to the user’s sync folder on their local machine through the sync_with_user function call. - You can delete any of those directory or file from the user’s sync folder on their local machine through the delete_from_user_sync_folder function call. Your current PWD is ‘/home/user’ and below are the files in it. {list_sandbox_files} Note: - The sandbox already comes pre-installed with the usual data analysis packages but if there’s a package you are not sure exists or your code had an import error due to a missing package, you can check if it’s installed and if not install it. - For image outputs (e.g from data visualization) make sure it is png format. Function Call Guidelines: - Always use run_python_code to perform any task unless you absolutely need to use run_on_command_line (e.g to install packages, etc) - Chain function calls when needed: After receiving results from one function call, immediately make additional calls if more information is required - Gather just the needed information first: Respond to the user only when you have at least enough information from function calls to provide a good answer - Be efficient: Although there is a maximum limit of {max_consecutive_function_calls_allowed} consecutive function calls try to make as less calls as possible to get just enough information. - Don’t just assume the user will read the output of the tool call respond to them with your answer. Be a helpful assistant to the user who is probably trying to perform EDA on dataset files ({downloaded_dataset_names}) at (/home/user/) directory. You can perform the following function calls: {available_function_calls_schema} ”“” |
Nun zur Methode eda_chat in der Klasse SandboxEDA. Diese Methode nimmt die Namen der Dateien entgegen, die in den Sandbox hochgeladen wurden (wir kümmern uns um den Upload vor dem Start des Chats, wie wir später sehen werden) sowie den Namen des zu verwendenden Novita-Modells.
1. Zuerst richten wir den OpenAI-Client so ein, dass er über die Basis-URL auf Novita verweist, und initialisieren die Konversation mit dem System-Prompt als erste Nachricht.
| … # below existing code class SandboxEDA: … # below existing code def eda_chat( self, downloaded_dataset_names: list[str], model_for_eda: str, ): “”“ Interactive EDA session with AI agent capable of code execution and terminal commands Args: downloaded_dataset_names (list[str]): The names of the downloaded datasets. model_for_eda (str, optional): The underlying model to use. ”“” console.print( Panel( “[bold green]EDA Session Started[/bold green]\ Type ‘quit()’ to exit.”, title=“Exploratory Data Analysis”, border_style=“green”, ) ) client = OpenAI( base_url=self.model_api_base_url, api_key=self.model_api_key, ) # Initialize conversation with system prompt messages = [ { “role”: “system”, “content”: SYSTEM_PROMPT.format( downloaded_dataset_names=str(downloaded_dataset_names), list_sandbox_files=str(self.list_files_in_sandbox_main_dir()), available_function_calls_schema=str( AVAILABLE_FUNCTION_CALL_SCHEMAS ), max_consecutive_function_calls_allowed=self.max_consecutive_function_calls_allowed, ), } ] |
2. Als Nächstes ist die Haupt-Chat-Schleife eine While-Schleife, in der wir die Benutzernachricht entgegennehmen und zum vorhandenen Nachrichtenverlauf hinzufügen. Um unendliche aufeinanderfolgende Tool-Aufrufe zu verhindern, gibt es innerhalb der While-Schleife eine For-Schleife, die bis zum Limit läuft und eine Ausnahme auslöst, wenn dieses erreicht ist. Anschließend wird das Modell mit den Nachrichten abgefragt.
| … # below existing code # Main chat loop while True: user_input = Prompt.ask(“\ [bold yellow]>>> User Message[/bold yellow]”) if user_input.lower().strip() == “quit()”: break messages.append({“role”: “user”, “content”: user_input}) # Handle potential consecutive tool calls with a safety limit to avoid infinite loops for i in range(self.max_consecutive_function_calls_allowed + 1): if i == self.max_consecutive_function_calls_allowed: raise Exception( f"Consecutive tool calls from the Agent must not exceed {self.max_consecutive_function_calls_allowed}." ) response = client.chat.completions.create( model=model_for_eda, messages=messages, tools=AVAILABLE_FUNCTION_CALL_SCHEMAS, frequency_penalty=0, ) response_message = response.choices[0].message |
3. Als Nächstes prüfen wir, ob das Modell einen Tool-Aufruf durchführen möchte. Wenn ja, führen wir das Tool mit den vom Modell bereitgestellten Argumenten aus, geben die Ausgabe im Terminal für den Benutzer aus (oder zeigen ggf. ein Bild an) und geben die Ausgabe dann an das Modell zurück, beginnend mit dem Tool-Aufruf run_python_code.
| … # below existing code tool_calls = response_message.tool_calls if tool_calls: messages.append( response_message ) # Add assistant message that triggered tool calls # Execute each requested tool call for tool_call in tool_calls: name = tool_call.function.name args = json.loads(tool_call.function.arguments) if name == “run_python_code”: console.print( Panel( args[“python_code”], title=“Agent Executing Python Code”, border_style=“blue”, ) ) code_result = self.run_python_code(args[“python_code”]) messages.append( { “tool_call_id”: tool_call.id, “role”: “tool”, “name”: name, # If there are any image outputs (e.g data visualization), as it is not yet possible to return images # from a tool call just inform the Agent that the image has been shown to the user. “content”: [ { “type”: “text”, “text”: ( f"THE IMAGES HAS ALREADY BEEN SHOW TO THE USER ON THE TERMINAL AND SAVED TO TEMP FILES eg temp-{{timestamp}}.png on the user’s computer in ./temp_image_output dir, THE OTHER OUTPUTS ARE BELOW\ {code_result[‘other_outputs’]}“ if code_result[“image_outputs”] else f”{code_result[‘other_outputs’]}" ), } ], } ) display_sandbox_code_output(code_result) |
3b. Tool-Aufruf run_on_command_line.
| … # below existing code elif name == “run_on_command_line”: console.print( Panel( args[“command”], title=“Agent Executing Command On Terminal”, border_style=“blue”, ) ) command_result = self.run_on_command_line(args[“command”]) messages.append( { “tool_call_id”: tool_call.id, “role”: “tool”, # Indicates this message is from tool use “name”: name, “content”: str(command_result), } ) display_sandbox_command_output(command_result) |
3c. sync_with_user Tool-Aufruf.
| … # below existing code elif name == “sync_with_user”: console.print( Panel( f"[bold yellow]Agent Started Syncing {args[‘sandbox_path’]} To User’s Sync Folder ({args[‘path_on_user_sync_folder’]})[/bold yellow]", title=“File Syncing”, border_style=“white”, ) ) sync_result = self.sync_with_user( args[“sandbox_path”], args[“path_on_user_sync_folder”] ) messages.append( { “tool_call_id”: tool_call.id, “role”: “tool”, # Indicates this message is from tool use “name”: name, “content”: sync_result, } ) … # skipped for brevity |
3d. Tool-Aufruf delete_from_user_sync_folder und Auslösen eines unbekannten Fehlers, wenn nicht existierende Funktionsaufrufe vorliegen.
| … # below existing code elif name == “delete_from_user_sync_folder”: console.print( Panel( f"[bold yellow]Agent Deleting File(s) From User’s Sync Folder ({args[‘path_on_user_sync_folder’]})[/bold yellow]“, title=“File Syncing”, border_style=“white”, ) ) delete_result = self.delete_from_user_sync_folder( args[“path_on_user_sync_folder”] ) messages.append( { “tool_call_id”: tool_call.id, “role”: “tool”, # Indicates this message is from tool use “name”: name, “content”: delete_result, } ) … # skipped for brevity else: raise ValueError(f"Unknown Function Call: {name}”) |
4. Wenn die letzte Antwort des Agenten kein Tool-Aufruf ist, gib seine Antwort an den Benutzer aus und verlasse die Schleife für das Limit aufeinanderfolgender Tool-Aufrufe.
| … # below existing code else: # No tool calls just display assistant response after adding it to the messages. messages.append( {“role”: “assistant”, “content”: response_message.content} ) console.print( f"[bold green]>>> Assistant Response: {response_message.content} [/]" ) break |
Orchestrierung des Agentenablaufs:
Schließlich haben wir main.py als Einstiegspunkt unserer Anwendung, der alles zusammenführt. Darin startet die Methode start_eda eine neue Sandbox-Sitzung. Der Parameter sandbox_timeout legt fest, wie lange der Sandbox aktiv bleibt, bevor er automatisch beendet wird; für unsere Demo setzen wir ihn auf 900 Sekunden (≈15 Minuten).
Nachdem der Sandbox erstellt wurde, laden wir Dateien in ihn hoch und starten dann die Methode eda_chat, um mit dem Agenten zu interagieren.
| … # below existing code def start_eda( model_for_eda: str, dataset_paths: list[str], dataset_file_names: list[str], api_key_for_sandbox_and_model: str, model_api_base_url: str, sandbox_domain: str, sandbox_template: str, sandbox_timeout: int, ): with Sandbox( template=sandbox_template, api_key=api_key_for_sandbox_and_model, domain=sandbox_domain, timeout=sandbox_timeout, ) as sandbox: try: sandbox_eda = SandboxEDA( sandbox, model_api_base_url, api_key_for_sandbox_and_model ) console.print( f"[bold cyan]Started Sandbox[/bold cyan] (id: {sandbox.sandbox_id})“ ) sandbox_eda.upload_files_to_sandbox(dataset_paths, dataset_file_names) sandbox_eda.eda_chat(dataset_file_names, model_for_eda) console.print( f”\ \ [bold cyan]------ EDA Session Completed for Sandbox (id: {sandbox.sandbox_id}) ------[/]“ ) finally: console.print( f”[bold cyan]----- Closed Sandbox (id: {sandbox.sandbox_id})-----[/]\ " ) |
Unten ist die main-Methode als Startpunkt unserer Anwendung:
| … # below existing code async def main( api_key_for_sandbox_and_model: str, model_api_base_url: str, model_for_browser_agent: str, enable_vision_for_browser_agent: bool, model_for_eda: str, sandbox_domain: str, sandbox_template: str, sandbox_timeout_seconds: int, ): while True: # Welcome Banner console.print( Panel( “[bold white]Welcome To Agentic Exploratory Data Analysis[/bold white]\ \ “ ”[grey]How would you like to proceed:[/grey]\ “ ”[grey]1.[/grey] Download a dataset first.\ “ ”[grey]2.[/grey] Proceed with already downloaded dataset.\ “ ”[grey]3.[/grey] Exit”, title=“MAIN MENU”, border_style=“green”, width=70, ) ) choice = Prompt.ask( “\ [bold yellow]Enter your choice[/bold yellow]”, choices=[“1”, “2”, “3”] ).strip() if choice == “1”: result = await choice_download_dataset( api_key_for_sandbox_and_model, model_api_base_url, model_for_browser_agent, enable_vision_for_browser_agent, ) if result: download_path, filenames = result DATASET_PATHS = [ str(Path(download_path) / filename) for filename in filenames ] DATASET_FILE_NAMES = filenames else: continue # User returned to main menu elif choice == “2”: result = choice_proceed_with_already_downloaded_datasets() if result: DATASET_PATHS = result DATASET_FILE_NAMES = [os.path.basename(path) for path in result] else: continue # since user click back to main menu. elif choice == “3”: break # Start the EDA session start_eda( model_for_eda, DATASET_PATHS, DATASET_FILE_NAMES, api_key_for_sandbox_and_model, model_api_base_url, sandbox_domain, sandbox_template, sandbox_timeout_seconds, ) |
Da main.py als Skript ausgeführt wird, fügen wir untenstehenden Code hinzu, der auch unsere Umgebungsvariablen, den Sandbox-Timeout und die Novita-Modelle, die wir verwenden möchten, übergibt:
| … # below existing code if __name__ == “__main__”: NOVITA_API_KEY = os.getenv(“NOVITA_API_KEY”) NOVITA_BASE_URL = os.getenv(“NOVITA_BASE_URL”) NOVITA_E2B_DOMAIN = os.getenv(“NOVITA_E2B_DOMAIN”) NOVITA_E2B_TEMPLATE = os.getenv(“NOVITA_E2B_TEMPLATE”) NOVITA_MODEL_FOR_BROWSER_AGENT = “qwen/qwen3-coder-480b-a35b-instruct” ENABLE_VISION_FOR_BROWSER_AGENT = ( False # If true make sure the browser agent model has vision capabilities. ) NOVITA_MODEL_FOR_EDA = “qwen/qwen3-coder-480b-a35b-instruct” NOVITA_SANDBOX_TIMEOUT_SECONDS = 900 # 900 seconds (15 minutes), sandbox instance will be killed automatically after. asyncio.run( main( NOVITA_API_KEY, NOVITA_BASE_URL, NOVITA_MODEL_FOR_BROWSER_AGENT, ENABLE_VISION_FOR_BROWSER_AGENT, NOVITA_MODEL_FOR_EDA, NOVITA_E2B_DOMAIN, NOVITA_E2B_TEMPLATE, NOVITA_SANDBOX_TIMEOUT_SECONDS, ) ) |
Testen unseres EDA-Agenten:
Führe den folgenden Befehl im Terminal aus
| uv run main.py |
Fazit
Herzlichen Glückwunsch zum Erstellen deines Explorative Datenanalyse-Agenten. Du kannst ihn nun bitten, Websites, PowerPoint-Präsentationen usw. unter Verwendung von Analysen/Erkenntnissen aus beliebigen Datensatzdateien zu erstellen, und die Ergebnisse werden direkt mit deinem lokalen Rechner synchronisiert.
Zur kurzen Wiederholung: In diesem Artikel hast du gelernt, wie du einen Agenten erstellst, der Anweisungen entgegennehmen, dann den Browser zur Navigation im Web und zum Herunterladen von Dateien nutzen, Code und Befehle im Novita-Sandbox ausführen sowie Dateien und Verzeichnisse mit deinem lokalen Rechner synchronisieren kann.
Dies ist nur die Spitze des Eisbergs: Du kannst deinen Agenten erweitern, um eine Verbindung zu Datenbanken herzustellen, Tools wie Google Docs über MCP zu integrieren und vieles mehr. Gehe zu Novita, um deine Ideen zum Leben zu erwecken!
Novita AI ist eine KI-Cloud-Plattform, die Entwicklern eine einfache Möglichkeit bietet, KI-Modelle über unsere einfache API bereitzustellen, und gleichzeitig eine erschwingliche und zuverlässige GPU-Cloud zum Erstellen und Skalieren bereitstellt.