

你有一個 AI 代理,希望它在安全的環境中運行,能夠存取檔案系統等正確資源、執行指令(例如 shell 指令),又不用擔心「搞壞任何東西」的風險,那麼你有什麼選擇呢?
最佳做法是為你的 AI 代理提供一個 沙箱(sandbox)。在沙箱內,代理可以安全地與 Linux 機器互動、操作檔案系統、執行特定指令,同時被限制執行可能有害的操作。
有了這樣的設定,我們就能構建強大的應用程式。例如,一個可以完成以下任務的 編碼代理:
- 在檔案系統中建立和編輯程式碼檔案
- 執行 git、python 或 node 等指令
- 直接在環境中執行和測試程式碼,與開發者協作
本文將一步步帶你構建這樣的編碼代理。我們會使用支援函式呼叫的 Novita LLM,搭配作為安全環境的 Novita 代理沙箱,最後還會用 Gradio 打造友善的使用者介面,並部署到 Hugging Face Spaces。
讓我們開始吧!
Agent Sandbox
Novita 的 Agent Sandbox 是專為 AI 代理設計的執行環境,提供安全隔離的雲端設定,功能類似虛擬電腦。在此環境中,代理可以安全執行生成的程式碼,無需擔心影響底層系統。
Novita Agent Sandbox 的主要功能
- 安全: 沙箱完全隔離,代理只能存取自身的資源。
- 快速啟動: 新環境可在 200 毫秒內完成啟動。
- 虛擬機器: 由於沙箱的行為類似 VM,代理可以執行任何程式語言的程式碼。
- 暫停與恢復: 你可以隨時暫停沙箱,之後再恢復執行。
- 背景任務: 代理可以在背景執行任務,非同步獲取結果。
安裝 SDK
要使用 Novita Sandbox,你需要安裝支援 Python 與 TypeScript/JavaScript 的 SDK。本次教學我們將使用 Python SDK:
pip install novita-sandbox
安裝完成後,將你的 Novita API 金鑰 設定為環境變數:
export NOVITA\_API\_KEY=your\_api\_key\_here
測試沙箱
所有設定完成後,我們來建立一個沙箱並執行幾個基本操作:
from novita_sandbox.code_interpreter import Sandbox

sandbox = Sandbox.create()

files = sandbox.files.list("/")

for file in files:
    print(file.name)

result = sandbox.commands.run('pwd')
print(result)

sandbox.kill()
這個範例展示了如何:
- 建立沙箱實例
- 透過
files物件存取檔案系統 - 使用
commands.run方法執行指令 - 完成後使用
kill釋放資源
現在我們已經了解了存取檔案系統和執行指令的基礎操作,接下來就可以構建使用這些沙箱功能作為工具的編碼代理了。
構建編碼代理
要構建編碼代理,我們需要一個支援函式呼叫的 LLM。Novita 提供了多款符合需求的模型。要讓代理的行為像編碼助手,它必須有一組正確的函式。
我們先想想人類程式設計師通常會做什麼:他們會編寫、讀取和執行程式碼。因此我們的代理應該要能:
- 寫入檔案
- 讀取檔案
- 執行指令
- 一次寫入多個檔案
設定代理
由於 Novita 的模型與 OpenAI 相容,我們可以使用 OpenAI SDK 與其互動。先來安裝它:
pip install openai
安裝完成後,和之前一樣將你的 Novita API 金鑰 設定為環境變數。完成後,我們就可以開始寫程式碼,先加入必要的 import:
from openai import OpenAI
import os
import json
from novita_sandbox.code_interpreter import Sandbox
現在,我們來建立 OpenAI 客戶端實例:
client = OpenAI(
    base_url="https://api.novita.ai/openai",
    api_key=os.environ["NOVITA_API_KEY"],
)
這裡我們將客戶端指向 Novita 的 base URL 而非 OpenAI 的,並使用 Novita API 金鑰進行驗證。
接下來,我們建立代理將使用的沙箱實例:
sandbox = Sandbox.create(timeout=1200)
timeout 參數指定沙箱要保持活躍的時長,此處我們設定為 10 分鐘。
函式定義
現在我們可以定義代理將使用的函式。
1. 讀取檔案
這個函式接收檔案路徑,使用沙箱的 files 物件讀取其內容。
def read_file(path: str):

   print(f"[DEBUG] read_file called with path: {path}")

   try:

       content = sandbox.files.read(path)

       print(f"[DEBUG] read_file result: {content}")

       return content  # returns string content

   except Exception as e:

       print(f"[DEBUG] read_file error: {e}")

       return f"Error reading file: {e}"
2. 寫入檔案
這個函式將資料寫入指定的檔案路徑。
def write_file(path: str, data: str):
   print(f"[DEBUG] write_file called with path: {path}")
   try:
       sandbox.files.write(path, data)
       msg = f"File created successfully at {path}"
       print(f"[DEBUG] {msg}")
       return msg
   except Exception as e:
       print(f"[DEBUG] write_file error: {e}")
       return f"Error writing file: {e}"
3. 寫入多個檔案
這個函式的功能與 write_file 類似,但可一次處理多個檔案。
def write_files(files: list):
   print(f"[DEBUG] write_files called with {len(files)} files")
   try:
       sandbox.files.write_files(files)
       msg = f"{len(files)} file(s) created successfully"
       print(f"[DEBUG] {msg}")
       return msg
   except Exception as e:
       print(f"[DEBUG] write_files error: {e}")
       return f"Error writing multiple files: {e}"
4. 執行指令
這個函式在沙箱內執行 shell 指令,並回傳標準輸出。
def run_commands(command: str):
   print(f"[DEBUG] run_commands called with commands: {command}")
   try:
       result = sandbox.commands.run(command)
       print(f"[DEBUG] run_commands result: {result}")
       return result.stdout  # returns CommandResult object
   except Exception as e:
       print(f"[DEBUG] run_commands error: {e}")
       return f"Error running commands: {e}"
工具註冊
現在我們已經有了所有函式,接下來要將它們註冊為 LLM 需要時可以呼叫的工具。每個工具定義包含函式名稱、描述和參數結構描述。
tools = [

   {

       "type": "function",

       "function": {

           "name": "read_file",

           "description": "Read contents of a file inside the sandbox",

           "parameters": {

               "type": "object",

               "properties": {

                   "path": {"type": "string", "description": "File path in the sandbox"}

               },

               "required": ["path"],

           },

       },

   },

   {

       "type": "function",

       "function": {

           "name": "write_file",

           "description": "Write a single file inside the sandbox",

           "parameters": {

               "type": "object",

               "properties": {

                   "path": {"type": "string", "description": "File path in the sandbox"},

                   "data": {"type": "string", "description": "Content to write"},

               },

               "required": ["path", "data"],

           },

       },

   },

   {

       "type": "function",

       "function": {

           "name": "write_files",

           "description": "Write multiple files inside the sandbox",

           "parameters": {

               "type": "object",

               "properties": {

                   "files": {

                       "type": "array",

                       "items": {

                           "type": "object",

                           "properties": {

                               "path": {"type": "string"},

                               "data": {"type": "string"},

                           },

                           "required": ["path", "data"],

                       },

                   }

               },

               "required": ["files"],

           },

       },

   },

   {

       "type": "function",

       "function": {

           "name": "run_commands",

           "description": "Run a single shell command inside the sandbox working directory",

           "parameters": {

               "type": "object",

               "properties": {

                   "command": {

                       "type": "string",

                       "description": "The shell command to run, e.g. 'ls' or 'python main.py'",

                   }

               },

               "required": ["command"],

           },

       },

   }

]
工具註冊完成後,我們接著建立會使用代理和所有已定義工具的聊天循環。
聊天循環
現在我們建立一個簡單的聊天循環,讓使用者能與編碼代理互動。這個循環會維護一個訊息清單,並在代理提出請求時處理函式呼叫。
messages = []

print("💬 Enter your queries (type 'exit' to quit):")

while True:

   user_input = input("You: ")

   if user_input.lower() == "exit":

       break

   # Append user message

   messages.append({"role": "user", "content": user_input})

   # Send to model

   response = client.chat.completions.create(

       model=model,

       messages=messages,

       tools=tools,

   )

   assistant_msg = response.choices[0].message

   messages.append(assistant_msg)

   if assistant_msg.tool_calls:

       print(f"[DEBUG] Assistant requested {len(assistant_msg.tool_calls)} tool call(s).")

       for tool_call in assistant_msg.tool_calls:

           fn_name = tool_call.function.name

           fn_args = json.loads(tool_call.function.arguments)

           print(f"[DEBUG] Tool call detected: {fn_name} with args {fn_args}")

           if fn_name == "read_file":

               fn_result = read_file(**fn_args)

           elif fn_name == "write_file":

               fn_result = write_file(**fn_args)

           elif fn_name == "write_files":

               fn_result = write_files(**fn_args)

           elif fn_name == "run_commands":

               fn_result = run_commands(**fn_args)

           else:

               fn_result = f"Error: Unknown tool {fn_name}"

               print(f"[DEBUG] Unknown tool requested: {fn_name}")

           # Append result back

           messages.append({

               "tool_call_id": tool_call.id,

               "role": "tool",

               "content": str(fn_result),

           })

       # Get model's final answer with tool results

       follow_up = client.chat.completions.create(

           model=model,

           messages=messages,

       )

       final_answer = follow_up.choices[0].message

       messages.append(final_answer)

       print("Assistant:", final_answer.content)

   else:

       print("Assistant:", assistant_msg.content)

sandbox.kill()

print("[DEBUG] Sandbox terminated. 👋")
這個聊天循環會持續互動,讓代理在需要時呼叫任何已註冊的工具,並在使用者退出時清理沙箱。
使用 Gradio 建立使用者介面
現在我們已經有一個功能完整的編碼代理,可以與我們聊天,但透過 REPL 互動並不夠吸引人。我們為代理打造一個簡單的 Gradio 介面,讓體驗更生動。
建立 Gradio 使用者介面非常簡單。我們會使用 gr.ChatInterface 管理聊天互動,並連結到我們之前寫好的邏輯。同時,我們還會加入一個指令介面,用於在沙箱內執行 shell 指令,以及一個下拉選單讓你可以選擇要使用的模型。
要將之前的程式碼更新為支援 Gradio,我們會把聊天循環和最後兩行替換為以下內容:
    # --- Persistent chat messages ---

    messages = []

    # --- Global model setter ---

    def set_model(selected_model):

       global model

       model = selected_model

       print(f"[DEBUG] Model switched to: {model}")

       return f"✅ Model switched to **{model}**"

    def chat_fn(user_message, history):

       global messages, model

       messages.append({"role": "user", "content": user_message})

       # Send to model

       response = client.chat.completions.create(

           model=model,

           messages=messages,

           tools=tools,

       )

       assistant_msg = response.choices[0].message

       messages.append(assistant_msg)

       output_text = ""

       if assistant_msg.tool_calls:

           print(f"[DEBUG] Assistant requested {len(assistant_msg.tool_calls)} tool call(s).")

           for tool_call in assistant_msg.tool_calls:

               fn_name = tool_call.function.name

               fn_args = json.loads(tool_call.function.arguments)

               print(f"[DEBUG] Tool call detected: {fn_name} with args {fn_args}")

               if fn_name == "read_file":

                   fn_result = read_file(**fn_args)

               elif fn_name == "write_file":

                   fn_result = write_file(**fn_args)

               elif fn_name == "write_files":

                   fn_result = write_files(**fn_args)

               elif fn_name == "run_commands":

                   fn_result = run_commands(**fn_args)

               else:

                   fn_result = f"Error: Unknown tool {fn_name}"

               messages.append({

                   "tool_call_id": tool_call.id,

                   "role": "tool",

                   "content": str(fn_result),

               })

           follow_up = client.chat.completions.create(

               model=model,

               messages=messages,

           )

           final_answer = follow_up.choices[0].message

           messages.append(final_answer)

           output_text = final_answer.content

       else:

           output_text = assistant_msg.content

       return output_text

    # --- Command Interface function ---

    def execute_command(command):

       if not command.strip():

           return "⚠️ Please enter a command."

       print(f"[DEBUG] Executing command from interface: {command}")

       output = run_commands(command)

       return f"```bash\
    {output}\
    ```" if output else "✅ Command executed (no output)."

    # --- Gradio UI ---

    with gr.Blocks(title="Novita Sandbox App") as demo:

       gr.Markdown("## 🧠 Novita Sandbox Agent")

       gr.Markdown(

       "This app is an AI-powered **code agent** that lets you chat with intelligent assistants backed by **Novita AI LLMs**. These agents can write, read, and execute code safely inside a **Novita sandbox**, providing a secure environment for running commands, testing scripts, and managing files, all through an intuitive chat interface with model selection and command execution built right in."

    )

       with gr.Row(equal_height=True):

           # Left: Chat Interface

           with gr.Column(scale=2):

               gr.Markdown("### 💬 Chat Interface")

               gr.ChatInterface(chat_fn)

           # Right: Command Interface

           with gr.Column(scale=1):

               gr.Markdown("### 💻 Command Interface")

               # Model selector

               model_selector = gr.Dropdown(

                   label="Select Model",

                   choices=[

                       "meta-llama/llama-3.3-70b-instruct",

                       "deepseek/deepseek-v3.2-exp",

                       "qwen/qwen3-coder-30b-a3b-instruct",

                       "openai/gpt-oss-120b",

                       "moonshotai/kimi-k2-instruct",

                   ],

                   value=model,

                   interactive=True,

               )

               model_status = gr.Markdown(f"✅ Current model: **{model}**")

               model_selector.change(set_model, inputs=model_selector, outputs=model_status)

               command_input = gr.Textbox(

                   label="Command",

                   placeholder="e.g., ls, python main.py",

                   lines=1,

               )

               with gr.Row():

                   run_btn = gr.Button("Run", variant="primary", scale=0)

               command_output = gr.Markdown("Command output will appear here...")

               run_btn.click(execute_command, inputs=command_input, outputs=command_output)

    # --- Cleanup on exit ---

    atexit.register(lambda: (sandbox.kill(), print("[DEBUG] Sandbox terminated. 👋")))

    if __name__ == "__main__":

       demo.launch()
在這個版本中,chat_fn 函式會處理使用者和代理之間的每則訊息交換。gr.ChatInterface 會將這個函式作為輸入,自動管理介面互動。
當 Gradio 應用程式啟動時,它會在瀏覽器中運行你的代理,為使用者提供乾淨、互動式的聊天介面。最後,我們使用 atexit 註冊一個清理程式,確保應用程式停止時沙箱能正確終止。
現在我們已經有一個在沙箱中安全運行的 AI 驅動編碼代理,還配備了友善的 Gradio 聊天介面。
你可以在 GitHub 上找到完整程式碼。
測試編碼代理
要使用這個代理,我們需要將 Gradio 程式碼作為腳本執行:
python gradio_chat.py
執行後,Gradio 應用程式就會在 localhost 上運行。此時你就可以和編碼代理對話,代理會在所有操作都在沙箱內執行。
在 Gradio 應用程式中,你只能看到代理的回應,但如果你查看終端機,就能看到代理為協助使用者請求而呼叫的函式與執行的指令的除錯輸出。
由於我們有檔案工具和指令工具,幾乎沒有什麼是我們無法編碼的;與其直接寫程式碼,我們只要給代理下指令,它就會為我們編寫和執行程式碼。
部署到 Hugging Face Spaces
目前我們的編碼代理是在本機電腦上運行,現在我們要把它部署到 Hugging Face Spaces,讓全世界都能使用。Hugging Face Spaces 讓你可以將程式碼和應用程式託管在同一個地方,讓我們開始吧。
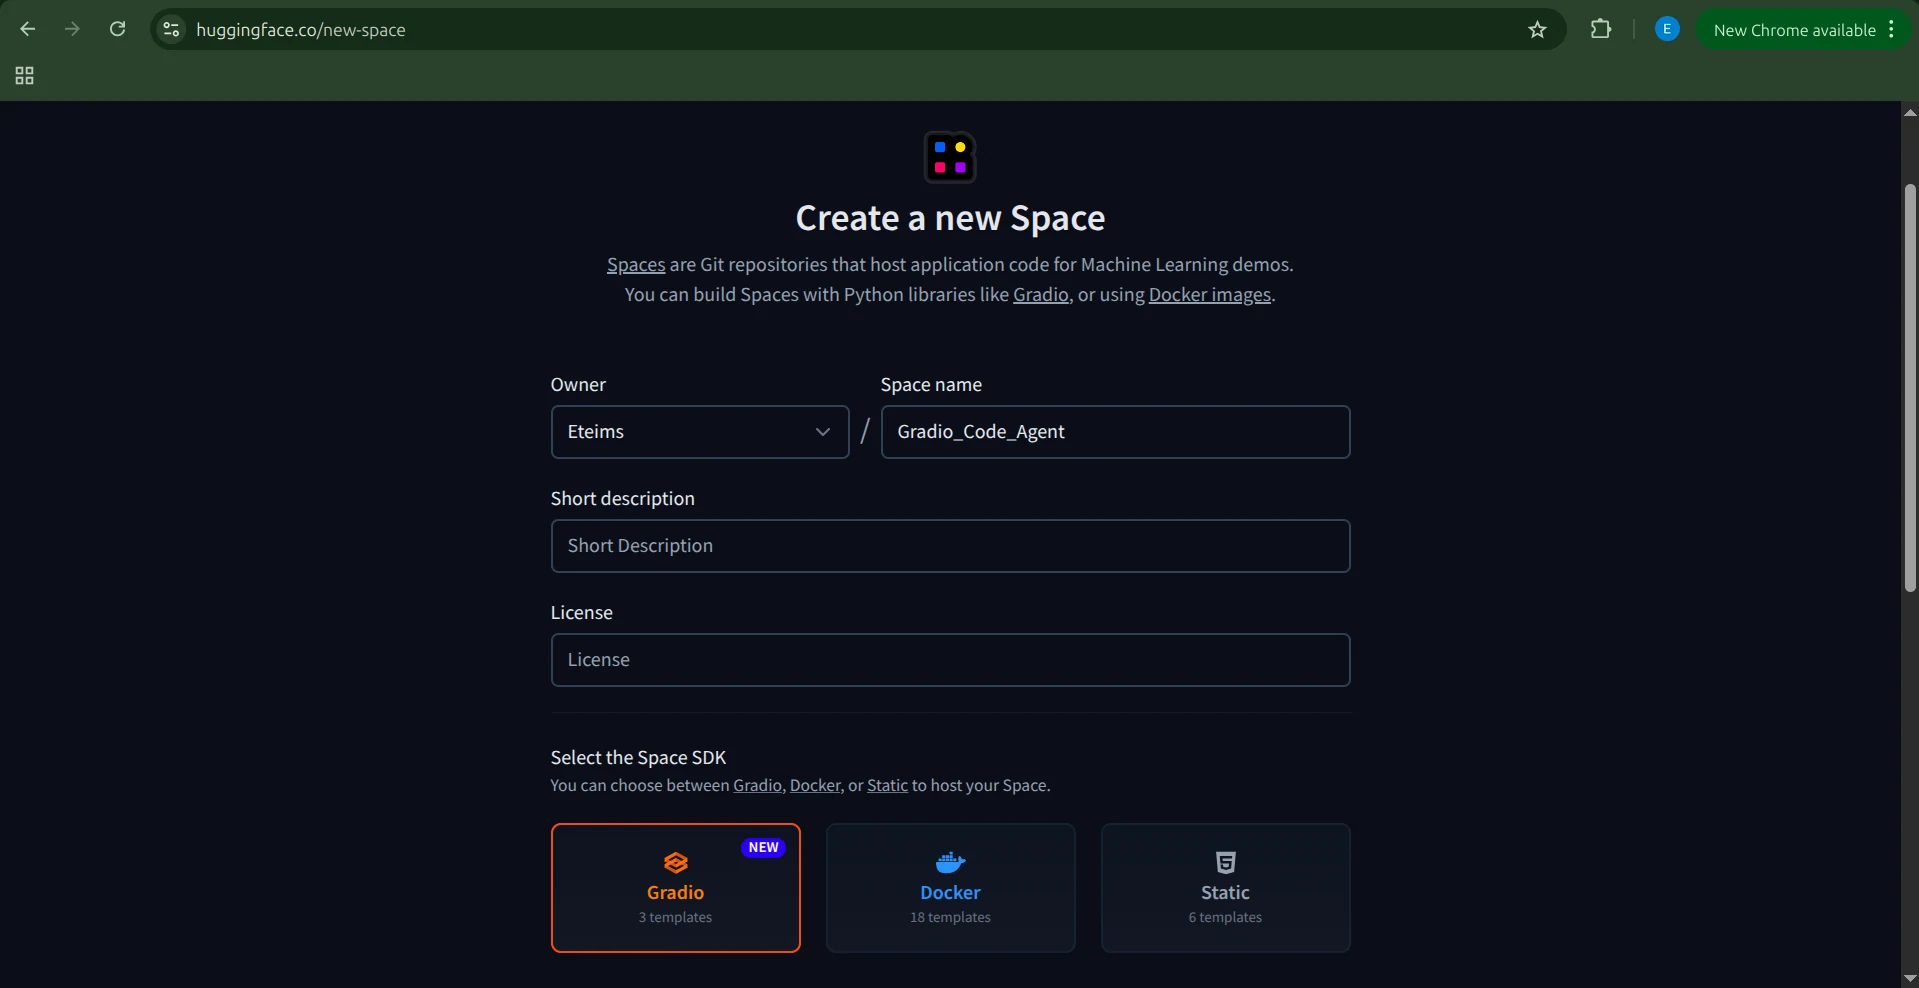
建立 Space
前往 Hugging Face,為你的編碼代理建立一個新的 Space,並為它設定一個獨一無二的名稱。
接下來,選擇 Space 適用的 SDK,我們這裡選擇 Gradio。由於我們已經有應用程式程式碼,請選擇 Blank 範本。
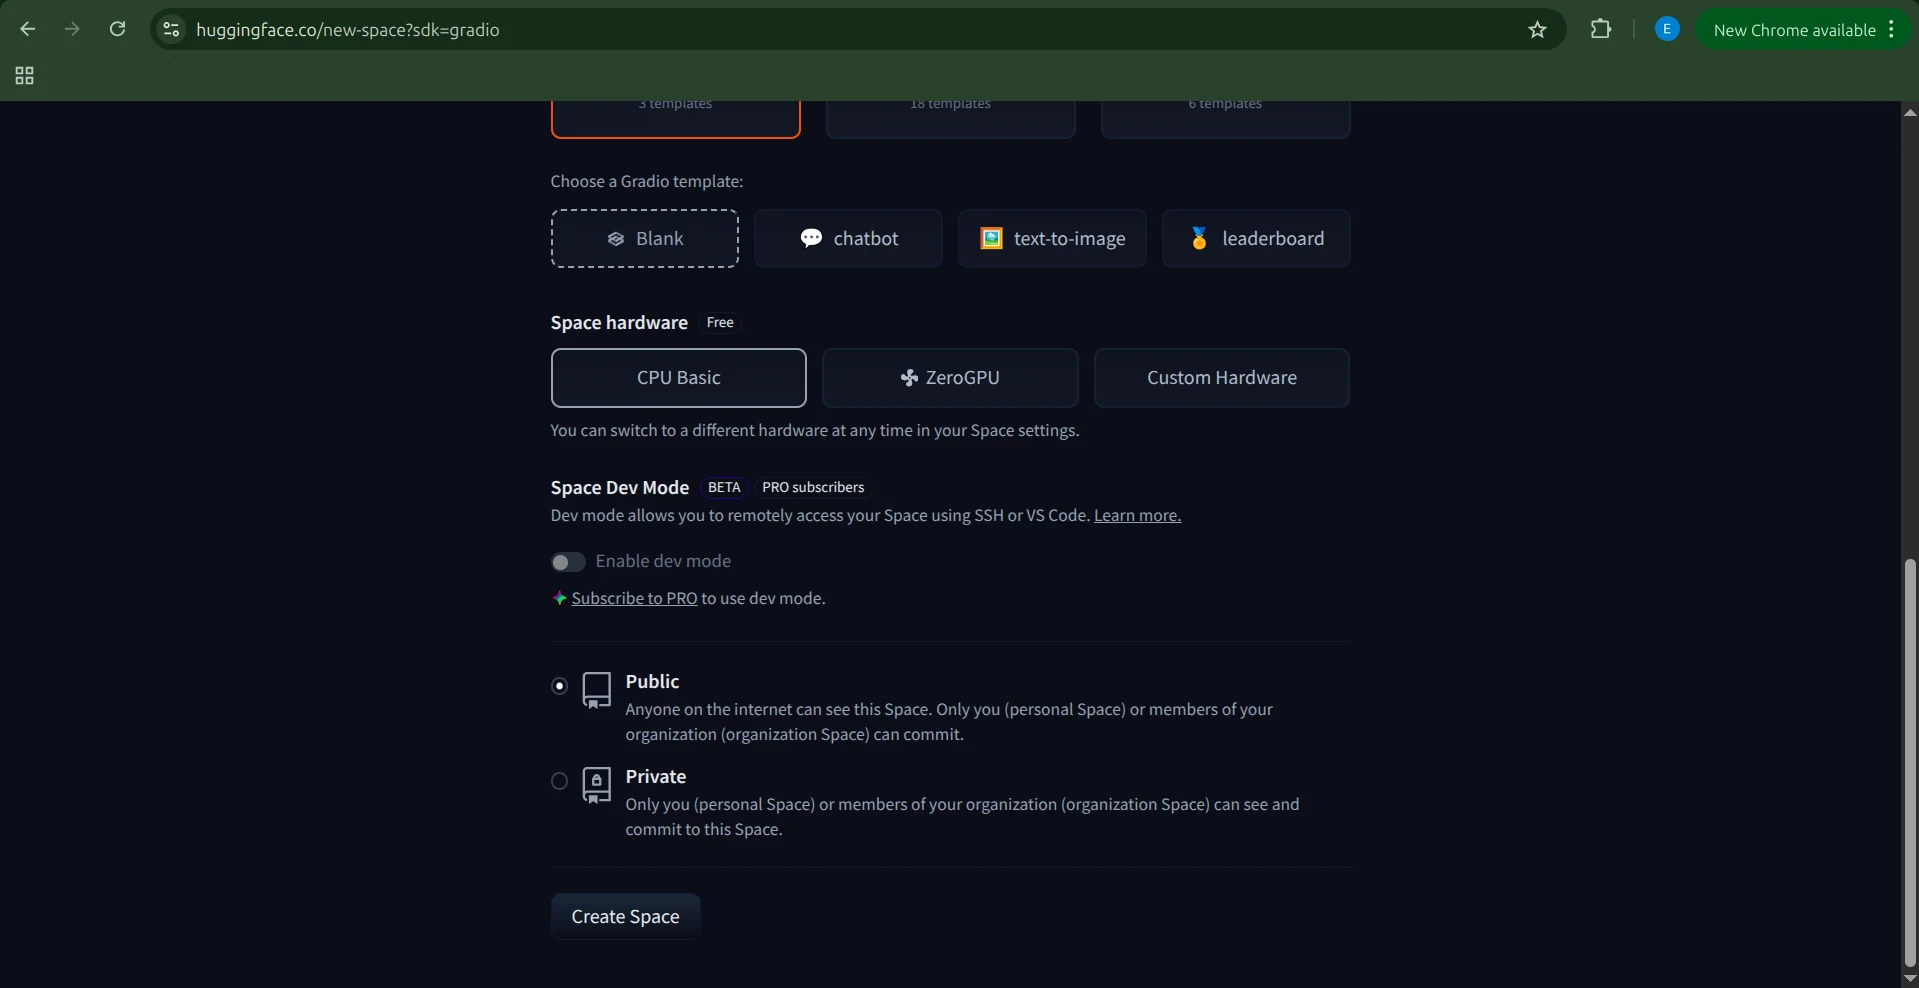
然後選擇硬體。由於我們的代理和沙箱都由 Novita 驅動,不需要特殊硬體,選擇 Basic CPU 即可。完成後點擊 Create Space。
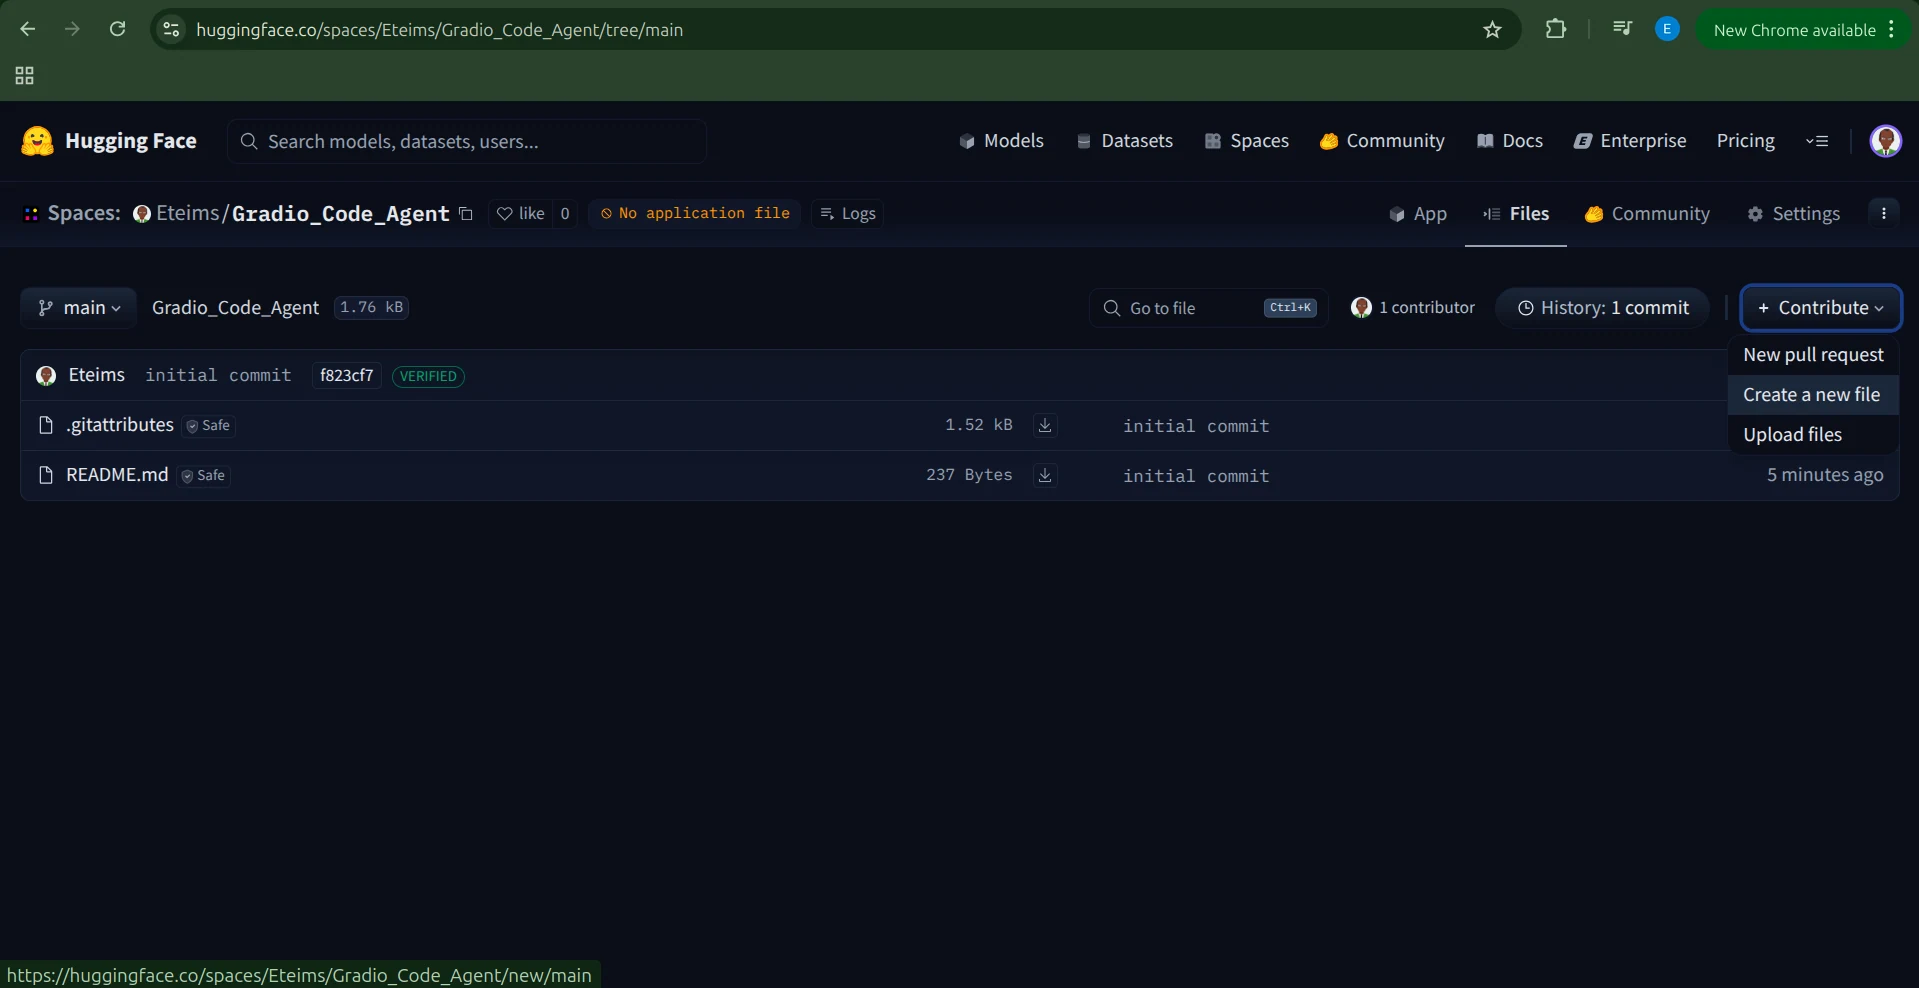
Hugging Face 會建立一個包含 README.md 和 .gitignore 檔案的 Space。
有多種方式可以加入你的程式碼,最簡單的是點擊 Contribute → Add file。
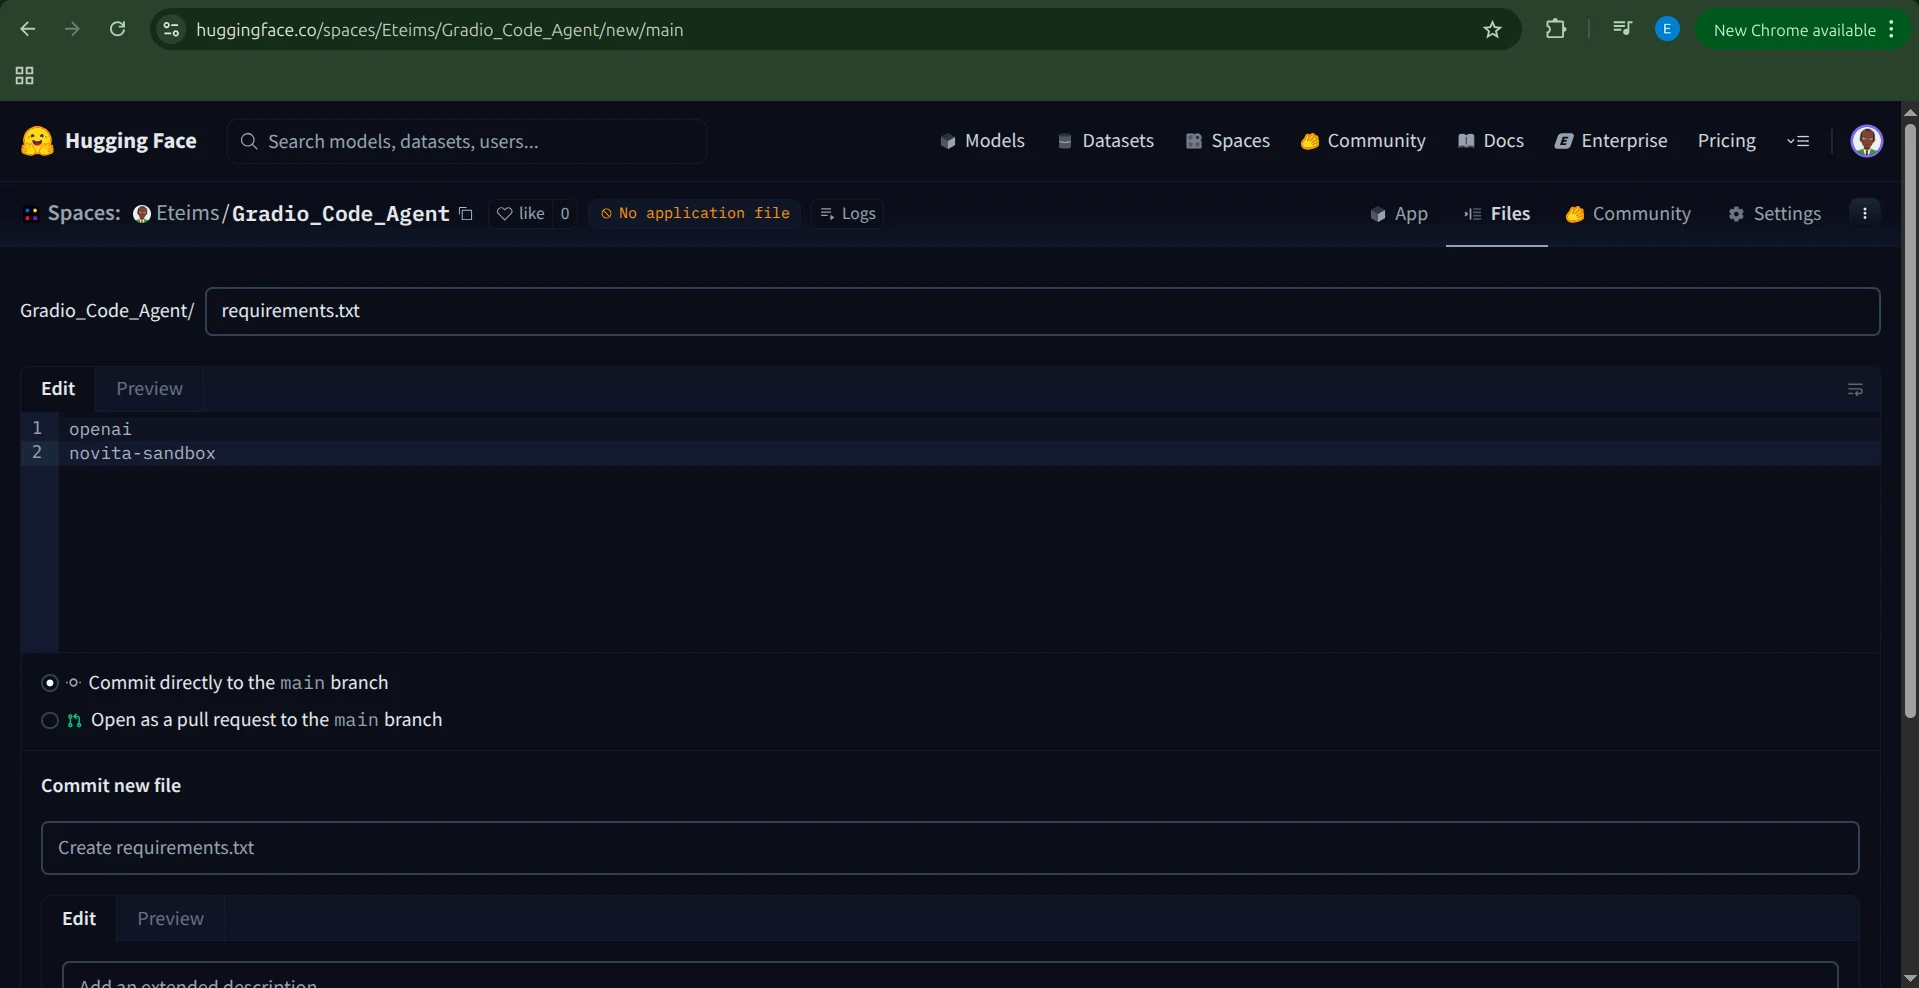
建立一個 requirements.txt 檔案,加入以下依賴套件:
openai

novita-sandbox
加入環境變數
在執行應用程式之前,我們需要將 NOVITA_API_KEY 設定為環境變數。
請前往你的 Space 的 Settings,捲動到 Variables and secrets 區段,新增一個名為 NOVITA_API_KEY 的 secret,並將你的 API 金鑰作為其值。
設定應用程式
環境變數設定完成後,我們就可以建立應用程式了。
建立一個名為 app.py 的新檔案,將完整的 Gradio 代理程式碼貼入其中。

儲存檔案後,Hugging Face 會自動開始構建你的 Space。
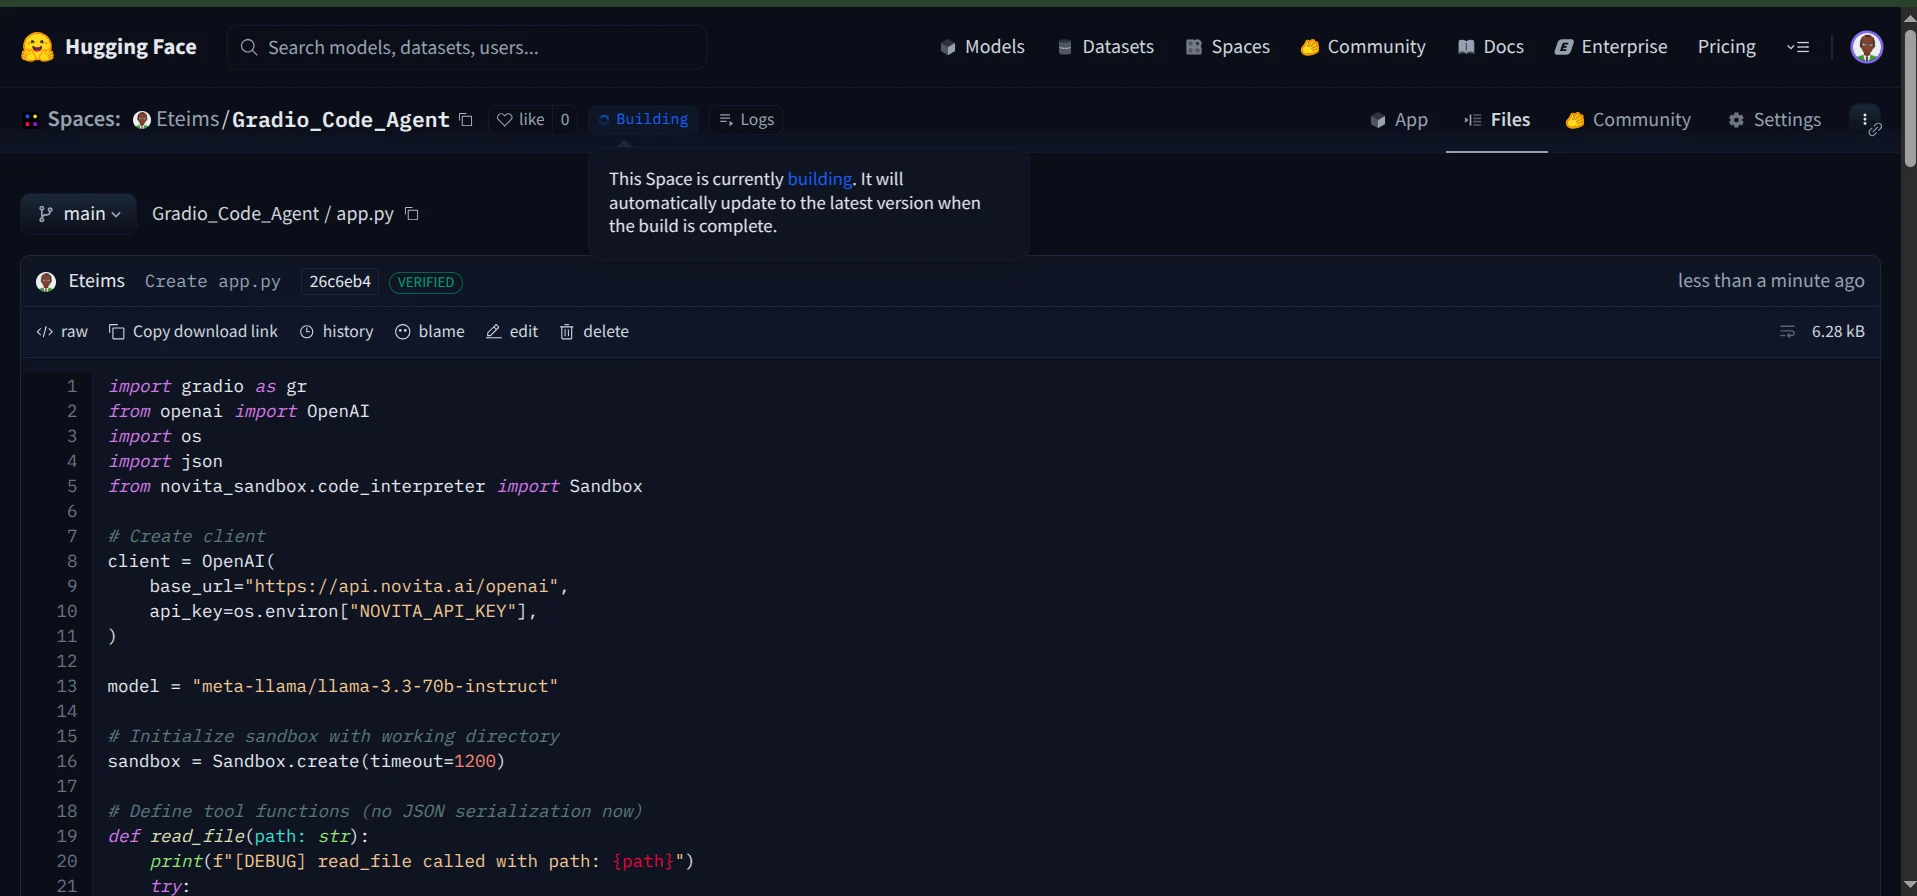
構建流程完成後,你的編碼代理就會上線,可以在 Hugging Face Spaces 上存取。
現在你可以透過互動式聊天介面與你的代理對話。
此外,你還可以查看日誌,觀察代理在執行過程中呼叫了哪些工具。
大功告成!你現在已經有一個功能完整的編碼代理,在安全沙箱中運行,配備了 Gradio 介面,並順利部署到 Hugging Face Spaces。
結論
本文說明了如何運用 Novita Sandbox 構建功能完整的編碼代理,它能夠讀取和建立檔案、執行指令,並在安全環境中安全運行。
我們在這裡構建的只是一個開端。沙箱開啟了無數可能性,從建立 AI 驅動的資料視覺化代理,到開發能智慧與系統互動的電腦使用代理,都能實現。
只要將代理與沙箱這類專用工具組結合,幾乎沒有什麼是不可能的。