
AIエージェントを安全な環境で実行したいと考えています。その環境では、ファイルシステムなどの適切なリソースにアクセスでき、コマンド(例:シェルコマンド)を実行できる一方で、「何かを壊す」リスクがないようにしたいのです。では、どのような選択肢があるでしょうか?
最善のアプローチは、AIエージェントにサンドボックスを提供することです。サンドボックス内では、エージェントはLinuxマシンと安全にやり取りし、ファイルシステムを操作し、特定のコマンドを実行できます。一方で、潜在的に有害な操作は制限されます。
この設定により、強力なアプリケーションを構築できます。例えば、以下のようなことができるコーディングエージェントです:
- ファイルシステム上でコードファイルを作成・編集する
- git、python、nodeなどのコマンドを実行する
- 環境内でコードを直接実行・テストすることで、開発者と協力する
この記事では、そのようなコーディングエージェントの構築手順を説明します。NovitaのLLM(関数呼び出し対応)と、安全な環境としてNovita Agent Sandboxを使用します。さらに、Gradioでユーザーフレンドリーなインターフェースを作成し、Hugging Face Spacesにデプロイします。
さっそく始めましょう!
Agent Sandbox
NovitaのAgent Sandboxは、AIエージェント専用に設計されたランタイム環境です。仮想コンピュータのように機能する、安全で隔離されたクラウド環境を提供します。この環境内で、エージェントは生成されたコードを基盤システムにリスクを与えることなく安全に実行できます。
Novita Agent Sandboxの主な機能
- 安全: サンドボックスは完全に隔離されているため、エージェントは自身のリソースにのみアクセスできます。
- 高速起動: 新しい環境は200ミリ秒未満で起動します。
- 仮想マシン: サンドボックスはVMのように動作するため、エージェントは任意のプログラミング言語でコードを実行できます。
- 一時停止と再開: サンドボックスをいつでも一時停止し、後で再開できます。
- バックグラウンドタスク: エージェントはバックグラウンドでタスクを実行し、結果を非同期で取得できます。
SDKのインストール
Novita Sandboxを使用するには、SDKが必要です。PythonとTypeScript/JavaScriptの両方をサポートしています。このチュートリアルではPython SDKを使用します:
pip install novita-sandbox
インストール後、Novita APIキーを環境変数として設定します:
export NOVITA_API_KEY=your_api_key_here
サンドボックスのテスト
準備が整ったら、サンドボックスを作成していくつかの基本操作を実行してみましょう:
from novita_sandbox.code_interpreter import Sandbox

sandbox = Sandbox.create()

files = sandbox.files.list("/")

for file in files:
    print(file.name)

result = sandbox.commands.run('pwd')
print(result)

sandbox.kill()
この例では、以下の方法を示しています:
- サンドボックスインスタンスの作成
- filesオブジェクトを使用したファイルシステムへのアクセス
- commands.runメソッドを使用したコマンドの実行
- 終了時にkillでリソースを解放
サンドボックスの基本(ファイルシステムへのアクセスとコマンド実行)を確認したので、これらのサンドボックス機能をツールとして使用するコーディングエージェントを構築する準備が整いました。
コーディングエージェントの構築
コーディングエージェントを構築するには、関数呼び出しをサポートするLLMが必要です。Novitaはこれを実行できるいくつかのモデルを提供しています。エージェントがコーディングアシスタントとして動作するには、適切な関数セットが必要です。
人間のコーダーが何をするかを考えてみましょう。通常、コードを書き、読み、実行します。したがって、エージェントは次のことができる必要があります:
- ファイルに書き込む
- ファイルから読み取る
- コマンドを実行する
- 複数のファイルに一度に書き込む
エージェントのセットアップ
NovitaのモデルはOpenAI互換であるため、OpenAI SDKを使用してそれらとやり取りできます。インストールしましょう:
pip install openai
インストール後、先ほどと同様にNovita APIキーを環境変数として設定します。完了したら、インポートを追加してコーディングを開始します:
from openai import OpenAI
import os
import json
from novita_sandbox.code_interpreter import Sandbox
次に、OpenAIクライアントインスタンスを作成します:
client = OpenAI(
    base_url="https://api.novita.ai/openai",
    api_key=os.environ["NOVITA_API_KEY"],
)
ここでは、OpenAIの代わりにNovitaのベースURLを指定し、認証にNovita APIキーを使用しています。
次に、エージェントが使用するサンドボックスインスタンスを作成します:
sandbox = Sandbox.create(timeout=1200)
timeoutパラメータは、サンドボックスがアクティブである時間を指定します。この場合は10分に設定しています。
関数定義
次に、エージェントが使用する関数を定義します。
1. ファイル読み取り
この関数はファイルパスを受け取り、サンドボックスのfilesオブジェクトを使用してその内容を読み取ります。
def read_file(path: str):

   print(f"[DEBUG] read_file called with path: {path}")

   try:

       content = sandbox.files.read(path)

       print(f"[DEBUG] read_file result: {content}")

       return content  # returns string content

   except Exception as e:

       print(f"[DEBUG] read_file error: {e}")

       return f"Error reading file: {e}"
2. ファイル書き込み
この関数は指定されたファイルパスにデータを書き込みます。
def write_file(path: str, data: str):
   print(f"[DEBUG] write_file called with path: {path}")
   try:
       sandbox.files.write(path, data)
       msg = f"File created successfully at {path}"
       print(f"[DEBUG] {msg}")
       return msg
   except Exception as e:
       print(f"[DEBUG] write_file error: {e}")
       return f"Error writing file: {e}"
3. 複数ファイル書き込み
この関数はwrite_fileと同様に動作しますが、複数のファイルを一度に処理します。
def write_files(files: list):
   print(f"[DEBUG] write_files called with {len(files)} files")
   try:
       sandbox.files.write_files(files)
       msg = f"{len(files)} file(s) created successfully"
       print(f"[DEBUG] {msg}")
       return msg
   except Exception as e:
       print(f"[DEBUG] write_files error: {e}")
       return f"Error writing multiple files: {e}"
4. コマンド実行
この関数はサンドボックス内でシェルコマンドを実行し、標準出力を返します。
def run_commands(command: str):
   print(f"[DEBUG] run_commands called with commands: {command}")
   try:
       result = sandbox.commands.run(command)
       print(f"[DEBUG] run_commands result: {result}")
       return result.stdout  # returns CommandResult object
   except Exception as e:
       print(f"[DEBUG] run_commands error: {e}")
       return f"Error running commands: {e}"
ツールの登録
すべての関数が揃ったので、LLMが必要に応じて呼び出せるツールとして登録します。各ツール定義には、関数名、説明、パラメータスキーマが含まれます。
tools = [

   {

       "type": "function",

       "function": {

           "name": "read_file",

           "description": "Read contents of a file inside the sandbox",

           "parameters": {

               "type": "object",

               "properties": {

                   "path": {"type": "string", "description": "File path in the sandbox"}

               },

               "required": ["path"],

           },

       },

   },

   {

       "type": "function",

       "function": {

           "name": "write_file",

           "description": "Write a single file inside the sandbox",

           "parameters": {

               "type": "object",

               "properties": {

                   "path": {"type": "string", "description": "File path in the sandbox"},

                   "data": {"type": "string", "description": "Content to write"},

               },

               "required": ["path", "data"],

           },

       },

   },

   {

       "type": "function",

       "function": {

           "name": "write_files",

           "description": "Write multiple files inside the sandbox",

           "parameters": {

               "type": "object",

               "properties": {

                   "files": {

                       "type": "array",

                       "items": {

                           "type": "object",

                           "properties": {

                               "path": {"type": "string"},

                               "data": {"type": "string"},

                           },

                           "required": ["path", "data"],

                       },

                   }

               },

               "required": ["files"],

           },

       },

   },

   {

       "type": "function",

       "function": {

           "name": "run_commands",

           "description": "Run a single shell command inside the sandbox working directory",

           "parameters": {

               "type": "object",

               "properties": {

                   "command": {

                       "type": "string",

                       "description": "The shell command to run, e.g. 'ls' or 'python main.py'",

                   }

               },

               "required": ["command"],

           },

       },

   }

]
ツールを登録したので、次にエージェントと定義したすべてのツールを活用するチャットループを作成しましょう。
チャットループ
次に、ユーザーがコーディングエージェントと対話できるシンプルなチャットループを作成します。このループはメッセージのリストを維持し、エージェントがツール呼び出しを要求するたびに処理します。
messages = []

print("💬 Enter your queries (type 'exit' to quit):")

while True:

   user_input = input("You: ")

   if user_input.lower() == "exit":

       break

   # Append user message

   messages.append({"role": "user", "content": user_input})

   # Send to model

   response = client.chat.completions.create(

       model=model,

       messages=messages,

       tools=tools,

   )

   assistant_msg = response.choices[0].message

   messages.append(assistant_msg)

   if assistant_msg.tool_calls:

       print(f"[DEBUG] Assistant requested {len(assistant_msg.tool_calls)} tool call(s).")

       for tool_call in assistant_msg.tool_calls:

           fn_name = tool_call.function.name

           fn_args = json.loads(tool_call.function.arguments)

           print(f"[DEBUG] Tool call detected: {fn_name} with args {fn_args}")

           if fn_name == "read_file":

               fn_result = read_file(**fn_args)

           elif fn_name == "write_file":

               fn_result = write_file(**fn_args)

           elif fn_name == "write_files":

               fn_result = write_files(**fn_args)

           elif fn_name == "run_commands":

               fn_result = run_commands(**fn_args)

           else:

               fn_result = f"Error: Unknown tool {fn_name}"

               print(f"[DEBUG] Unknown tool requested: {fn_name}")

           # Append result back

           messages.append({

               "tool_call_id": tool_call.id,

               "role": "tool",

               "content": str(fn_result),

           })

       # Get model's final answer with tool results

       follow_up = client.chat.completions.create(

           model=model,

           messages=messages,

       )

       final_answer = follow_up.choices[0].message

       messages.append(final_answer)

       print("Assistant:", final_answer.content)

   else:

       print("Assistant:", assistant_msg.content)

sandbox.kill()

print("[DEBUG] Sandbox terminated. 👋")
このチャットループは対話を継続し、エージェントが必要に応じて登録されたツールを呼び出せるようにし、ユーザーが終了したときにサンドボックスをクリーンアップします。
Gradioを使ったUIの作成
これで、私たちとチャットできる完全に機能するコーディングエージェントができましたが、REPLを通じて対話するのはあまり面白くありません。エージェントにシンプルなGradioインターフェースを与えて、体験をより魅力的にしましょう。
Gradio UIの作成は簡単です。gr.ChatInterfaceを使用してチャットのやり取りを管理し、先ほど構築したロジックにリンクします。それに加えて、サンドボックス内でシェルコマンドを実行するためのコマンドインターフェースと、使用するモデルを選択できるドロップダウンメニューも含めます。
以前のコードをGradioに対応させるために、チャットループと最後の2行を次のように置き換えます:
# --- Persistent chat messages ---

messages = []

# --- Global model setter ---

def set_model(selected_model):

   global model

   model = selected_model

   print(f"[DEBUG] Model switched to: {model}")

   return f"✅ Model switched to **{model}**"

def chat_fn(user_message, history):

   global messages, model

   messages.append({"role": "user", "content": user_message})

   # Send to model

   response = client.chat.completions.create(

       model=model,

       messages=messages,

       tools=tools,

   )

   assistant_msg = response.choices[0].message

   messages.append(assistant_msg)

   output_text = ""

   if assistant_msg.tool_calls:

       print(f"[DEBUG] Assistant requested {len(assistant_msg.tool_calls)} tool call(s).")

       for tool_call in assistant_msg.tool_calls:

           fn_name = tool_call.function.name

           fn_args = json.loads(tool_call.function.arguments)

           print(f"[DEBUG] Tool call detected: {fn_name} with args {fn_args}")

           if fn_name == "read_file":

               fn_result = read_file(**fn_args)

           elif fn_name == "write_file":

               fn_result = write_file(**fn_args)

           elif fn_name == "write_files":

               fn_result = write_files(**fn_args)

           elif fn_name == "run_commands":

               fn_result = run_commands(**fn_args)

           else:

               fn_result = f"Error: Unknown tool {fn_name}"

           messages.append({

               "tool_call_id": tool_call.id,

               "role": "tool",

               "content": str(fn_result),

           })

       follow_up = client.chat.completions.create(

           model=model,

           messages=messages,

       )

       final_answer = follow_up.choices[0].message

       messages.append(final_answer)

       output_text = final_answer.content

   else:

       output_text = assistant_msg.content

   return output_text

# --- Command Interface function ---

def execute_command(command):

   if not command.strip():

       return "⚠️ Please enter a command."

   print(f"[DEBUG] Executing command from interface: {command}")

   output = run_commands(command)

   return f"```bash\
{output}\
```" if output else "✅ Command executed (no output)."

# --- Gradio UI ---

with gr.Blocks(title="Novita Sandbox App") as demo:

   gr.Markdown("## 🧠 Novita Sandbox Agent")

   gr.Markdown(

   "This app is an AI-powered **code agent** that lets you chat with intelligent assistants backed by **Novita AI LLMs**. These agents can write, read, and execute code safely inside a **Novita sandbox**, providing a secure environment for running commands, testing scripts, and managing files, all through an intuitive chat interface with model selection and command execution built right in."

)

   with gr.Row(equal_height=True):

       # Left: Chat Interface

       with gr.Column(scale=2):

           gr.Markdown("### 💬 Chat Interface")

           gr.ChatInterface(chat_fn)

       # Right: Command Interface

       with gr.Column(scale=1):

           gr.Markdown("### 💻 Command Interface")

           # Model selector

           model_selector = gr.Dropdown(

               label="Select Model",

               choices=[

                   "meta-llama/llama-3.3-70b-instruct",

                   "deepseek/deepseek-v3.2-exp",

                   "qwen/qwen3-coder-30b-a3b-instruct",

                   "openai/gpt-oss-120b",

                   "moonshotai/kimi-k2-instruct",

               ],

               value=model,

               interactive=True,

           )

           model_status = gr.Markdown(f"✅ Current model: **{model}**")

           model_selector.change(set_model, inputs=model_selector, outputs=model_status)

           command_input = gr.Textbox(

               label="Command",

               placeholder="e.g., ls, python main.py",

               lines=1,

           )

           with gr.Row():

               run_btn = gr.Button("Run", variant="primary", scale=0)

           command_output = gr.Markdown("Command output will appear here...")

           run_btn.click(execute_command, inputs=command_input, outputs=command_output)

# --- Cleanup on exit ---

atexit.register(lambda: (sandbox.kill(), print("[DEBUG] Sandbox terminated. 👋")))

if __name__ == "__main__":

   demo.launch()
このバージョンでは、chat_fn関数がユーザーとエージェント間の各メッセージ交換を処理します。gr.ChatInterfaceはこの関数を入力として受け取り、UIのやり取りを自動的に管理します。
Gradioアプリが起動すると、ブラウザ内でエージェントが実行され、ユーザーにクリーンでインタラクティブなチャットインターフェースが提供されます。最後に、atexitを使用してクリーンアップルーチンを登録し、アプリが停止したときにサンドボックスが適切に終了されるようにします。
これで、サンドボックス内で安全に実行されるAI搭載のコーディングエージェントが、親しみやすいGradioチャットインターフェースとともに完成しました。
完全なコードはGitHubで見つけることができます。
コーディングエージェントのテスト
エージェントを使用するには、gradioコードをスクリプトとして実行する必要があります。
python gradio_chat.py
実行すると、gradioアプリがlocalhostで起動します。これでコーディングエージェントと会話でき、エージェントはサンドボックス内で全てのアクションを実行します。
gradioアプリケーションからはエージェントとのチャットしか見えませんが、ターミナルに移動すると、エージェントがユーザーのリクエストを支援するために呼び出した関数やコマンドのデバッグ出力も確認できます。
ファイルツールとコマンドツールにアクセスできるということは、コーディングできないものはほとんどないということです。ただし、直接コーディングする代わりに、エージェントに指示を与え、エージェントがコードを書いて実行してくれます。
Hugging Face Spacesへのデプロイ
現在、コーディングエージェントはローカルコンピュータ上で実行されています。次に、Hugging Face Spacesにデプロイして、世界中からアクセスできるようにしましょう。Hugging Face Spacesを使用すると、コードとアプリケーションを1か所でホストできます。始めましょう。
Spaceの作成
Hugging Faceにアクセスし、コーディングエージェント用の新しいSpaceを作成します。一意の名前を付けます。
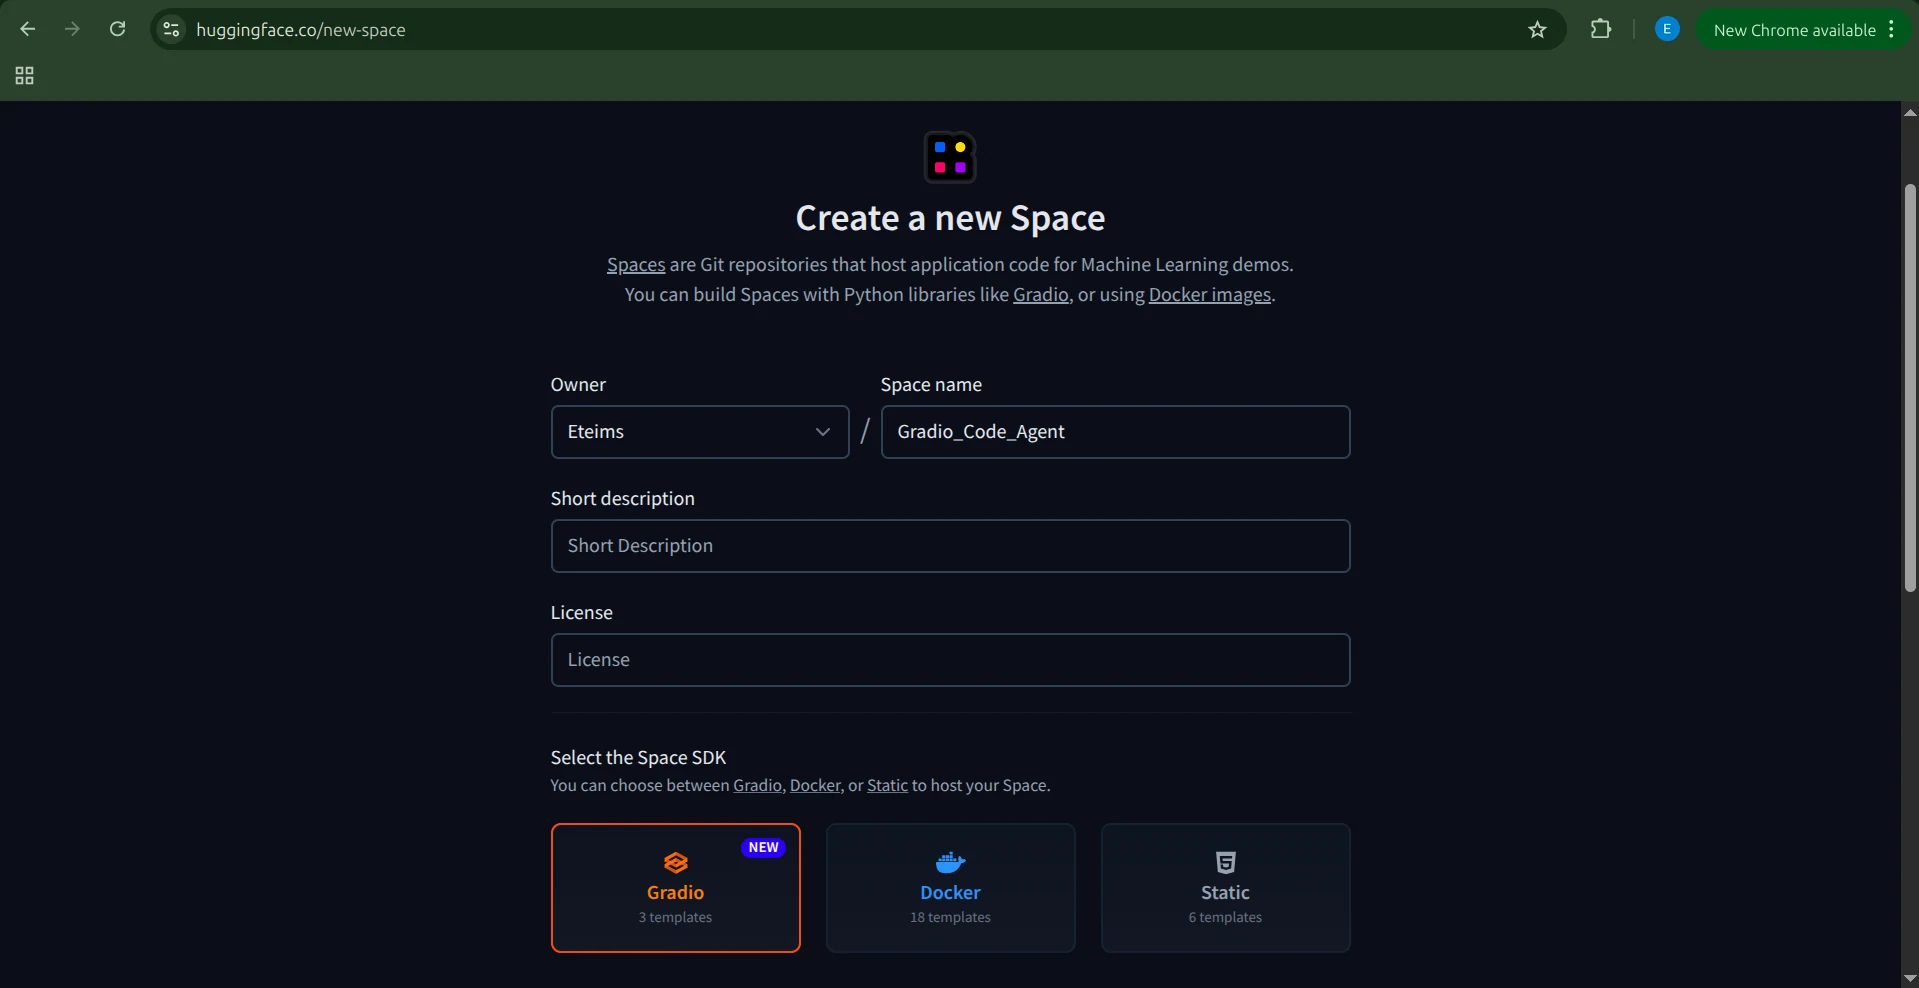
次に、SpaceのSDKを選択します。この場合はGradioです。アプリケーションコードは既にあるので、Blankテンプレートを選択します。
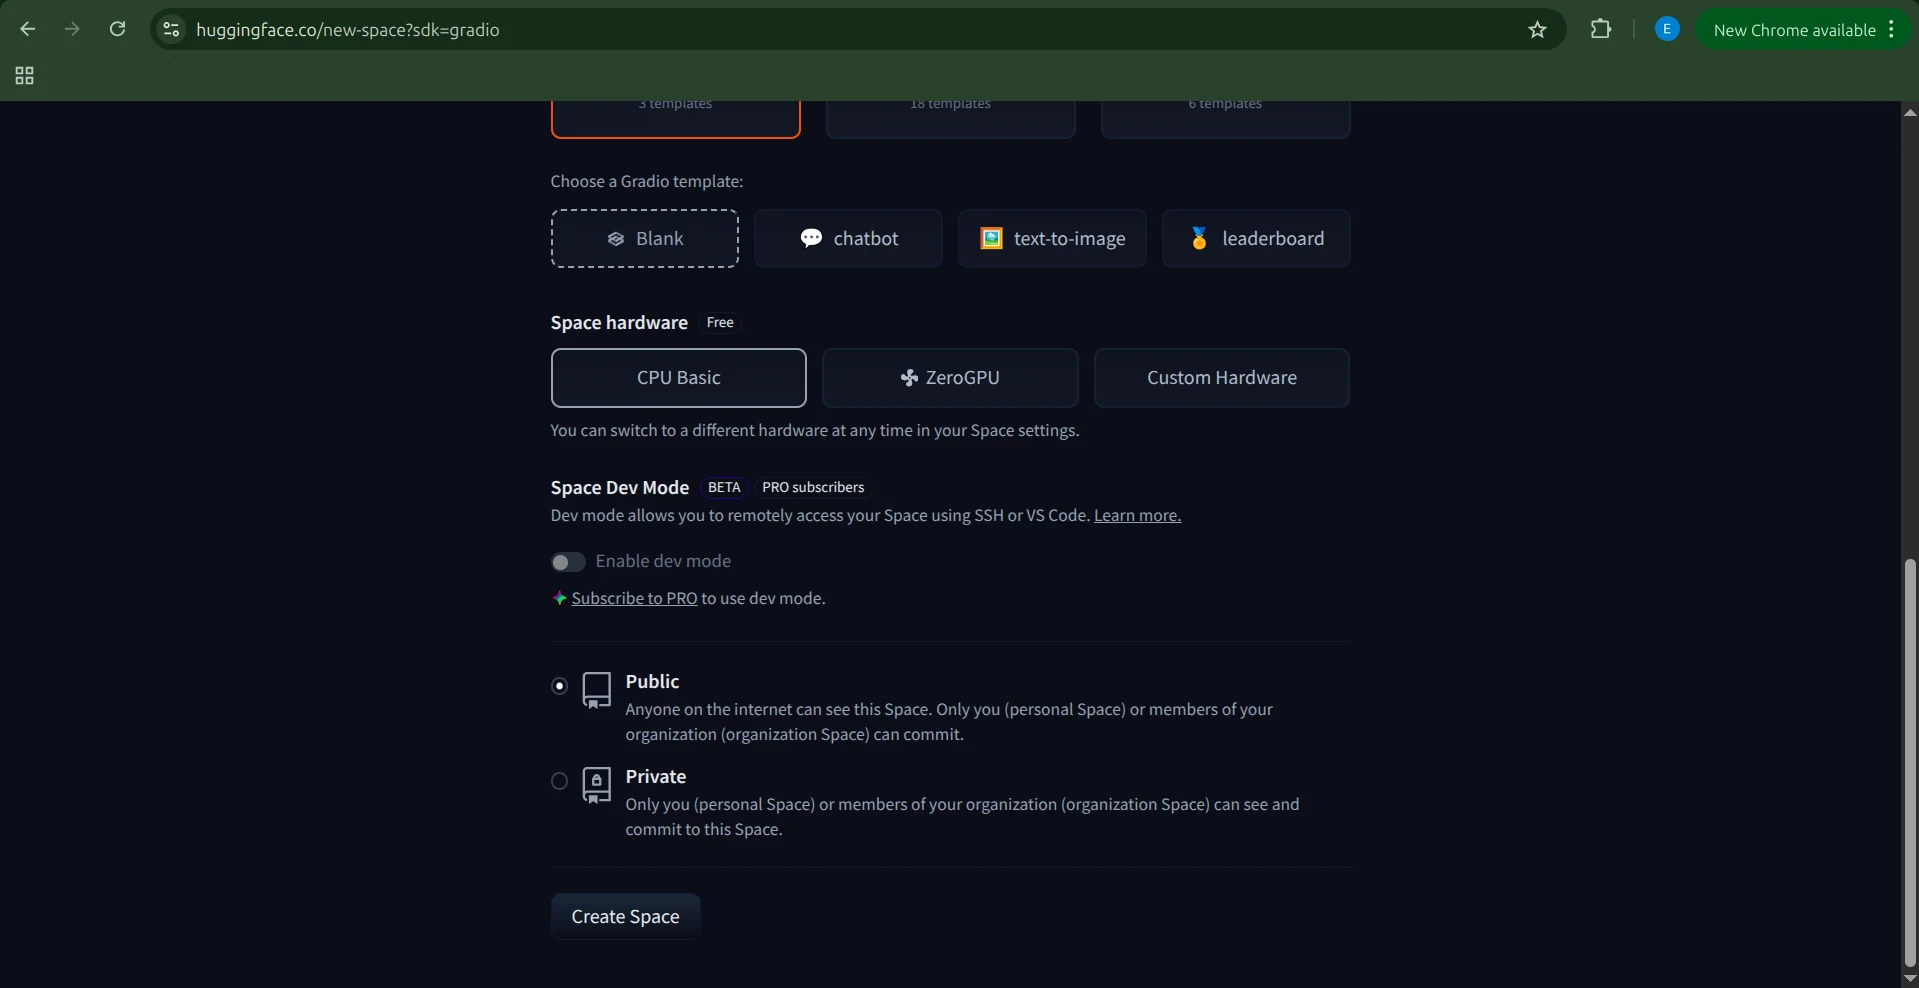
次に、ハードウェアを選択します。エージェントとサンドボックスはNovitaによって動作するため、特別なハードウェアは必要ありません。Basic CPUオプションで十分です。完了したら、Create Spaceをクリックします。
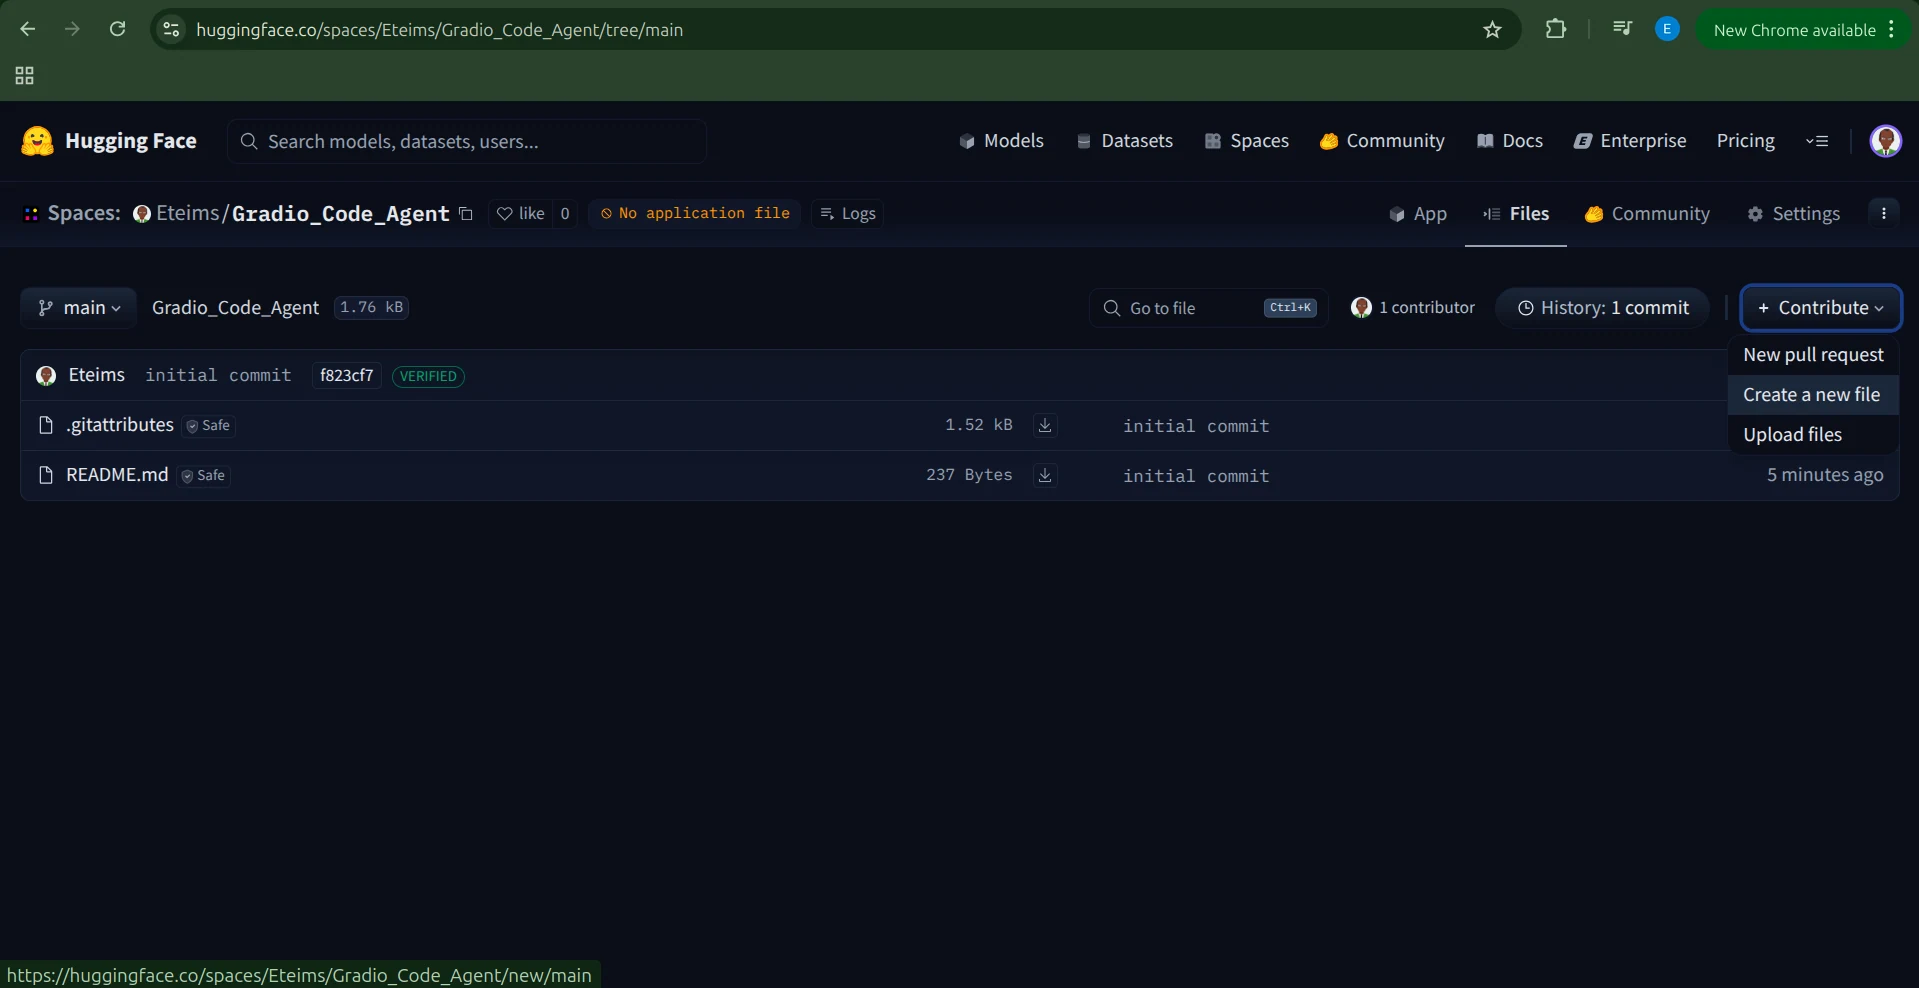
Hugging Faceは、README.mdと.gitignoreファイルを含むSpaceを作成します。
コードを追加する方法はいくつかありますが、最も簡単なのはContribute → Add fileをクリックすることです。
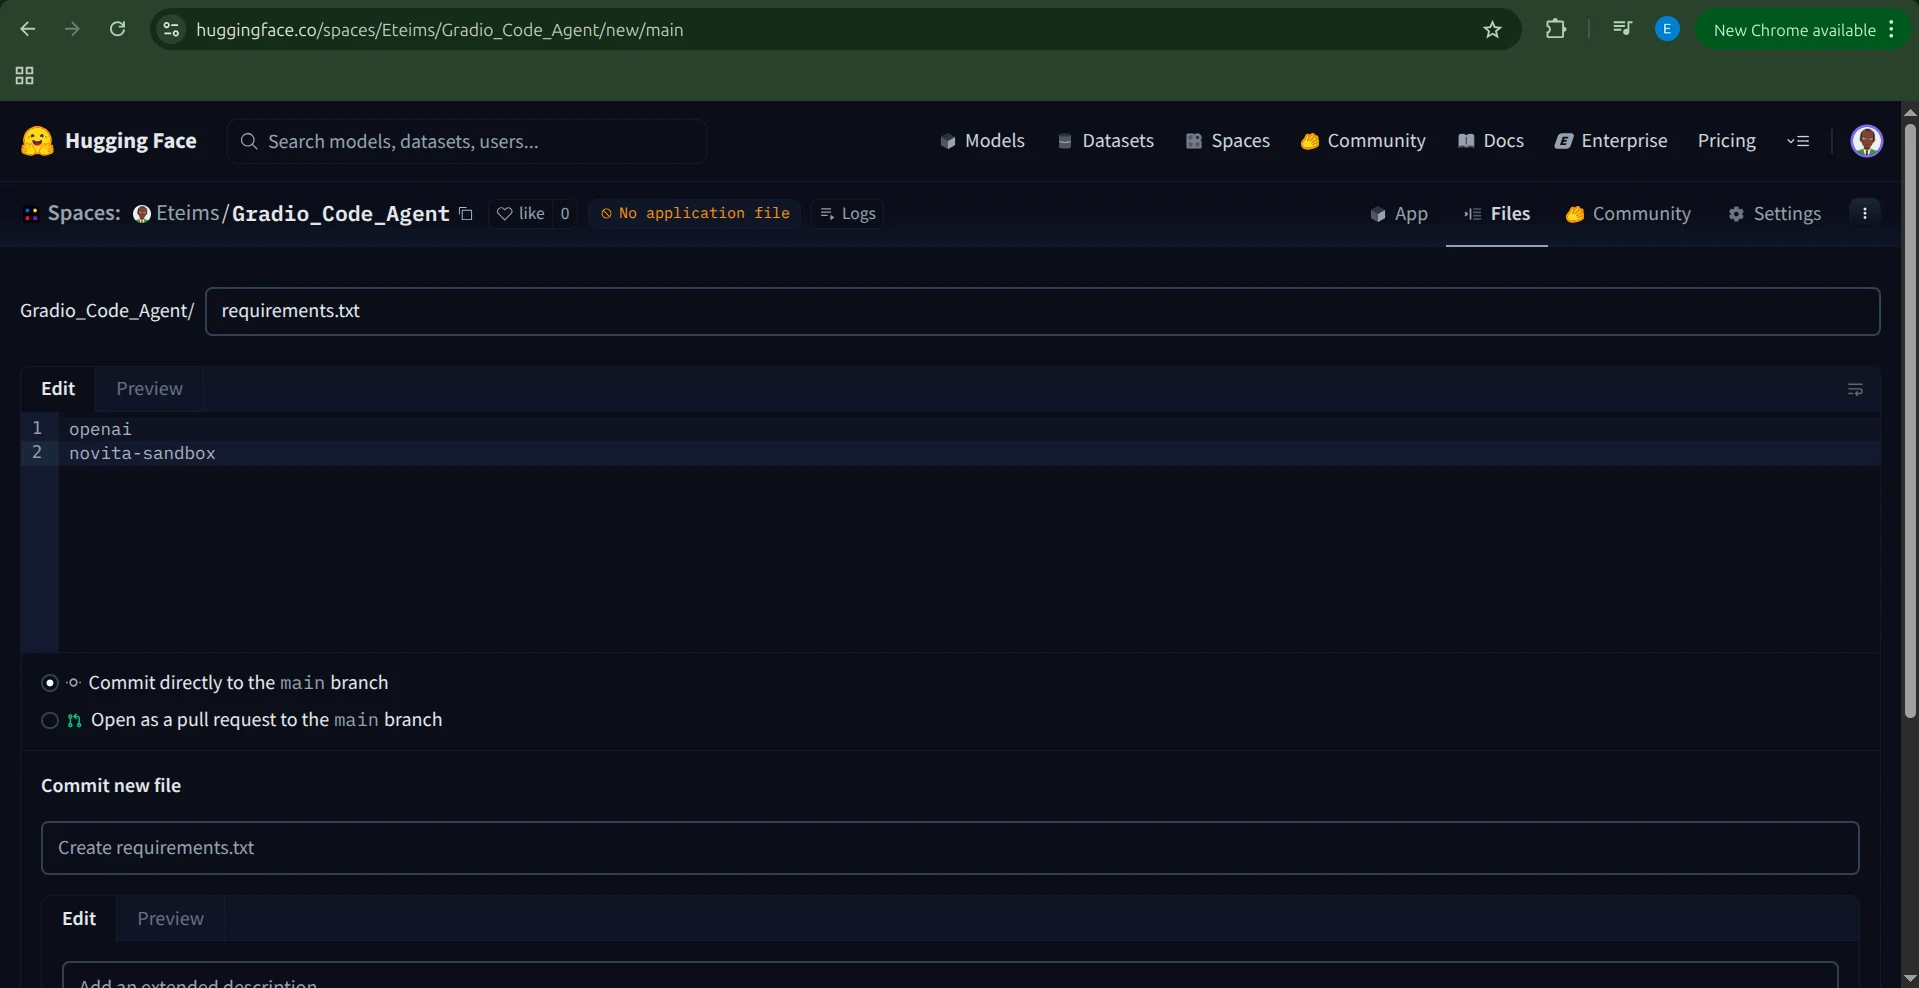
requirements.txtファイルを作成し、以下の依存関係を含めます:
openai
novita-sandbox
環境変数の追加
アプリケーションを実行する前に、NOVITA_API_KEYを環境変数として設定する必要があります。
これを行うには、SpaceのSettingsに移動し、Variables and secretsセクションまでスクロールして、NOVITA_API_KEYという名前の新しいシークレットを追加し、値にAPIキーを設定します。
アプリケーションのセットアップ
環境変数が設定されたので、アプリケーションを作成します。
app.pyという新しいファイルを作成し、完全なGradioエージェントコードを貼り付けます。

ファイルを保存すると、Hugging Faceが自動的にSpaceのビルドを開始します。
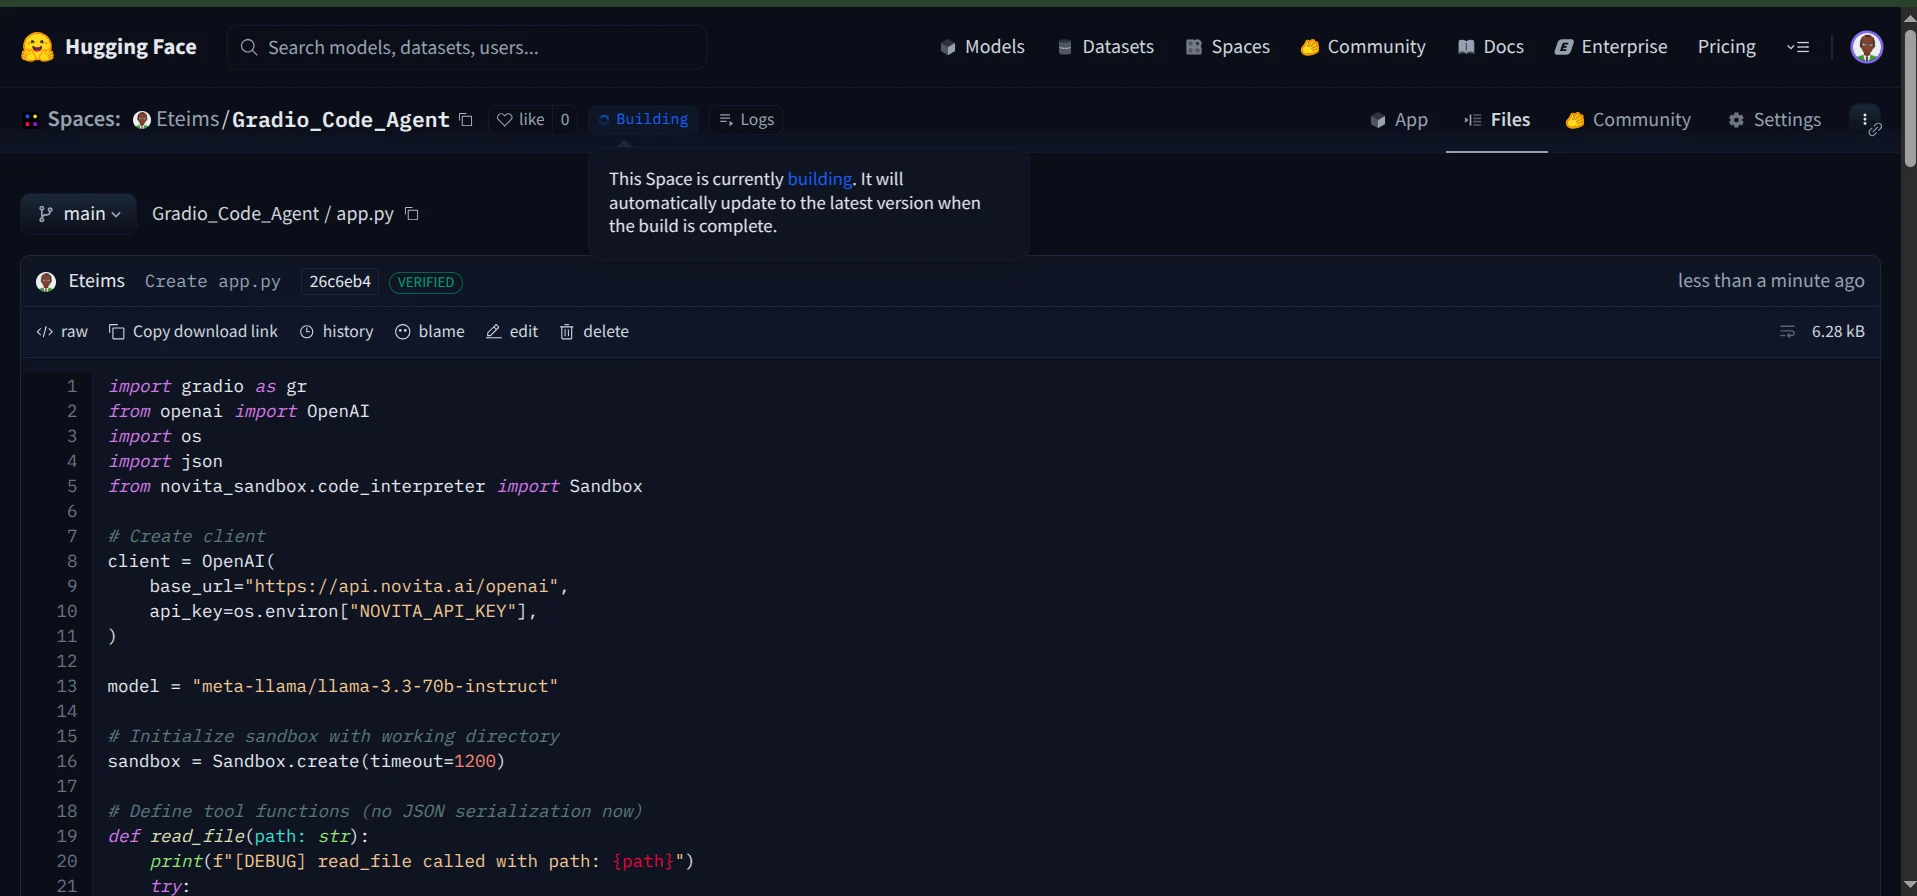
ビルドプロセスが完了すると、コーディングエージェントがHugging Face Spaces上で公開され、アクセス可能になります。
インタラクティブなチャットインターフェースを通じてエージェントと会話できるようになりました。
さらに、ログを監視して、エージェントが実行中に呼び出すツールを確認することもできます。
これで、安全なサンドボックス内で動作し、Gradioインターフェースを備え、Hugging Face Spacesにシームレスにデプロイされた、完全に機能するコーディングエージェントが完成しました。
結論
この記事では、NovitaのSandboxを活用して、ファイルの読み取りや作成、コマンドの実行、安全な環境内での操作が可能な完全に機能するコーディングエージェントを構築する方法を探りました。
ここで構築したものは始まりに過ぎません。サンドボックスは、AIを活用したデータ可視化エージェントの作成から、システムとインテリジェントにやり取りできるコンピュータ使用エージェントの開発まで、無限の可能性を開きます。
エージェントとサンドボックスのような専用ツールセットを組み合わせれば、ほとんど何でも可能です。