
You’ve got an AI agent, and you want it to run in a secure environment where it has access to the right resources like a file system and the ability to execute commands (e.g., shell commands) without the risk of “breaking anything.” So, what are your options?
The best approach is to give your AI agent a sandbox. Inside a sandbox, the agent can safely interact with a Linux machine, work with the file system, and run specific commands while being restricted from executing potentially harmful operations.
With this setup, we can build powerful applications. For example, a coding agent that can:
- Create and edit code files in the filesystem
- Run commands like git, python, or node
- Collaborate with developers by executing and testing code directly in the environment
In this article, we’ll walk through building such a coding agent. We’ll use Novita’s LLMs with function calling, paired with the Novita agent sandbox as our secure environment. To top it off, we’ll create a user-friendly interface with Gradio, and deploy it on Hugging Face Spaces.
Let’s dive in!
Agent Sandbox
Novita’s Agent Sandbox is a runtime environment designed specifically for AI agents. It provides a secure and isolated cloud setup that functions like a virtual computer. Within this environment, agents can safely execute generated code without risking the underlying system.
Key Features of the Novita Agent Sandbox
- Secure: The sandbox is fully isolated, so the agent only has access to its own resources.
- Fast startup: New environments spin up in less than 200 ms.
- Virtual machine: Since the sandbox behaves like a VM, agents can run code in any programming language.
- Pause and resume: You can pause a sandbox at any time and resume it later.
- Background tasks: Agents can run tasks in the background and retrieve results asynchronously.
Installing the SDK
To use the Novita Sandbox, you’ll need the SDK, which supports both Python and TypeScript/JavaScript. For this walkthrough, we’ll use the Python SDK:
pip install novita-sandbox
After installing, set your Novita API key as an environment variable:
export NOVITA_API_KEY=your_api_key_here
Testing the Sandbox
With everything set up, let’s create a sandbox and run a few basic operations:
from novita_sandbox.code_interpreter import Sandbox

sandbox = Sandbox.create()

files = sandbox.files.list("/")

for file in files:
    print(file.name)

result = sandbox.commands.run('pwd')
print(result)

sandbox.kill()
This example shows how to:
- Create a sandbox instance
- Access the filesystem with the files object
- Execute commands using the commands.run method
- Release resources with kill once you’re finished
Now that we’ve explored the basics of accessing the filesystem and running commands, we’re ready to build our coding agent that uses these sandbox capabilities as tools.
Building a Coding Agent
To build our coding agent, we need an LLM that supports function calling. Novita provides several models that can do this. For our agent to behave like a coding assistant, it must have the right set of functions.
Let’s think about what a human coder does. They usually write, read, and execute code. So our agent should be able to:
- Write to a file
- Read from a file
- Execute commands
- Write to multiple files at once
Setting Up the Agent
Since Novita’s models are OpenAI-compatible, we can use the OpenAI SDK to interact with them. Let’s install it:
pip install openai
After installing, set your Novita API key as an environment variable just like we did earlier. Once that’s done, we can start coding by adding our imports:
from openai import OpenAI
import os
import json
from novita_sandbox.code_interpreter import Sandbox
Now, let’s create our OpenAI client instance:
client = OpenAI(
    base_url="https://api.novita.ai/openai",
    api_key=os.environ["NOVITA_API_KEY"],
)
Here, we’re pointing the client to Novita’s base URL instead of OpenAI’s and using our Novita API key for authentication.
Next, we’ll create the sandbox instance our agent will use:
sandbox = Sandbox.create(timeout=1200)
The timeout parameter specifies how long the sandbox should remain active. In this case, we’ve set it to 10 minutes.
Function Definitions
Now we can define the functions our agent will use.
1. Read File
This function takes a file path and reads its contents using the sandbox’s files object.
def read_file(path: str):

   print(f"[DEBUG] read_file called with path: {path}")

   try:

       content = sandbox.files.read(path)

       print(f"[DEBUG] read_file result: {content}")

       return content  # returns string content

   except Exception as e:

       print(f"[DEBUG] read_file error: {e}")

       return f"Error reading file: {e}"
2. Write File
This function writes data to a specified file path.
def write_file(path: str, data: str):
   print(f"[DEBUG] write_file called with path: {path}")
   try:
       sandbox.files.write(path, data)
       msg = f"File created successfully at {path}"
       print(f"[DEBUG] {msg}")
       return msg
   except Exception as e:
       print(f"[DEBUG] write_file error: {e}")
       return f"Error writing file: {e}"
3. Write Multiple Files
This function works just like write_file but handles multiple files at once.
def write_files(files: list):
   print(f"[DEBUG] write_files called with {len(files)} files")
   try:
       sandbox.files.write_files(files)
       msg = f"{len(files)} file(s) created successfully"
       print(f"[DEBUG] {msg}")
       return msg
   except Exception as e:
       print(f"[DEBUG] write_files error: {e}")
       return f"Error writing multiple files: {e}"
4. Run Commands
This function executes shell commands inside the sandbox and returns the standard output.
def run_commands(command: str):
   print(f"[DEBUG] run_commands called with commands: {command}")
   try:
       result = sandbox.commands.run(command)
       print(f"[DEBUG] run_commands result: {result}")
       return result.stdout  # returns CommandResult object
   except Exception as e:
       print(f"[DEBUG] run_commands error: {e}")
       return f"Error running commands: {e}"
Tool Registration
Now that we have all our functions, we’ll register them as tools that the LLM can call when needed. Each tool definition includes the function name, description, and parameter schema.
tools = [

   {

       "type": "function",

       "function": {

           "name": "read_file",

           "description": "Read contents of a file inside the sandbox",

           "parameters": {

               "type": "object",

               "properties": {

                   "path": {"type": "string", "description": "File path in the sandbox"}

               },

               "required": ["path"],

           },

       },

   },

   {

       "type": "function",

       "function": {

           "name": "write_file",

           "description": "Write a single file inside the sandbox",

           "parameters": {

               "type": "object",

               "properties": {

                   "path": {"type": "string", "description": "File path in the sandbox"},

                   "data": {"type": "string", "description": "Content to write"},

               },

               "required": ["path", "data"],

           },

       },

   },

   {

       "type": "function",

       "function": {

           "name": "write_files",

           "description": "Write multiple files inside the sandbox",

           "parameters": {

               "type": "object",

               "properties": {

                   "files": {

                       "type": "array",

                       "items": {

                           "type": "object",

                           "properties": {

                               "path": {"type": "string"},

                               "data": {"type": "string"},

                           },

                           "required": ["path", "data"],

                       },

                   }

               },

               "required": ["files"],

           },

       },

   },

   {

       "type": "function",

       "function": {

           "name": "run_commands",

           "description": "Run a single shell command inside the sandbox working directory",

           "parameters": {

               "type": "object",

               "properties": {

                   "command": {

                       "type": "string",

                       "description": "The shell command to run, e.g. 'ls' or 'python main.py'",

                   }

               },

               "required": ["command"],

           },

       },

   }

]
With the tools registered let’s move on to creating a chat loop that would utilize our agent and all the tools we have defined.
Chat Loop
Now we’ll create a simple chat loop that allows the user to interact with the coding agent. The loop will maintain a list of messages and handle function calls whenever the agent requests one.
messages = []

print("💬 Enter your queries (type 'exit' to quit):")

while True:

   user_input = input("You: ")

   if user_input.lower() == "exit":

       break

   # Append user message

   messages.append({"role": "user", "content": user_input})

   # Send to model

   response = client.chat.completions.create(

       model=model,

       messages=messages,

       tools=tools,

   )

   assistant_msg = response.choices[0].message

   messages.append(assistant_msg)

   if assistant_msg.tool_calls:

       print(f"[DEBUG] Assistant requested {len(assistant_msg.tool_calls)} tool call(s).")

       for tool_call in assistant_msg.tool_calls:

           fn_name = tool_call.function.name

           fn_args = json.loads(tool_call.function.arguments)

           print(f"[DEBUG] Tool call detected: {fn_name} with args {fn_args}")

           if fn_name == "read_file":

               fn_result = read_file(**fn_args)

           elif fn_name == "write_file":

               fn_result = write_file(**fn_args)

           elif fn_name == "write_files":

               fn_result = write_files(**fn_args)

           elif fn_name == "run_commands":

               fn_result = run_commands(**fn_args)

           else:

               fn_result = f"Error: Unknown tool {fn_name}"

               print(f"[DEBUG] Unknown tool requested: {fn_name}")

           # Append result back

           messages.append({

               "tool_call_id": tool_call.id,

               "role": "tool",

               "content": str(fn_result),

           })

       # Get model's final answer with tool results

       follow_up = client.chat.completions.create(

           model=model,

           messages=messages,

       )

       final_answer = follow_up.choices[0].message

       messages.append(final_answer)

       print("Assistant:", final_answer.content)

   else:

       print("Assistant:", assistant_msg.content)

sandbox.kill()

print("[DEBUG] Sandbox terminated. 👋")
This chat loop keeps the interaction running, allows the agent to call any of the registered tools when needed, and cleans up the sandbox when the user exits.
Creating a UI with Gradio
We now have a fully functional coding agent that can chat with us, but interacting through a REPL isn’t exactly exciting. Let’s make the experience more engaging by giving our agent a simple Gradio interface.
Creating a Gradio UI is simple. We’ll use gr.ChatInterface to manage our chat interactions and link it to the logic we built earlier. Alongside that, we’ll include a command interface for running shell commands inside the sandbox, as well as a dropdown menu that lets us select which model to use.
To update our previous code to support Gradio, we’ll replace the chat loop and the last two lines with the following:
# --- Persistent chat messages ---

messages = []

# --- Global model setter ---

def set_model(selected_model):

   global model

   model = selected_model

   print(f"[DEBUG] Model switched to: {model}")

   return f"✅ Model switched to **{model}**"

def chat_fn(user_message, history):

   global messages, model

   messages.append({"role": "user", "content": user_message})

   # Send to model

   response = client.chat.completions.create(

       model=model,

       messages=messages,

       tools=tools,

   )

   assistant_msg = response.choices[0].message

   messages.append(assistant_msg)

   output_text = ""

   if assistant_msg.tool_calls:

       print(f"[DEBUG] Assistant requested {len(assistant_msg.tool_calls)} tool call(s).")

       for tool_call in assistant_msg.tool_calls:

           fn_name = tool_call.function.name

           fn_args = json.loads(tool_call.function.arguments)

           print(f"[DEBUG] Tool call detected: {fn_name} with args {fn_args}")

           if fn_name == "read_file":

               fn_result = read_file(**fn_args)

           elif fn_name == "write_file":

               fn_result = write_file(**fn_args)

           elif fn_name == "write_files":

               fn_result = write_files(**fn_args)

           elif fn_name == "run_commands":

               fn_result = run_commands(**fn_args)

           else:

               fn_result = f"Error: Unknown tool {fn_name}"

           messages.append({

               "tool_call_id": tool_call.id,

               "role": "tool",

               "content": str(fn_result),

           })

       follow_up = client.chat.completions.create(

           model=model,

           messages=messages,

       )

       final_answer = follow_up.choices[0].message

       messages.append(final_answer)

       output_text = final_answer.content

   else:

       output_text = assistant_msg.content

   return output_text

# --- Command Interface function ---

def execute_command(command):

   if not command.strip():

       return "⚠️ Please enter a command."

   print(f"[DEBUG] Executing command from interface: {command}")

   output = run_commands(command)

   return f"```bash\
{output}\
```" if output else "✅ Command executed (no output)."

# --- Gradio UI ---

with gr.Blocks(title="Novita Sandbox App") as demo:

   gr.Markdown("## 🧠 Novita Sandbox Agent")

   gr.Markdown(

   "This app is an AI-powered **code agent** that lets you chat with intelligent assistants backed by **Novita AI LLMs**. These agents can write, read, and execute code safely inside a **Novita sandbox**, providing a secure environment for running commands, testing scripts, and managing files, all through an intuitive chat interface with model selection and command execution built right in."

)

   with gr.Row(equal_height=True):

       # Left: Chat Interface

       with gr.Column(scale=2):

           gr.Markdown("### 💬 Chat Interface")

           gr.ChatInterface(chat_fn)

       # Right: Command Interface

       with gr.Column(scale=1):

           gr.Markdown("### 💻 Command Interface")

           # Model selector

           model_selector = gr.Dropdown(

               label="Select Model",

               choices=[

                   "meta-llama/llama-3.3-70b-instruct",

                   "deepseek/deepseek-v3.2-exp",

                   "qwen/qwen3-coder-30b-a3b-instruct",

                   "openai/gpt-oss-120b",

                   "moonshotai/kimi-k2-instruct",

               ],

               value=model,

               interactive=True,

           )

           model_status = gr.Markdown(f"✅ Current model: **{model}**")

           model_selector.change(set_model, inputs=model_selector, outputs=model_status)

           command_input = gr.Textbox(

               label="Command",

               placeholder="e.g., ls, python main.py",

               lines=1,

           )

           with gr.Row():

               run_btn = gr.Button("Run", variant="primary", scale=0)

           command_output = gr.Markdown("Command output will appear here...")

           run_btn.click(execute_command, inputs=command_input, outputs=command_output)

# --- Cleanup on exit ---

atexit.register(lambda: (sandbox.kill(), print("[DEBUG] Sandbox terminated. 👋")))

if __name__ == "__main__":

   demo.launch()
In this version, the chat_fn function handles each message exchange between the user and the agent. The gr.ChatInterface takes this function as input and manages the UI interactions automatically.
When the Gradio app starts, it runs your agent inside the browser giving the user a clean, interactive chat interface. Finally, we register a cleanup routine using atexit to ensure that the sandbox is properly terminated when the app stops.
Now we have an AI-powered coding agent running securely in a sandbox, complete with a friendly Gradio chat interface.
You can find the complete code on GitHub.
Testing the Coding Agent
To use the agent we need to run our gradio code as a script.
python gradio_chat.pyWhen we do that we would have our gradio app running on localhost. With this we can have conversations with our coding agent and the agent would execute all our actions within the sandbox.
From the gradio application all we can see is the chats from our agent but if we go to our terminal we can also see the debug outputs what command the function the agent called to assist the user’s request.
The fact we have access to a file tool and a command tool means there almost nothing that we can’t code but instead of coding directly we are giving instruction to our agent and it gets to write and execute the codes for us.
Deploying on Hugging Face Spaces
We currently have our coding agent running locally on our computer. Now, let’s make it accessible to the rest of the world by deploying it on Hugging Face Spaces. Hugging Face Spaces allows us to host both our code and application in one place. Let’s get started.
Create the Space
Head over to Hugging Face and create a new Space for your coding agent by giving it a unique name.
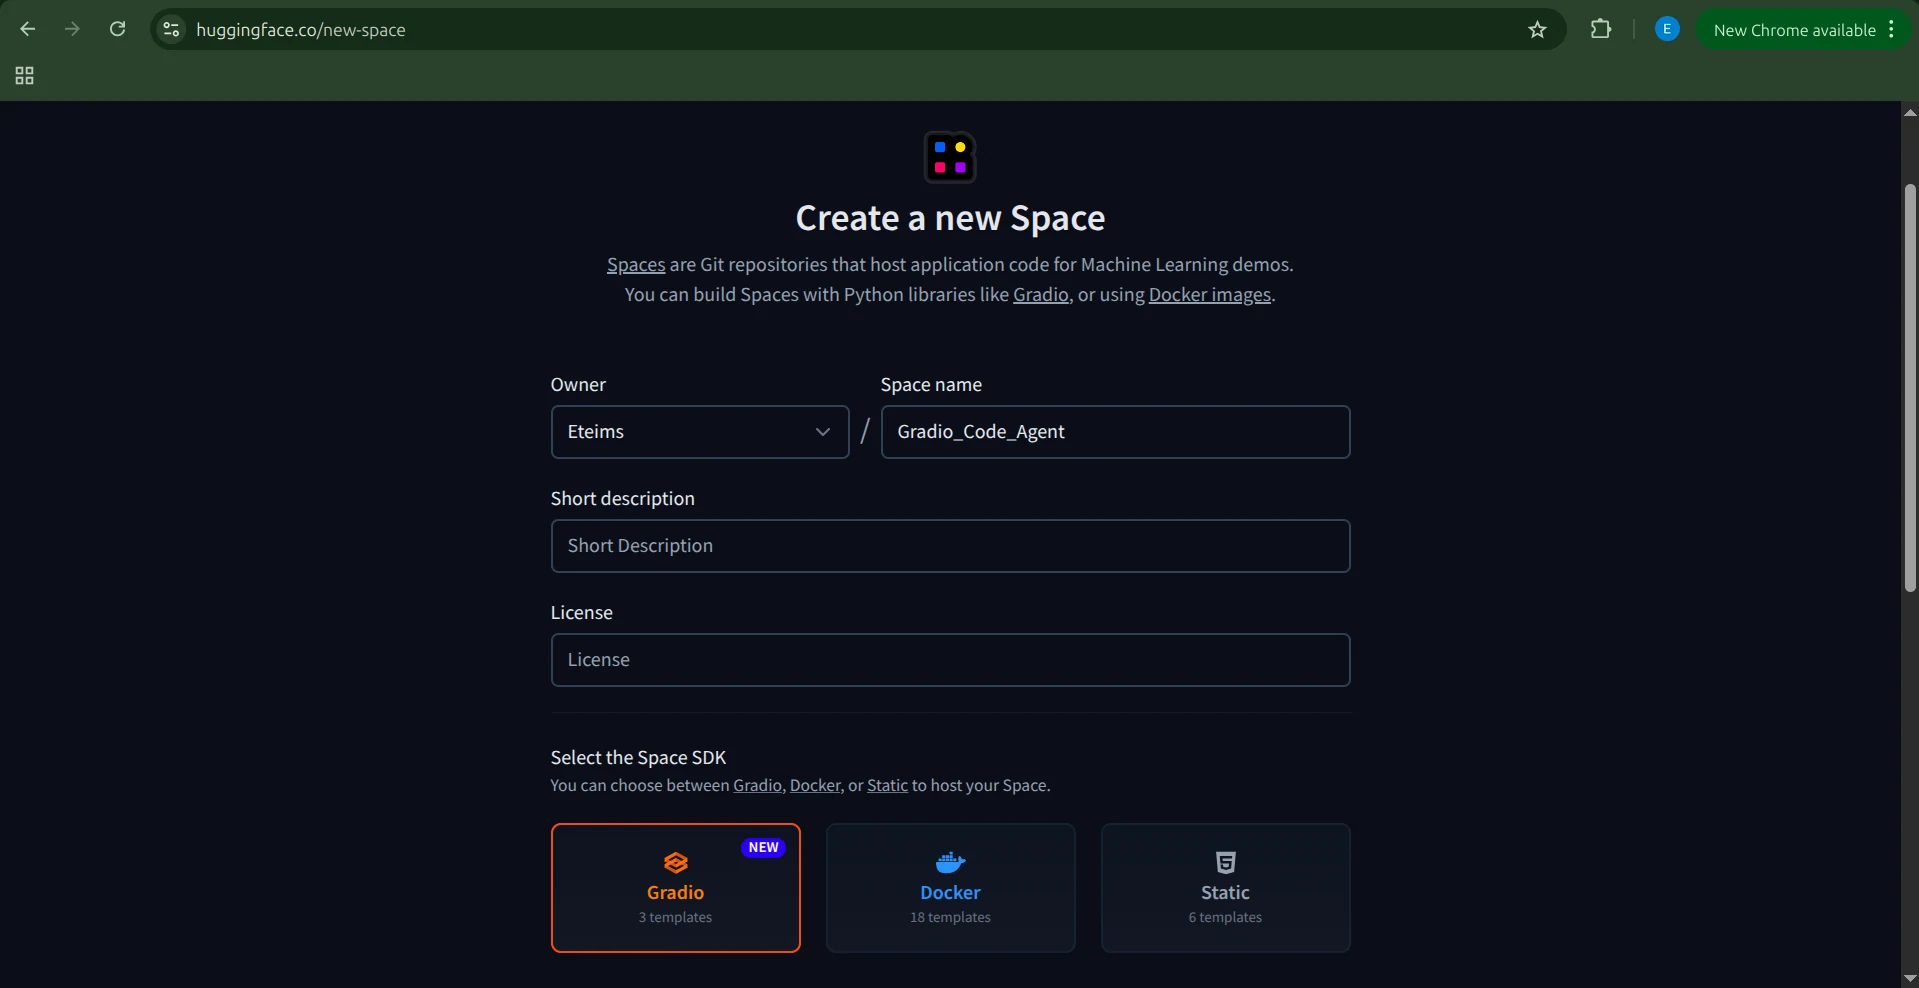
Next, select the SDK for the Space which in our case is Gradio. Choose the Blank template since we already have our application code.
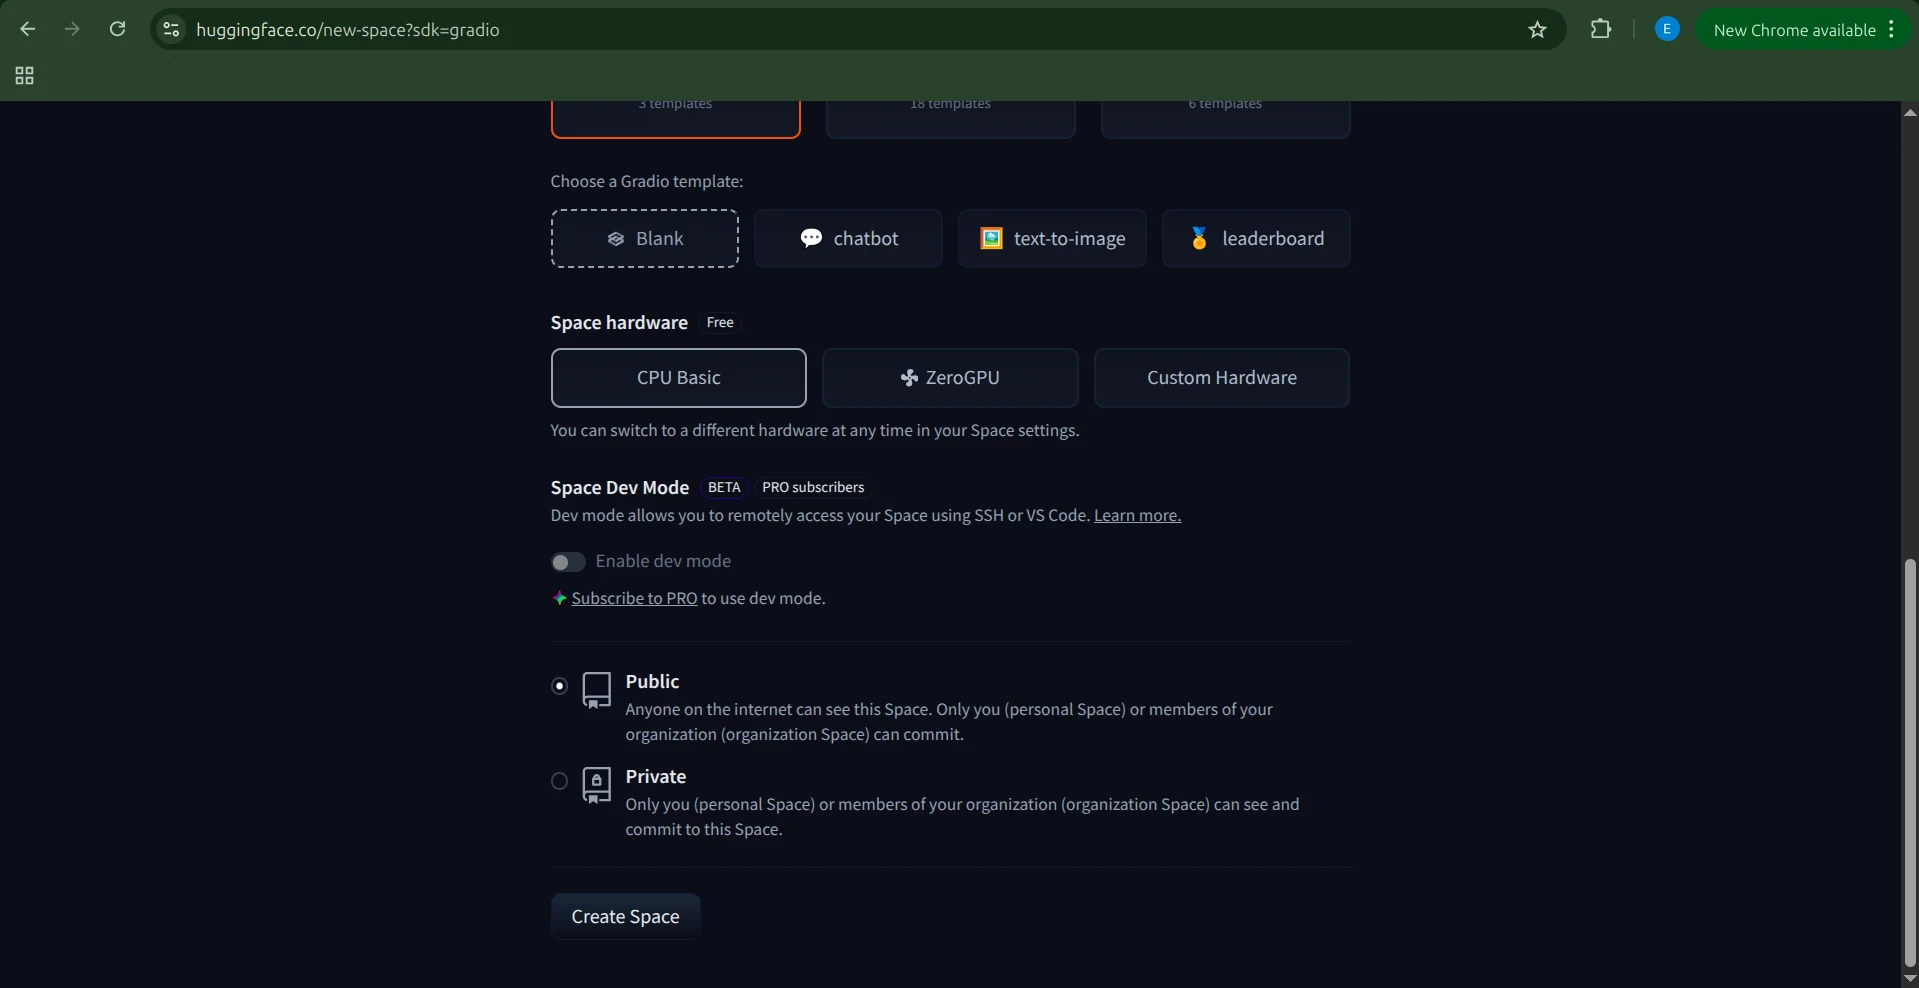
Then, select the hardware. Since our agent and sandbox are powered by Novita, we don’t need any specialized hardware. The Basic CPU option is sufficient. Once done, click Create Space.
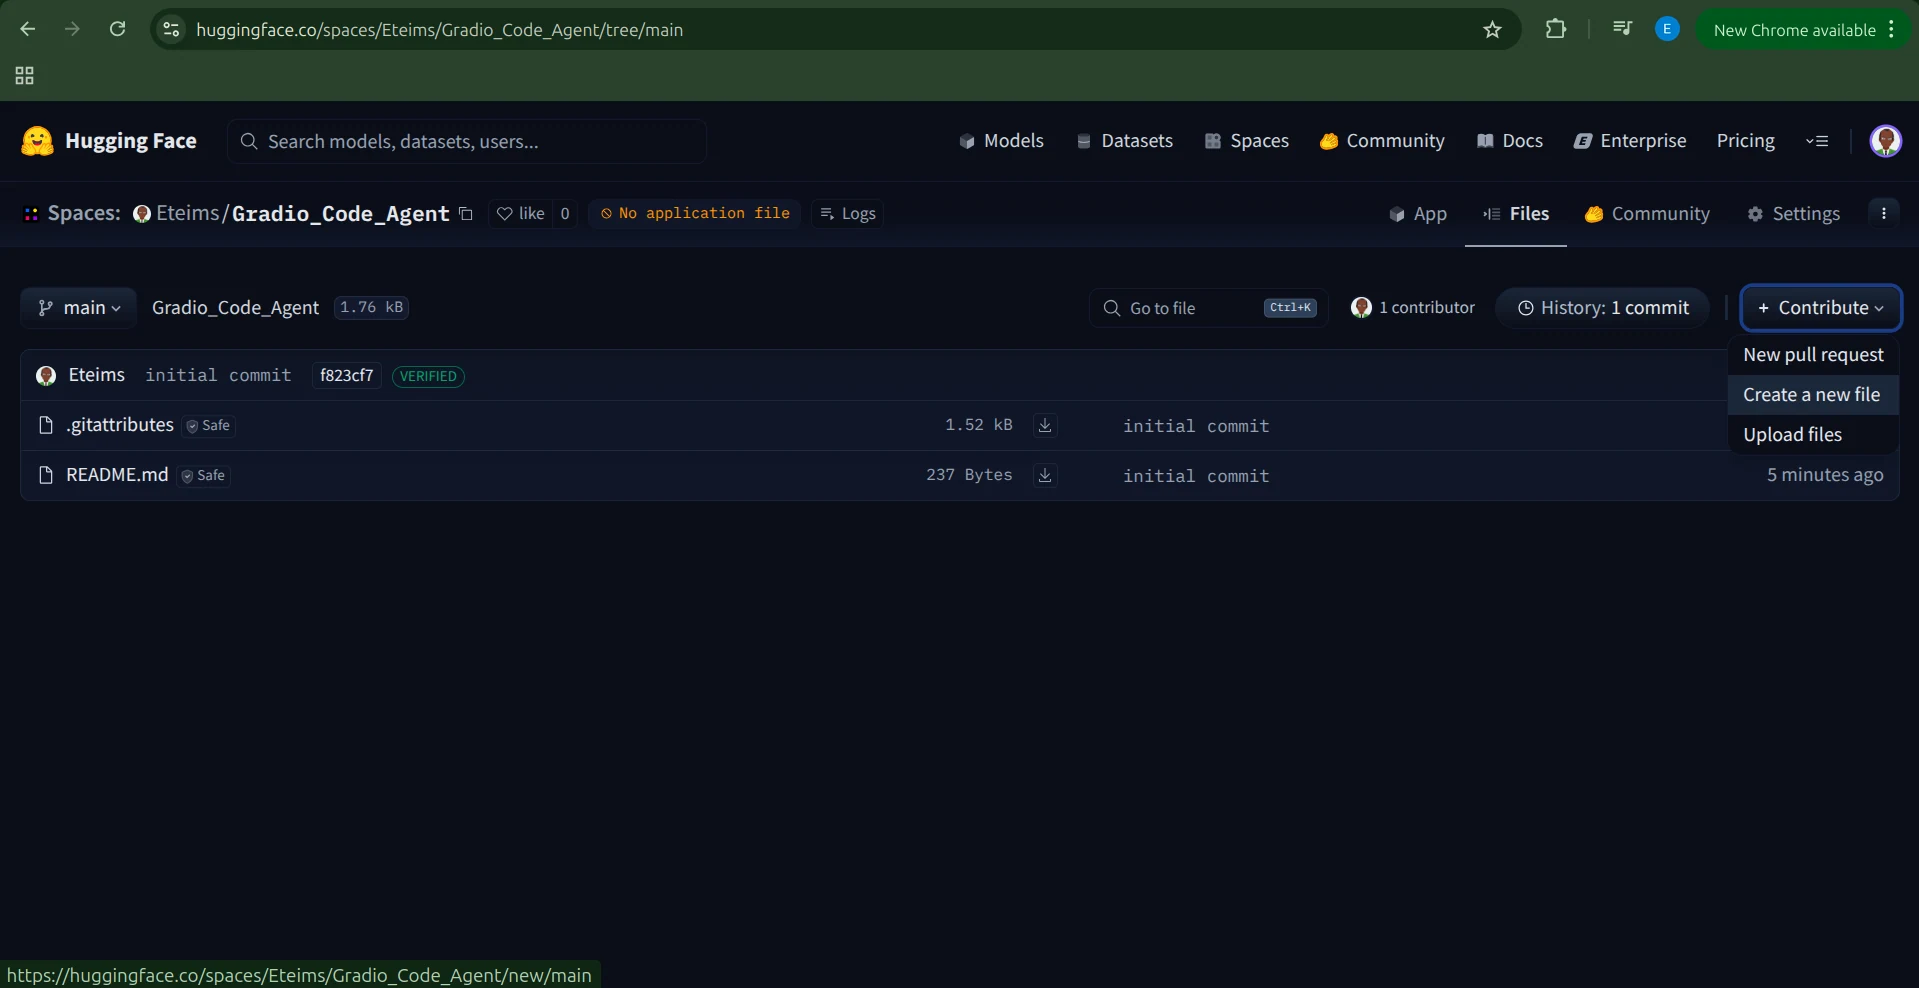
Hugging Face will create the Space with a README.md and a .gitignore file.
There are multiple ways to add your code, but the simplest is to click Contribute → Add file.
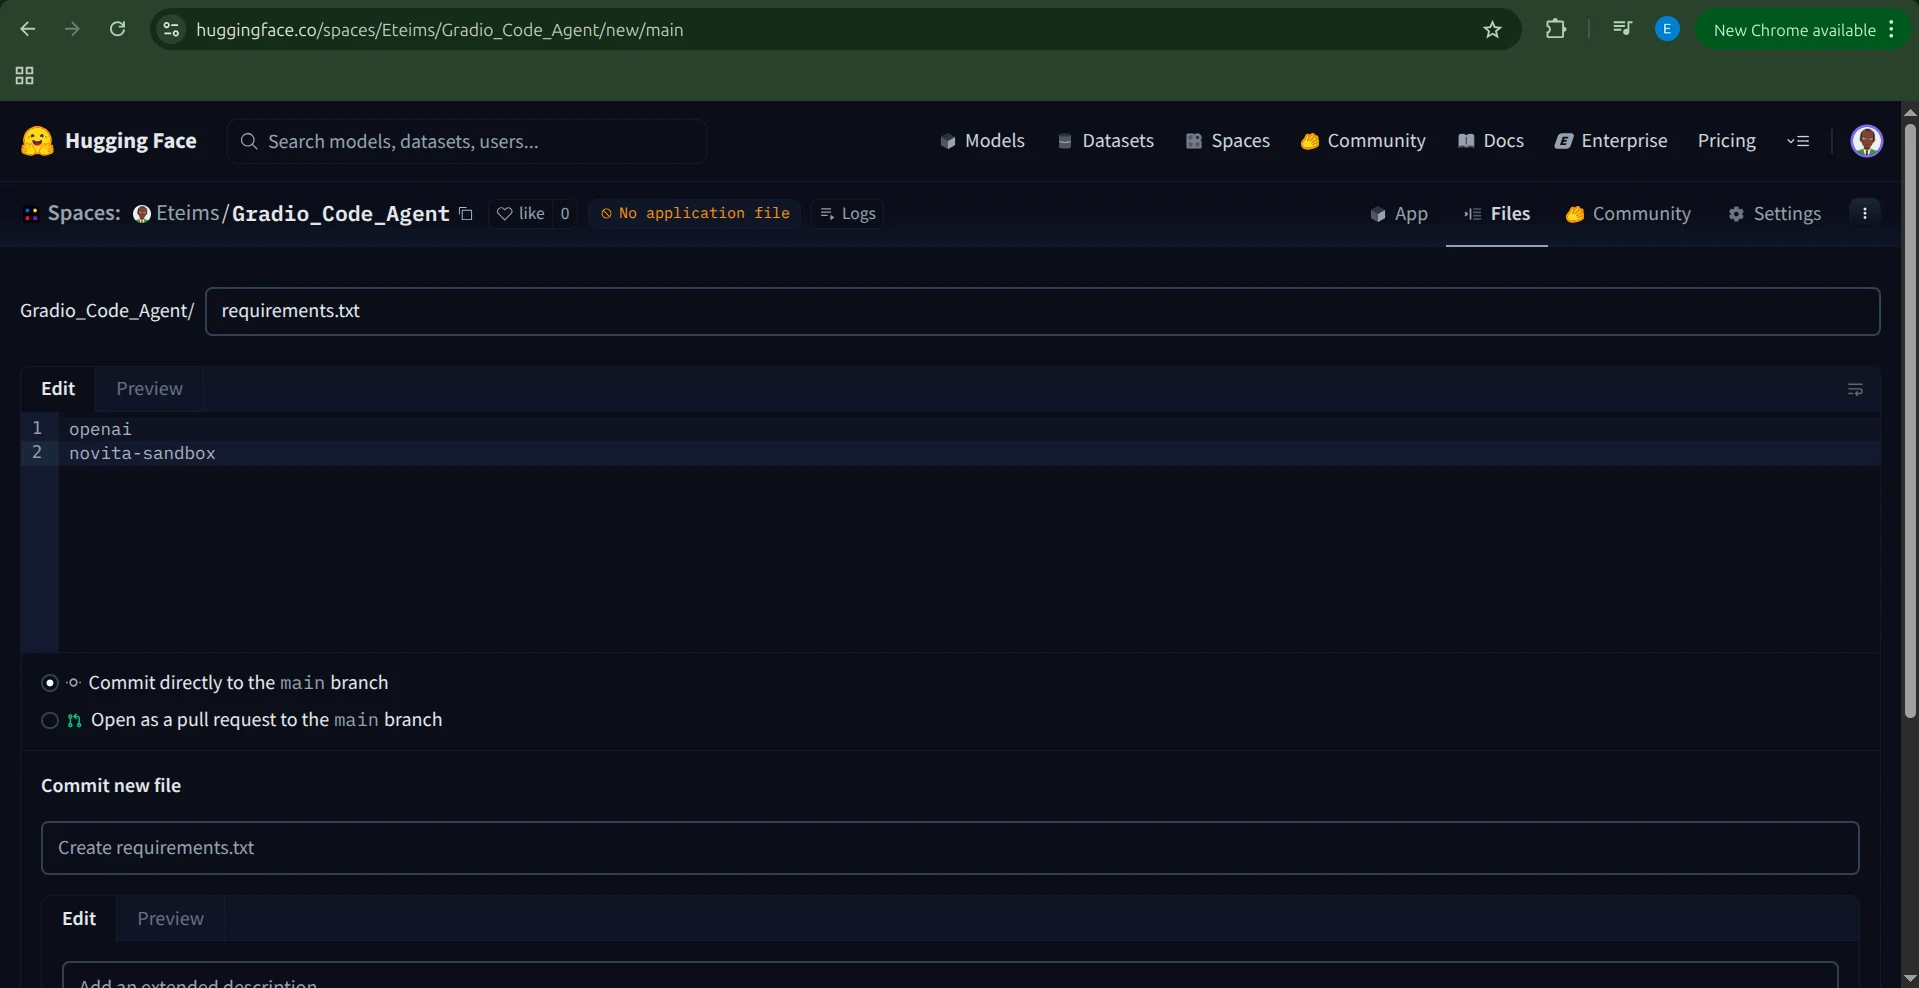
Create a requirements.txt file and include the following dependencies:
openai
novita-sandbox
Add Environment Variables
Before we can run our application, we need to set our NOVITA_API_KEY as an environment variable.
To do this, navigate to your Space’s Settings, scroll to the Variables and secrets section, and add a new secret named NOVITA_API_KEY with your API key as its value.
Set Up the Application
With the environment variable set, it’s time to create our application.
Create a new file named app.py and paste our complete Gradio agent code into it.

Once you save the file, Hugging Face will automatically start building your Space.
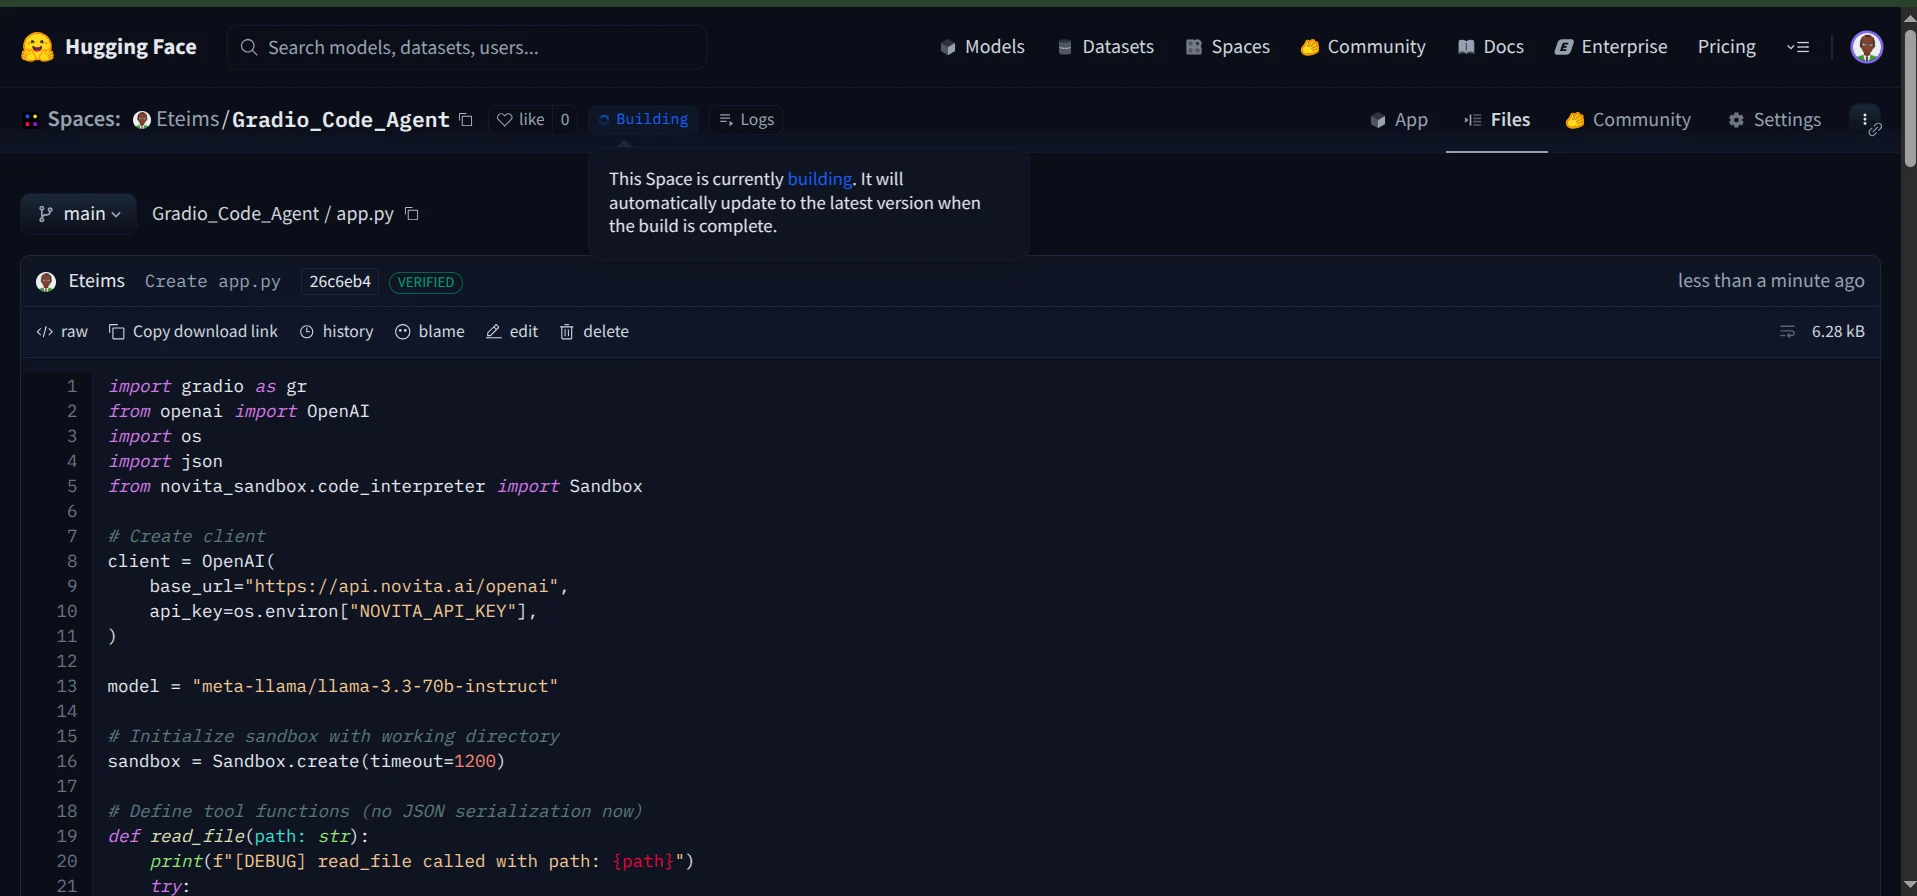
After the build process completes, your coding agent will be live and accessible on Hugging Face Spaces.
You can now chat with your agent through the interactive chat interface.
Additionally, you can monitor the logs to see the tools your agent calls during execution.
And that’s it, you now have a fully functional coding agent running in a secure sandbox, equipped with a Gradio interface, and deployed seamlessly on Hugging Face Spaces.
Conclusion
In this article, we explored how to harness Novita’s Sandbox to build a fully functional coding agent capable of reading and creating files, executing commands, and operating safely within a secure environment.
What we’ve built here is just the beginning. The sandbox opens the door to countless possibilities, from creating AI-powered data visualization agents to developing computer-use agents that can interact with systems intelligently.
Almost anything is possible when you combine an agent with a dedicated toolset like the sandbox.