
We are at the brink of a new type of software. In his recent keynote at YC Startup School, Andrej Karpathy described Software 3.0, a world where natural language becomes the primary programming interface, and large language models serve as both computing engines and autonomous collaborators.
Unlike Software 1.0, where developers wrote explicit instructions, or Software 2.0, where neural networks learned patterns from data, Software 3.0 runs on natural language. Our prompts become programs, and LLMs translate our intentions into executable behaviour.
In this tutorial, we will build an MCP server that provides remote access to a Novita AI sandbox where our AI agent can safely execute code. The agent itself will be created with the mcp-use library, which also manages communication with the MCP server automatically.
What is MCP (Model Context Protocol)?
The Model Context Protocol (MCP) is an open standard developed by Anthropic for AI models to communicate with external services, tools, and data sources. Think of it as a “USB-C for AI”; it provides a standard interface between agents and the outside world.
The three core components:
- Tools: Callable functions / APIs that are exposed by the server (e.g, web browsing, code execution).
- Resources: External data provided by the server, usually meant as context for the AI agent (e.g, files, metadata, datasets).
- Prompts: These detailed instructions are meant to guide the agent’s behavior when interacting with the above tools or resources.
For a more in-depth look at MCP, its architecture, and components, check out our blog on building your first MCP server
Why MCP Matters for AI Tool Integration
MCP establishes two-way communication between AI agents and external systems. This makes it easy to “plug” LLMs into custom tools while reducing integration work and minimizing the potential for errors.
Introduction to the mcp-use Library

The mcp-use library is a Python package that simplifies the building of AI agents that interact with MCP servers. It handles the agent’s creation and manages communication with MCP servers to access external tools and data sources, allowing you to just focus on your application logic.
Overview of Novita AI Sandbox and Model API
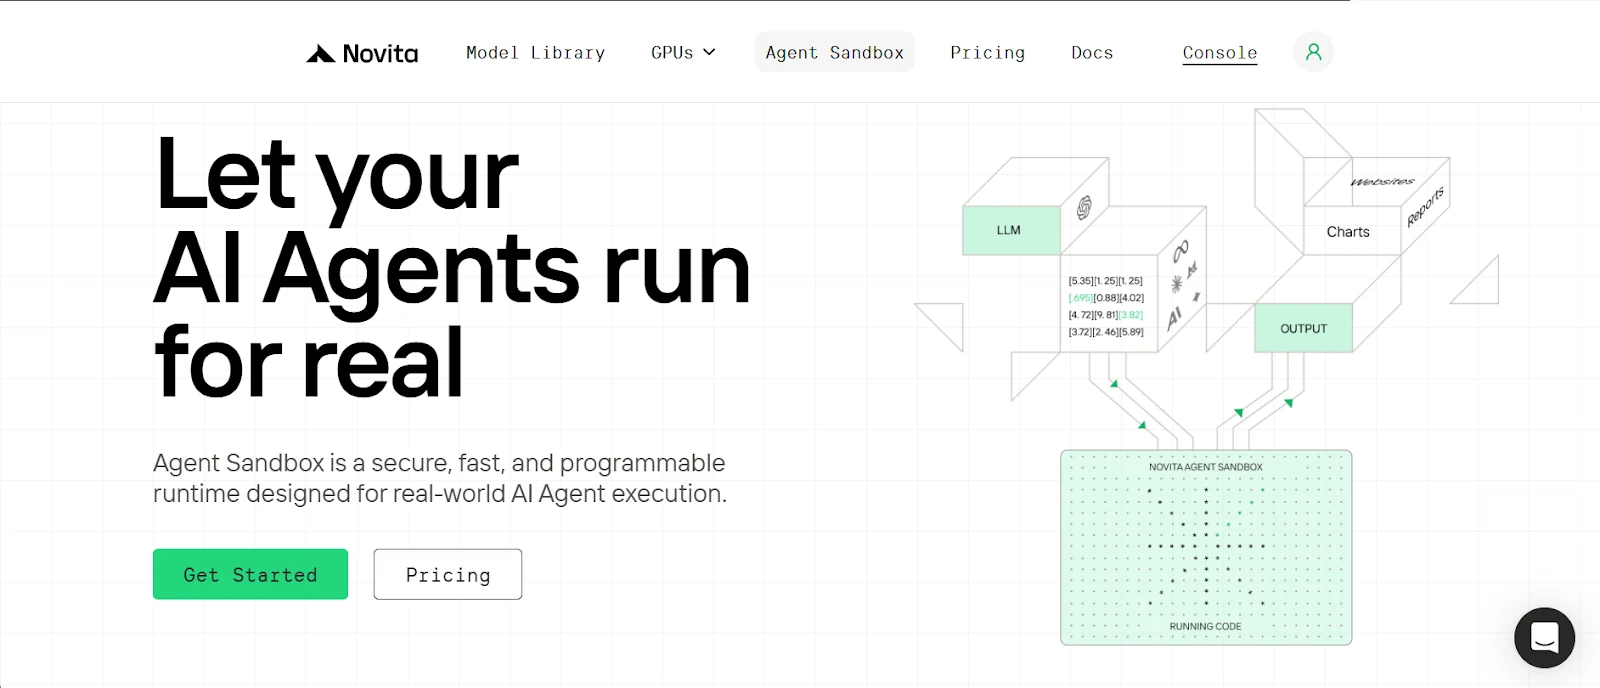
What a Sandbox Is and Why It Matters
A sandbox is a secure, isolated runtime environment where untrusted code can be executed without affecting the host system. It is basically a lightweight virtual computer for your AI agent to execute code, commands, create files, etc.
Novita AI provides this sandbox on the cloud for your agent to access quickly on demand, with flexible per-second billing based on resources used.
Key features of the Novita sandbox:
- Secure Isolation: Each sandbox gets its isolated filesystem and environment, protecting data and preventing unintended interactions.
- Fast Startup: Sandbox instances launch in under ~200ms on average, making it ideal for low-latency scenarios.
- Multi-Language Support: You can run code in multiple programming languages, including Python, JavaScript, TypeScript, and more.
- Quick Pause & Resume: Pause the sandbox at any time and resume when needed, with filesystem and process state fully restored.
- Background Execution: Supports background task execution and is suitable for scenarios that require waiting for a result.
Novita Model API:
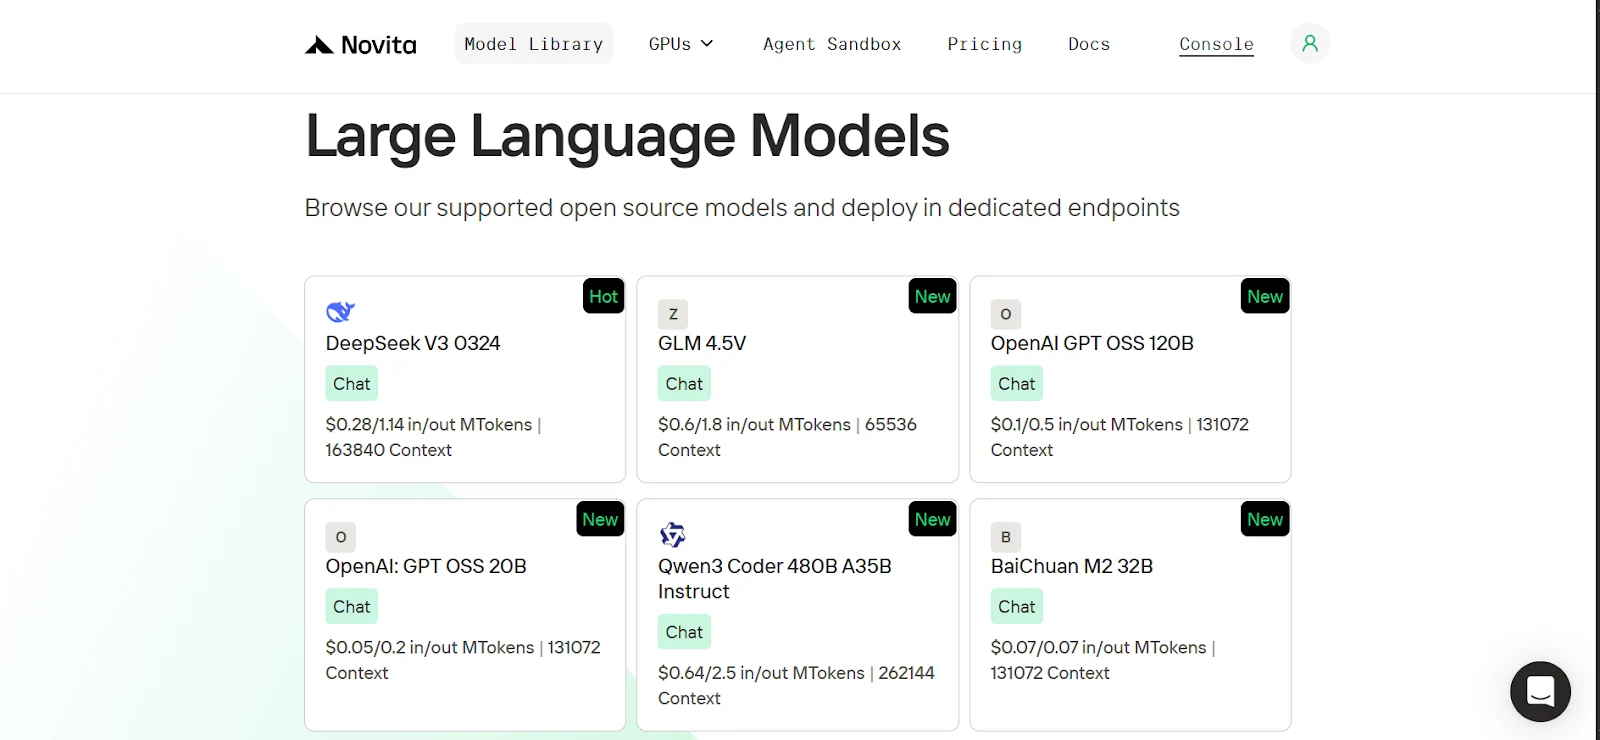
Novita offers a vast library of open source AI models from leading research labs like OpenAI, Google, DeepSeek, and Qwen etc. These include models for language, vision, audio, video, and embeddings. Our language models are also fully compatible with the OpenAI SDK, so switching from OpenAI to Novita only requires updating the base URL and API key in your client, then selecting a Novita model.
| from openai import OpenAI client = OpenAI( base_url=“https://api.novita.ai/v3/openai”, api_key=" ) |
Setting Up Your Development Environment
To get started, we’ll clone the GitHub repository, set up a clean Python environment, install all required dependencies, and get Novita AI keys.
Clone the GitHub repository, and install dependencies with uv.
1. Install uv (a lightweight Python package manager)
| pip install uv |
2. Clone the repository (GitHub repo) and navigate into it.
| git clone https://github.com/Studio1HQ/mcp\_remote\_execution.git cd mcp_remote_execution |
3. Create and activate the uv virtual environment
| # Creates a virtual environment uv venv # Activate the virtual environment source .venv/bin/activate # For Mac/Linux # or .venv\Scripts\activate # For Windows |
4. Install project dependencies
| # Install dependencies uv sync |
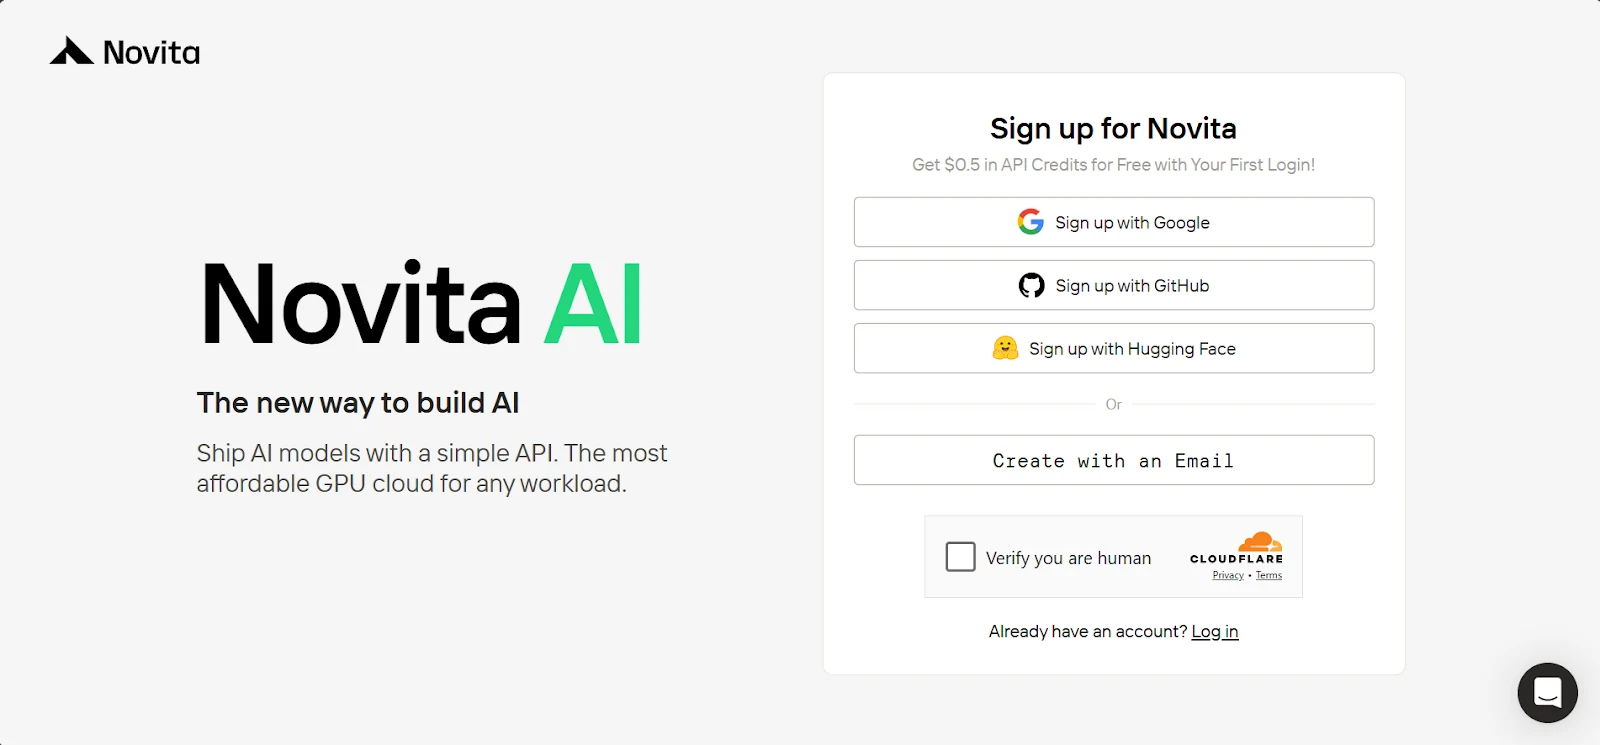
Creating a Novita AI account and obtaining an API key
1. Sign up at novita.ai.
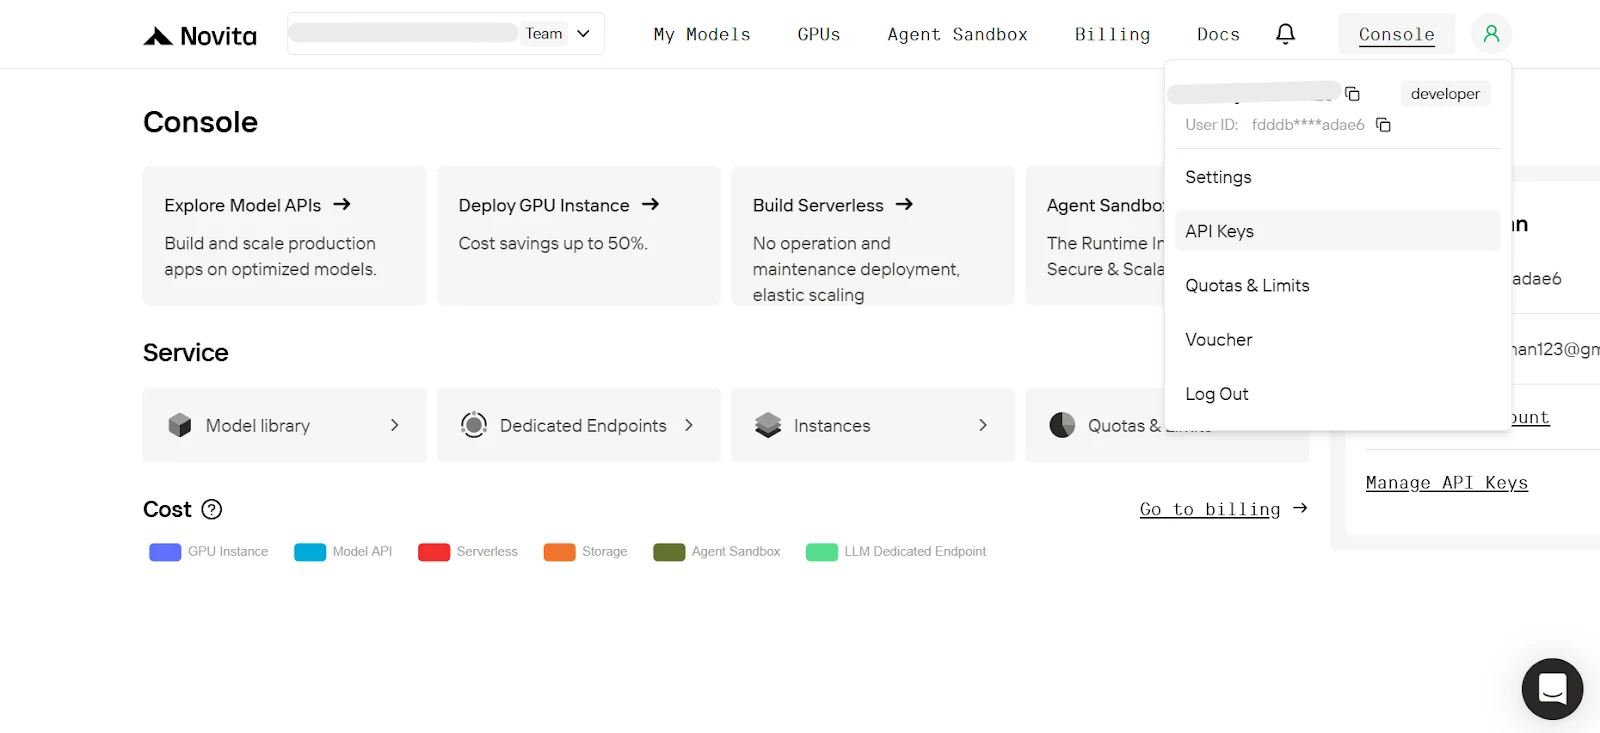
2. In the dashboard, hover over the user profile icon and click API Keys on the pop-up.
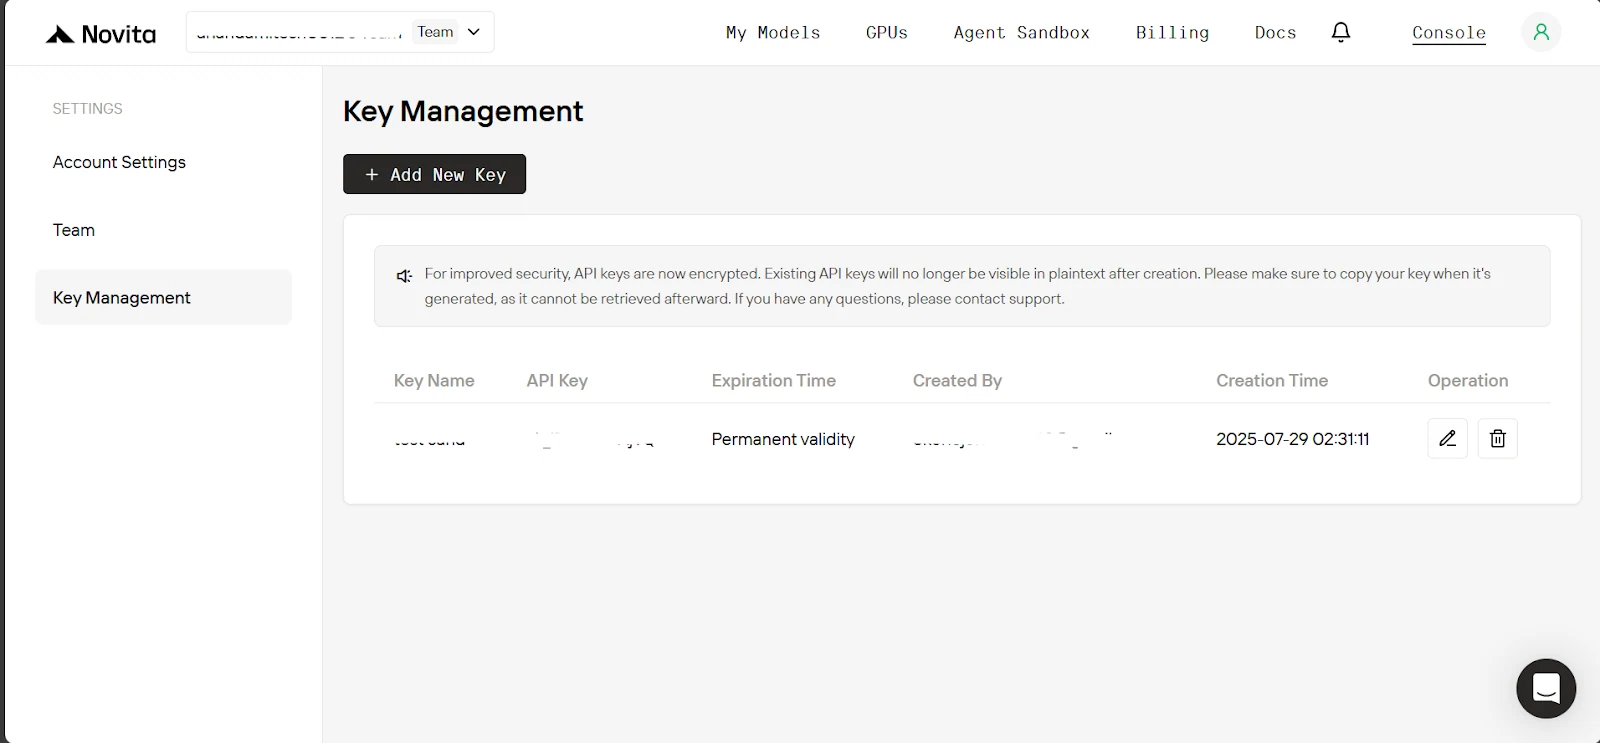
3. On the Key Management page, click Add New Key. In the pop-up, enter a name for your key, click Confirm, and then copy the generated key.
4. Now inside the project’s directory, create a .env file, and paste this below.
| NOVITA_API_KEY=" NOVITA_BASE_URL=“https://api.novita.ai/v3/openai” NOVITA_E2B_DOMAIN=“sandbox.novita.ai” NOVITA_E2B_TEMPLATE=“code-interpreter-v1” |
Add credits to the Novita AI account.
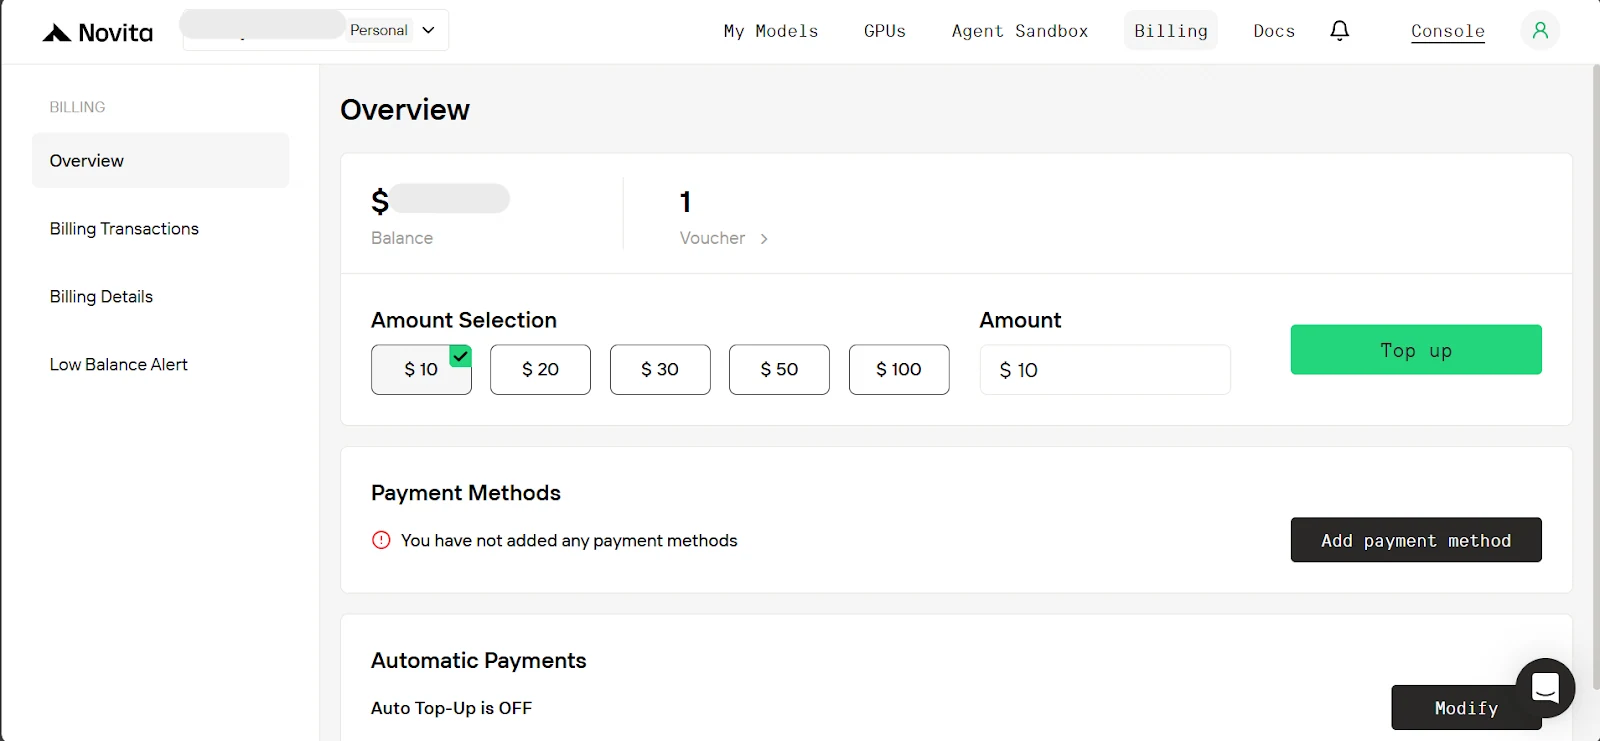
To use the Novita sandbox, you need to add credits to our account. On the dashboard tab, click ‘Billing.’ Then, on the billing page, add a payment method and top up at least $10 in credits.
Building the MCP server and AI agent integration
Now that our environment is set up, let’s start building. This process will have two parts: first, we’ll walk through creating the MCP server, and then we’ll build the AI agent application (which acts as the MCP client). But before we begin, let’s create the sandbox manager that the MCP server will use.
The Sandbox Manager
This will be responsible for starting and stopping sandbox instances. In our setup, we’ll restrict the server to a single sandbox instance at a time. The Sandbox Manager will also handle executing Python code and running shell commands in the sandbox.
First, in sandbox_manager.py, we have the SandboxManager class, which takes the following parameters:
- sandbox_template: The template used to create a sandbox instance. We’ll be using “code-interpreter-v1”, which comes preinstalled with commonly used Python packages (eg, pandas, numpy).
- sandbox_domain: The domain endpoint used to connect to the Novita AI sandbox instance.
- sandbox_timeout: The duration (in seconds) that determines how long the sandbox remains active before it’s automatically terminated.
| from novita_sandbox.code_interpreter import Sandbox class SandboxManager: def __init__( self, sandbox_template: str, sandbox_domain: str, sandbox_timeout: int, ): self.sandbox_template = sandbox_template self.sandbox_domain = sandbox_domain self.sandbox_timeout = sandbox_timeout |
Now we’ll add methods to create and stop a sandbox.
- For creation, we take a sandbox_api_key, use it to start a new sandbox instance for the user, and return a success message with the sandbox ID or exception message if something goes wrong.
- For stopping, we take both the sandbox_api_key and the sandbox_id, connect to the sandbox, and stop it if it exists. Just like before, we return a success message or exception message depending on the result.
| … class SandboxManager: … # below existing code def create_sandbox_session(self, sandbox_api_key: str) -> str: """ This will create a new sandbox instance. Args: sandbox_api_key (str): The API key for the sandbox. Returns: str: Success message with the sandbox ID of the new sandbox or error message. """ try: # create the new sandbox sandbox = Sandbox.create( template=self.sandbox_template, api_key=sandbox_api_key, domain=self.sandbox_domain, timeout=self.sandbox_timeout, ) return f”Successfully created sandbox. Sandbox ID: {sandbox.sandbox_id}“ except Exception as e: return f”Failed to create new sandbox:{str(e)}“ def stop_sandbox_session(self, sandbox_api_key: str, sandbox_id: str) -> str: """ This will kill a sandbox instance if it exists. Args: sandbox_api_key (str): The API key for the sandbox. sandbox_id (str): The ID of the sandbox. Returns: str: Success message with the sandbox ID of the killed sandbox or error message. """ try: # connect to sandbox sandbox = Sandbox.connect( api_key=sandbox_api_key, sandbox_id=sandbox_id, ) sandbox.kill() return f”Successfully killed Sandbox ID: {sandbox_id}“ except Exception as e: return f”Failed to kill Sandbox ID: {sandbox_id}\ {str(e)}” |
Finally, we add methods for running Python code and shell commands in a user’s sandbox after connecting to it via the API key and ID. All sandbox outputs (including exceptions and errors) are returned in a dictionary.
| … class SandboxManager: … # below existing code def run_python_code( self, python_code: str, sandbox_api_key: str, sandbox_id: str ) -> dict: """ Runs the python code on the sandbox, and if there any image outputs they are skipped. Args: python_code (str): The python code to run. sandbox_api_key (str): The API key for the sandbox. sandbox_id (str): The ID of the sandbox. Returns: dict: Containing stdout, logs, error, etc. """ try: # connect to sandbox sandbox = Sandbox.connect( api_key=sandbox_api_key, sandbox_id=sandbox_id, ) execution = sandbox.run_code(python_code, language=“python”) return { # we will skip image outputs. ”outputs”: [result for result in execution.results if not result.png], “logs”: execution.logs, “error”: execution.error, } except Exception as e: return {“error”: str(e)} def run_on_command_line( self, command: str, sandbox_api_key: str, sandbox_id: str ) -> dict: """ Runs the command on the sandbox. Args: command (str): The command to run. sandbox_api_key (str): The API key for the sandbox. sandbox_id (str): The ID of the sandbox. Returns: dict: Containing the output of the command and the execution error if any. """ try: # connect to sandbox sandbox = Sandbox.connect( api_key=sandbox_api_key, sandbox_id=sandbox_id, ) result = sandbox.commands.run(command) return { “output”: { “stdout”: result.stdout, “stderr”: result.stderr, “exit_code”: result.exit_code, “error”: result.error, }, “execution error”: None, } except Exception as e: return {“output”: None, “execution error”: str(e)} |
Creating the MCP server
Now that the Sandbox Manager is set up, it’s time to work on mcp_server.py. First, we create an instance of FastMCP, the framework that will run the server, along with a Sandbox Manager. We also create a rich console instance for beautiful printing on terminal.
Note: The sandbox timeout passed to the Sandbox Manager is used for every sandbox started on this server. It is the maximum time (in seconds) each sandbox can stay alive (running), unless it’s stopped earlier.
| import asyncio import os from dotenv import load_dotenv from mcp.server.fastmcp import Context, FastMCP from rich.console import Console from rich.panel import Panel from rich.table import Table from starlette.requests import Request from sandbox_manager import SandboxManager # load .env variables load_dotenv() console = Console() # Initialize FastMCP server mcp = FastMCP(“MCP_Server”) # Initialize sandbox manager for the singleton sandbox instance. sandbox_manager = SandboxManager( sandbox_template=os.getenv(“NOVITA_E2B_TEMPLATE”), sandbox_domain=os.getenv(“NOVITA_E2B_DOMAIN”), sandbox_timeout=900, # 900 seconds (15 minutes), sandbox instance will be killed automatically after. ) |
Now, since we need an API key to connect to a user’s sandbox, we’ll get it from the user’s request to the server. As we’ll see later in the MCP client, this key will be sent in the authorization header of every request. That means we need a way to extract the API key from this header on the server side.
FastMCP provides a Context object that at runtime holds information about the user making the request. So we’ll create a helper method get_user_api_key that takes a context object, extracts the API key from the header, and returns it or raises an exception if it’s missing.
| … # below existing code def get_user_api_key(ctx: Context) -> str: """ Returns the API key from the request header if it exists otherwise raise an exception. """ request: Request = ctx.request_context.request # Access request data auth_header = request.headers.get(“Authorization”) if auth_header: auth_header = auth_header.split(” ”)[1] if not auth_header: raise Exception(“Missing API Key in Authorization Bearer header”) return auth_header |
Time to expose prompts, tools, and resources on our server. To do this, we simply add the decorator @mcp.{prompt, tool, resource}() to the Python function. Starting with our prompt, which returns instructions on how our agent should use the sandbox.
| … # below existing code (Note: Console display helper methods were skipped for brevity) @mcp.prompt() def instructions_for_sandbox_use() -> str: """ RETURNS MUST READ INSTRUCTIONS FOR SANDBOX USE. """ return """ When you want to use the sandbox function, you must first create a new sandbox session by calling the create_sandbox_session() function. Then you can use the run_python_code() or run_on_command_line() function to run on the sandbox. When you are done, you must kill the sandbox session by calling the stop_sandbox_session() function. Note: - The sandbox already comes pre-installed with the usual data analysis packages but if there’s a package you are not sure exists or your code had an import error due to a missing package, you can check if it’s installed and if not install it. """ |
For the tools, we expose methods that use the sandbox_manager instance to create, stop, and execute code or commands on a user’s sandbox.
Note: Among the arguments the below tool methods take, we’ll include a ctx: Context. This tells FastMCP to automatically insert the request context into that parameter, a process known as dependency injection. Then we get the api key if it exists by passing this context to our helper method (get_user_api_key).
| … # below existing code @mcp.tool() def create_sandbox_session(ctx: Context) -> str: """ This will create a sandbox instance and return success message with the sandbox id or error message. """ try: return sandbox_manager.create_sandbox_session(get_user_api_key(ctx)) except Exception as e: return e @mcp.tool() def stop_sandbox_session(sandbox_id: str, ctx: Context) -> str: """ This will kill a sandbox instance if it exists. """ try: return sandbox_manager.stop_sandbox_session(get_user_api_key(ctx), sandbox_id) except Exception as e: return e @mcp.tool() def run_python_code(python_code: str, sandbox_id: str, ctx: Context) -> dict: """ Runs the python code on the sandbox, and if there any image outputs they are skipped. Args: python_code (str): The python code to run. sandbox_id (str): The ID of the sandbox. Note: The ctx (Context) is a dependency injection object that is automatically passed. Returns: dict: Containing stdout, logs, error, etc. """ console.print( Panel( python_code, title=“Agent Executing Python Code”, border_style=“blue”, ) ) try: result = sandbox_manager.run_python_code( python_code, get_user_api_key(ctx), sandbox_id ) # display the result. Note: only do this in test not in prod. display_sandbox_code_output(result) return result except Exception as e: return {“error”: str(e)} @mcp.tool() def run_on_command_line(command_line: str, sandbox_id: str, ctx: Context) -> dict: """ Runs the command on the sandbox. Args: command_line (str): The command to run. sandbox_id (str): The ID of the sandbox. Note: The ctx (Context) is a dependency injection object that is automatically passed. Returns: dict: Containing the output of the command and the execution error if any. """ console.print( Panel( command_line, title=“Agent Executing Command Line”, border_style=“blue”, ) ) try: result = sandbox_manager.run_on_command_line( command_line, get_user_api_key(ctx), sandbox_id ) # display the result. Note: only do this in test not in prod. display_sandbox_command_output(result) return result except Exception as e: return {“execution error”: str(e)} |
Now we’ll expose a single resource for one of our demo scenarios, which we’ll see later. This resource returns a mock of a user’s stock portfolio. Unlike prompts and tools, resources require specifying a URL where they will be accessible.
| … # below existing code @mcp.resource(“data://user_stock_portfolio”) def get_user_portfolio() -> dict: """ Returns the user’s portfolio holdings across major index ETFs and individual stocks. Returns: dict: Portfolio with ticker symbols, quantities, and average purchase prices """ portfolio = { “holdings”: [ # Major Index ETFs { “ticker”: “SPY”, “name”: “SPDR S&P 500 ETF”, “quantity”: 4, “avg_purchase_price”: 670.13, “asset_type”: “ETF”, }, … # skipped for brevity ] } return portfolio |
Finally, we add the code that starts our server. We won’t use the stdio mcp transport because the Rich console prints to the terminal, which is a blocking operation that would interfere. Instead, we’ll use the streamable-http mcp transport (this is what you will also use in production, as it’s best suited for remote connection between client and server over HTTP).
| … # below existing code if __name__ == “__main__”: # run the server # Note: We use streamable-http as the transport protocol instead of stdio because we are printing to the console which would block stdio. # Also in production you should use SSE or streamable-http rather than stdio. asyncio.run(mcp.run(transport=“streamable-http”)) |
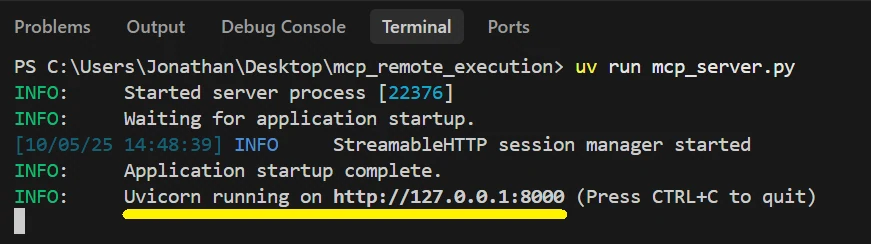
Phew, let’s start our MCP server so we can get the URL it’s running at, which we’ll need to connect our AI agent. Run the command below in the terminal.
| uv run mcp_server.py |
You should see the server now running. Take note of the URL it is running at
Integrating the AI Agent with the MCP Server
Now we’ll start working on the AI agent in mcp_client.py. The mcp-use library makes this process easy. First, we set the debug level to INFO to see what the agent is doing. In the main method, we create a config dictionary for the mcp client. It specifies the mcp servers available, using a name (I used “stock&sandbox”) and the URL the mcp server runs at (remember to add /mcp), also we include the user’s API key as the value for “auth” this will be automatically inserted by mcp-use in the Authorization bearer header of every request.
Since mcp-use relies on langchain-openai, we pass the novita base url, api key, and LLM model name, which works because Novita is OpenAI-compatible.
And in addition to the agent’s response, we’d like to include the ID of the sandbox it used on the server, if any (we’ll explain why later). To do this, we’ll define a Pydantic class to represent our response format.
| import asyncio import os from datetime import datetime from typing import Optional import mcp_use from dotenv import load_dotenv from langchain_openai import ChatOpenAI from mcp_use import MCPAgent, MCPClient from pydantic import BaseModel, Field from rich.console import Console from rich.panel import Panel from rich.prompt import Prompt # Load environment variables load_dotenv() console = Console() # Note: 1 for INFO level, 2 for full verbose DEBUG level and 0 for NO debug output. mcp_use.set_debug(1) class ResponseFormat(BaseModel): response: str id_of_used_sandbox: Optional[str] = Field( …, description=“The id of the sandbox used if any” ) async def main(model: str, base_url: str, api_key: str): # Create configuration dictionary config = { “mcpServers”: { “stock&sandbox”: { # If the url the mcp server is running at is different replace below, # also remember to add /mcp. ”url”: “http://127.0.0.1:8000/mcp”, “auth”: api_key, } } } # Create MCPClient from configuration dictionary client = MCPClient(config) # Create LLM llm = ChatOpenAI(model=model, base_url=base_url, api_key=api_key) … |
We then create the MCP agent by passing in the LLM, MCP client, max steps (which limits the actions the agent can take before responding), and enabling memory so that mcp-use handles our conversation history. We also provide a system prompt that includes the current date and time, along with custom instructions for using the sandbox (I added this because some models forget to read the instruction prompts exposed on the server).
Finally, we set up the standard conversation loop: get user input, pass it to agent.run(), and print the response. If a sandbox was used, we then create a session to manually call the stop method on the server as a safety measure, in case the model forgets to close it.
| … async def main(model: str, base_url: str, api_key: str): … # below existing code # Create agent with the client agent = MCPAgent( llm=llm, client=client, max_steps=25, memory_enabled=True, # mcp-use will auto handle the conversation history. system_prompt=f""" You are a helpful assistant and the current date is {datetime.now().strftime(‘%Y-%m-%d’)} MUST REMEMBER: - Before any tool call first call instructions_for_sandbox_use() so you can read them. - Ensure you call stop_sandbox_session() after using the sandbox before responding to the user. """, ) console.print( Panel( “[bold green]MCP Session Started[/bold green]\ Type ‘quit()’ to exit.”, title=“MCP Session”, border_style=“green”, ) ) while True: user_input = Prompt.ask(”\ [bold yellow]>>> User Message[/bold yellow]“) if user_input.lower().strip() == “quit()“: break # Pass the query to the agent and await the response. response_obj = await agent.run(user_input, output_schema=ResponseFormat) console.print( f”\ [bold green]>>> Assistant Response: {response_obj.response} [/]“ ) if response_obj.id_of_used_sandbox: # Will trigger closure of sandbox on MCP server if it sill active. session = await client.create_session(“stock&sandbox”) await session.call_tool( name=“stop_sandbox_session”, arguments={“sandbox_id”: response_obj.id_of_used_sandbox}, ) await session.disconnect() |
At last, we add the code that starts the client:
| … # below existing code if __name__ == “__main__“: asyncio.run( main( model=“qwen/qwen3-coder-480b-a35b-instruct”, base_url=os.getenv(“NOVITA_BASE_URL”), api_key=os.getenv(“NOVITA_API_KEY”), ) ) |
Test running our MCP AI Agent:
You can start the AI agent application by running the command below in the terminal
| uv run mcp_client.py |
Below are video links of demo runs to the following prompts:
- User Prompt 1: “I have $2,000. Get the performance of the major US stock indices from yfinance over the past 6 months and run ML models to predict how to allocate this investment to maximize potential returns over the next 2 months.”(Insert link here)
- User Prompt 2: “Run multiple simulations of a U.S. economic deflation crash, pick the most probable, and explain the impact it will have on my stock portfolio.”(Insert link here)
T ips for MCP servers in production
While this tutorial focused on building a working MCP server with Novita Sandbox, deploying to production requires additional considerations:
Use the Right Transport: While “stdio” works for local development, production MCP servers should use “streamable-http” to enable remote connections, just like we did above.
Implement Authentication: Like we did above, make sure to secure your mcp server endpoints with authentication. Ensure each client only has permission to access the tools and resources they need. You can read up on more authentication methods at FastMCP authentication
Enable Logging: Use a logger to monitor server activity, debug issues, and track usage patterns. This is vital for maintenance and troubleshooting.
Rate Limiting and Quotas: Protect your server from abuse by implementing rate limits and quotas. This is especially important when exposing resource-intensive tools.
Documentation and Versioning: Maintain clear documentation of your MCP server’s API and versioning to facilitate easier integration for developers and LLMs.
Conclusion
Phew, you can finally build an MCP server where AI agents can remotely execute code through natural language instructions, a practical implementation of Software 3.0 in action.
In this tutorial, you learned how to build an MCP server with code execution ability, manage sandbox lifecycles, and create an AI agent using mcp-use that connects to your server. Next, try extending it with database access, web search, or linking multiple servers to one agent. Head over to Novita, we have the tools you need to build your AI agents.
Novita AI is an AI cloud platform that offers developers an easy way to deploy AI models using our simple API, while also providing affordable and reliable GPU cloud for building and scaling.